If you want to reinstall QuickBooks using Clean Install for Windows then you are at the right place. Read the whole article and in minutes your problem will be taken care of. Whenever a QuickBooks desktop function is damaged or a simple restore does not correct any issue, then you have to uninstall the QuickBooks Desktop for Windows and rename the downloaded installation files and after that the program has to be restored. This process is known as Clean Install or Clean Uninstall.
Note: Make sure you have your own installation CD and license number available before uninstalling QuickBooks Desktop.
You may also read: How to Fix QuickBooks error code 1712?
Steps to Reinstall QuickBooks by Using Clean Install for Windows
Perform the mentioned below steps to uninstall the QuickBooks Desktop:
Step 1: Uninstall QuickBooks Desktop
- Press Windows+R keys together so that Run command could open.
- Into the Run command type control panel and hit Enter.
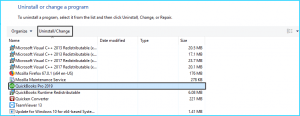
- Select Program Features and if control panel is in category view then choose Uninstall program.
- From the list of Programs, select QuickBooks and then choose Uninstall.

- Follow the on-screen prompts till the process is completed.
Note: If you get any type of error message and you are not able to uninstall QuickBooks then we highly recommend you to take help from your IT Person immediately. However, you can bring this issue to us by calling on our Help-desk at as your QuickBooks can crash and the other reason could be that your Microsoft Windows is corrupted.
Step 2: Rename the Installation Folder

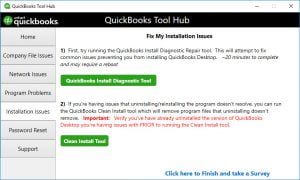
To rename folders you have the option to use QuickBooks Clean Install Tool. You can manually rename the QuickBooks installation folder, if you don’t want to run this tool.
Read Also: How to Resolve QuickBooks Running Slowly in Multi-User Mode Issue?
Downloaded and run the QuickBooks Clean Install Tool
- Download QuickBooks_Clean_Install_Tool.exe and save in your Desktop.
- Choose I accept in License agreement after opening QuickBooks.
- Select your version of QuickBooks Desktop and then click on Continue tab.
- Press Ok when you see the message: “QuickBooks is now ready for a clean install, please install in the default directory.”
Rename the QuickBooks Desktop installation folder manually
You can use Windows Explorer to view hidden files and then rename every folder location listed for your QuickBooks. We recommend adding ‘old’ or ‘damaged’ at the last of the folder name. This will avoid the QuickBooks from recognizing the folder to form a new one.
Folder Location
- C:\program files\Intuit\QuickBooks
- For 64-bit version C:\program files(x86)\Intuit\QuickBooks
- C:\program data\Intuit\QuickBooks
- C:\User\current user\Appdata\local\Intuit\Quickbooks
Occurred Error: Rejected folder name when renaming
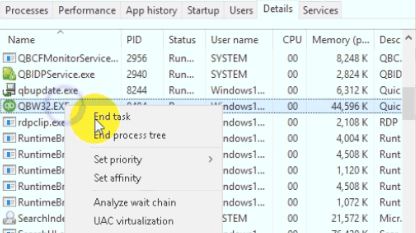
- Perform a right-click operation on Windows Taskbar and then select Task Manager.
- Beneath the Process tab, choose the Image Name column header to sort processes in alphabetical order by name.
- Choose QBDBMgrN.exe, QBDBMgr.exe, QBCFMonitorService.exe, Qbw32.exe, files and then choose the end process.

- Select the End Process.
- Click on OK on the message appeared which displays, “Warning: eliminating any process can result in undesirable consequences, including data loss and system instability“.
Read Also: How to import bank statements or transactions into QuickBooks?
We hope that after performing the steps mentioned above to reinstall the QuickBooks by using clean install for Windows has actually solved your problem. If you still have any doubts or issues related to QuickBooks then feel free to seek advice from our QuickBooks experts by dialing toll-free +1-866-453-7060.
You may also like:
QuickBooks ProAdvisor Program Training & Certification Guide

