

Yes, you can install QuickBooks Desktop on more than one computer and with multi-user mode, your entire team can work on the same company file simultaneously without anyone being locked out. It’s one of the most practical features QuickBooks offers for growing businesses, and it eliminates the bottleneck of having only one person able to access the books at a time.
Before you start, there’s one key thing to keep in mind: each computer needs its own licensed copy of QuickBooks. One computer acts as the server (hosting the company file), and the rest are workstations that connect to it over your network. QuickBooks Desktop Pro supports up to 3 users, Premier up to 5, and Enterprise up to 30.
This guide walks through all 6 steps installation, folder permissions, Database Server Manager setup, admin rights, and turning on multi-user hosting. For help at any point, our team is available at +1-888-510-9198.
Also Read: Can I Install QuickBooks Pro on Multiple Computers?
Steps to setup and install multi user network or QuickBooks desktop on multiple computers.
The below steps can be performed to successfully set up and install multiple user network in QuickBooks.
Step 1: Install QuickBooks on multiple computers
On a multi-user network, one system hosts your company files. This is your server system. All other systems connected to your network that don’t host your company files are known as workstations.
- The very first step is to download QuickBooks on your server system.
- After that click on custom and network install for the install time type
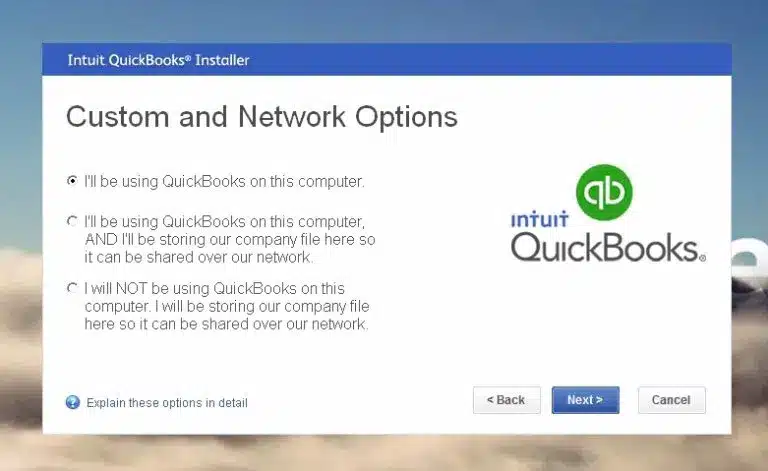
- And then click on I’II be using QuickBooks Desktop on this computer option, And I’ll be storing…if you have the required full version of QuickBooks Desktop on your server system. Either you just want your server system to host your files, then click on I Will Not Be Using QuickBooks Desktop on This Computer.
- Perform on screen steps to install
Map network Drive-in window
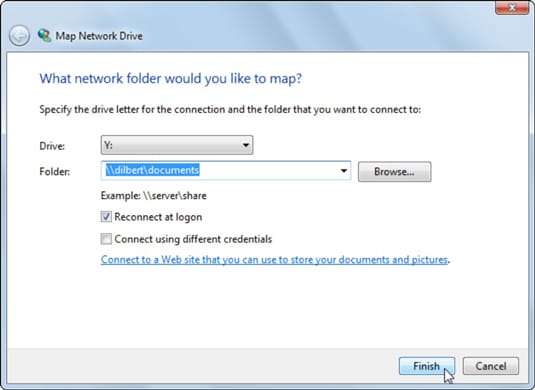
Steps to follow to put your files on a mapped network drive:
For Windows 8/10:
- The very first step is to search for this pc in the windows search bar and choose the same
- After in the computer tab option, choose map a network drive
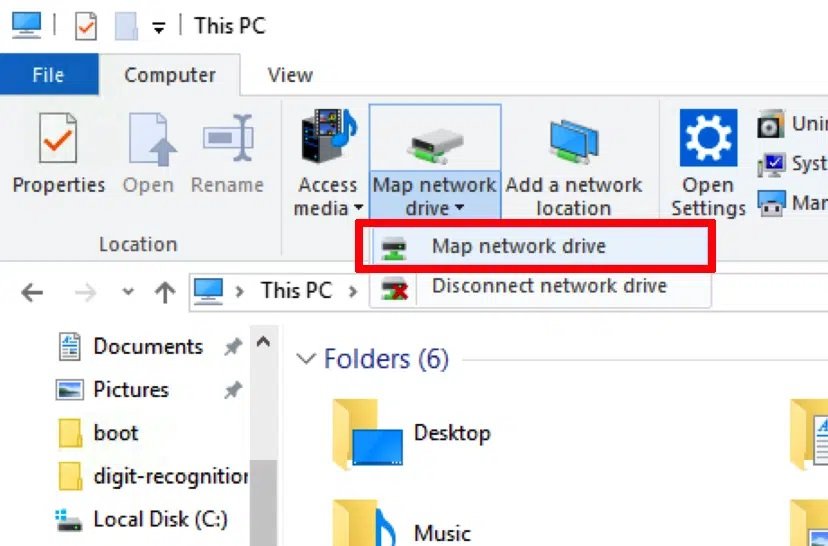
- The user should then choose any unused drive and also select browser
- The next step is to head to the network location where the company file is placed
- It should be noted that if you are unable to map a network drive using the UNC, then try using the IP address of the server.
- And then hit ok tab
- And reopen QuickBooks company file from the new mapped drive
For Windows 7:
- The user needs to first choose Computer, in the Start Menu.
- After that select the Tools menu then click on Map network drive. If you don’t find the Tools menu, then press the Alt key to show the menu bar.
- The next step is to choose any unused drive letter then select Browse.
- And also head to the network location where your QuickBooks company file is saved.
- The next step is to hit ok tab to finish
- And the new drive will appear as a network drive
- Now, reopen QuickBooks company file
- And now it is easy for you to access your QuickBooks company file from any other drive or system
Also Read: What is QuickBooks Enterprise Solutions Benefits & Features?
Step 2: Set or Change Folder Permission
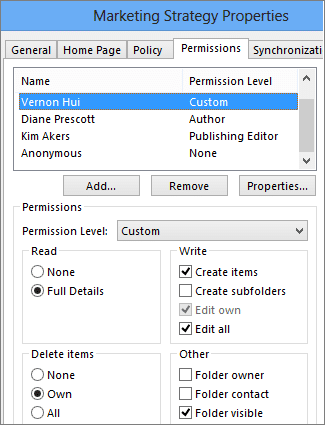
The user needs to perform the steps to set up folder permissions on the server system. And also ensure that the folder having the company file is on the network
Important points to remember
- Be particular while performing the steps
- Ensure that the installation directory have the right permission
- In case you are running Microsoft Windows Home Edition, then the security tab will not be available in normal mode in it. Thus, you need to restart your system in Safe Mode to complete the process.
This can be done by performing the following steps:
- The very first step is to restart the system, and then press F8 to open Advanced Boot Window.
- Now choose Safe Mode on the Advanced Boot window, and press Enter.
Also Read: What is QuickBooks Desktop?
Set up folder and Windows access permission to share company file:
- Ensure that the permissions are given correctly
- And then right click the company folder to choose properties
- After that click on Advance, on Security tab
- Now, choose QBDataServiceUserXX and click on the Edit option
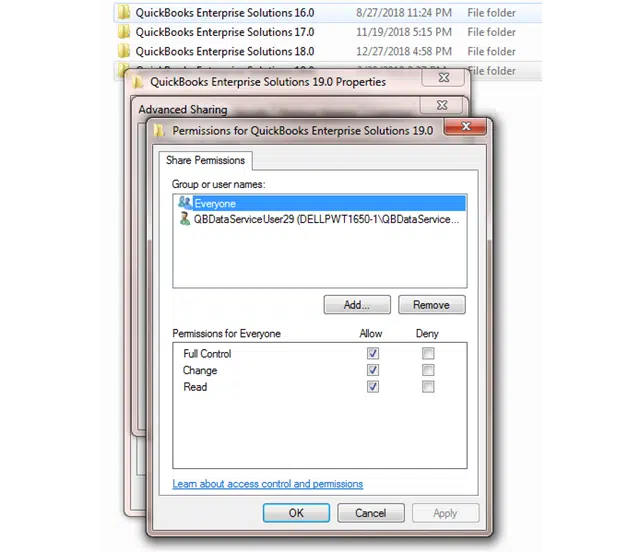
- The user needs to ensure that the settings are set to Allowed
- Traverse Folder/ Execute File
- List Folder/Read Data
- Read Attributes
- Read Extended Attributes
- Create files/Write Data
- Create Folders/Append Data
- Write Attributes
- Write extended Attributes
- Read Permissions
In case the permissions are not set properly then follow these steps:
- The user needs to first right-click the company file folder and hit on Properties tab
- Now, click on Security and choose Edit
- Go for QBDataServiceUserXX and click on Full Control, then Allow.
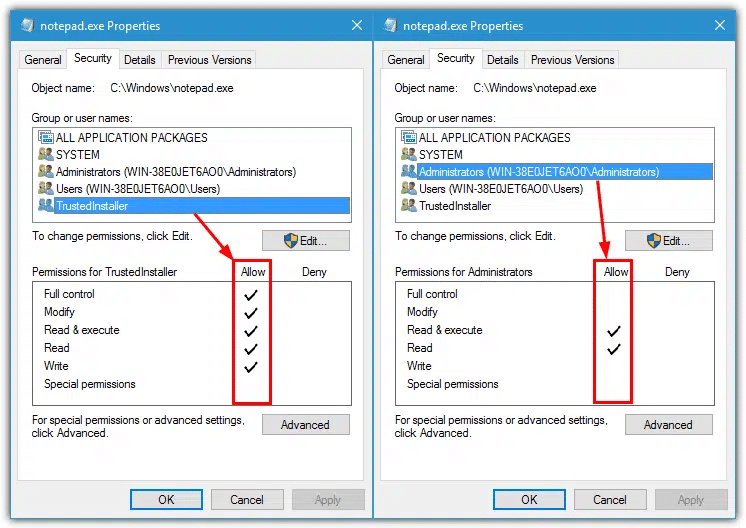
- Hit Apply option, then OK.
Change Folder Permission
- The very first step is to open File Explorer (Window + E)
- After that head to the parent folder, and choose the Properties option.
- It should be noted that these steps are to be performed for every folder on the list but all folders may not apply to each installation as they apply to a particular version of QuickBooks Desktop
- C:\Program Data\Intuit\Entitlement Client\v8
- C:\Program Data\Intuit\Entitlement Client\v6.
- C:\Program Data\Intuit\Entitlement Client\v5
- C:\Program Data\Intuit\Entitlement Client\v3
- C:\Program Data\Intuit\Entitlement Client
- C:\Program Data\Intuit\QuickBooks Enterprise Solutions X.0 (X = version) or C:\Program Data\Intuit\QuickBooks 20XX (XX = year)
- C:\Program Data\COMMON FILES\INTUIT
- C:\Program Data\COMMON FILES\INTUIT\QUICKBOOKS
- C:\Users\Public\Public Documents\Intuit\QuickBooks\FAMXX (XX = year) C:\Users\Public\Public Documents\Intuit\QuickBooks\Company Files
- After that, on the Security tab, click Everyone.
- It should be noted that in case Everyone option is not listed in Group or User Name box, choose Add and type in Everyone, then go for OK.
- The user needs to choose Full Control, then pick Apply and OK
- After that choose Everyone on the Security tab
Note: If for any reason Everyone is not listed in Group and Username box, then need to select Add and type in Everyone, then choose Ok.
- And tap on Full Control and click on Apply then Ok.
- Set Windows access permissions to share company files
- Ensure that QuickBooks has the right access permission that can help in getting rid of future issues while working with your company files across the network.
Windows 10, 8 and 7
- The very first step is to press Windows + E to open File Explorer
- After that right-click that folder contains your Company file.
- Now choose Properties option,> then Sharing > Share Add.
- The next step is to choose the QBDataServiceUserXX that corresponds to your version.
- In order to access full control over the file set the permission level.
Windows 8.1
- The user needs to initially take control of the file
- Now, choose the folder for taking ownership of and choose Share.
- Head to Advanced Security > Change > Advanced > Find Now.
- Now, go for the user and hit OK.
You might also like: Is there a Method to Enter a Contract with the total Amount and then Bill from that Contract?
Steps to Grant Full Control
- The user needs to choose the folder and then the Share option.
- After that head to Advanced Security option> Add > choose a principal.
- Now hit Advanced option> then Find Now.
- And go for the user and click OK
- Opt for Full Control and OK.
Windows Server 2012
Before heading to the steps, ascertain that the File and Storage Services are installed.
- The user needs to then press Ctrl + R to open Run Command
- Now, enter Server Manager and click OK.
- And also head to file and Storage Services > and then Shares.
- Now, on the Task drop-down, select New Share. A list of File Share Profile shows.
- The next step is to hit SMB Share – Quick.
- Now, in share location selection, go for Type a custom path > Browse to locate the folder you wish to share.
- And then choose the folder > then hit Next.
- In order to find out more, head to the setting up a folder and windows access permission
Step 3: Install Database Server Manager (Verify an existing setup)
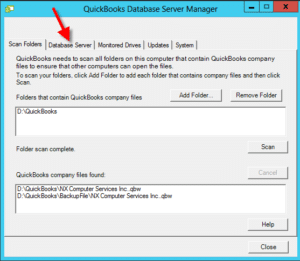
The user needs to make use of the QuickBooks Desktop Manager to verify an existing setup. And also, to scan the company file in the system where the file is located. The user should ascertain that the database server manager is installed in the system, as it will help the user to share the company files with other systems over the network.
Step 4: Set admin rights to install QuickBooks on Multiple Computers
When the user signs in with the user account, it is essential to ensure that the account has Windows admin rights and the Database Server Manager has admin rights.
Step 5: Using Database Server Manager
When the installation process ends, the user is suggested to use Database Server Manager to scan the folder that holds your company files.
Once the process ends the file in the “QuickBooks company files found” will be seen. The user can access the company files in these folders through other systems via a network.
Step 6: Turn on hosting
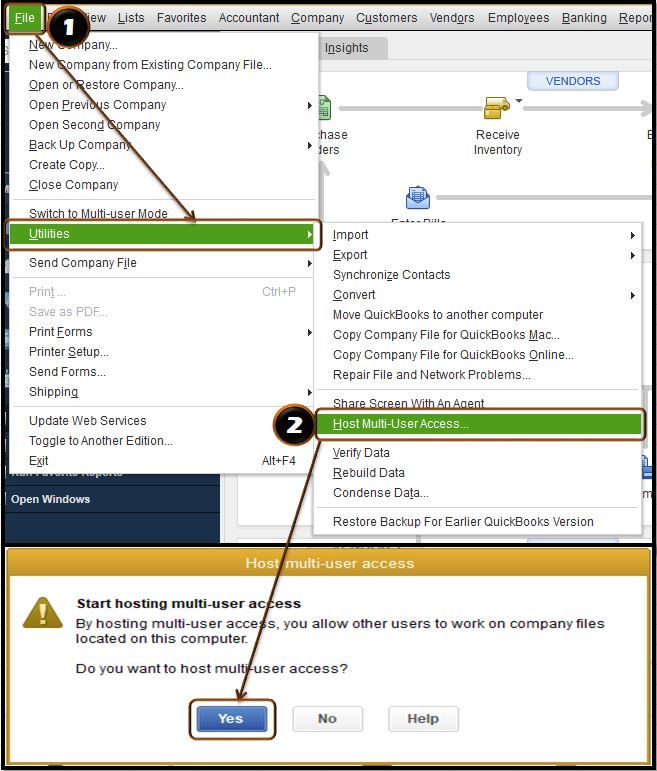
All the steps are now performed to complete the set up outside QuickBooks, now the user needs to only turn on Multi-user Access on the server. However, ensure that the server system should be the only one in which this feature is turned on.
- The user should head to the QuickBooks desktop
- And then head to the file menu and navigate to utilities tab
- Once done with that click on host multi user access and click on yes to confirm
- The user can now easily host your company files through your network.
- Whenever the user wishes to access the multi-user network, all that is needed is a sign-up as a user with admin rights in the server system and workstations.
You might also need: QuickBooks Does Not Open or Stops Working on Windows 10 (Dell/HP/Lenovo/Asus/Acer)
Steps to Install QuickBooks on Multiple Computers
The user can try performing the steps below to install QuickBooks on other system.
- The very first step is to open your workstations and install QuickBooks Desktop software.
- After that head back to your older/server computer and create a backup copy of your company file.
- In case they are connected, copy the backup file to your new one via flash drive or another external device or network.
- And now restore all the backup data on your new PC.
- You can perform these steps on all the workstations.
Conclusion!
Once all 6 steps are complete and multi-user hosting is turned on at the server, every authorized workstation on your network should be able to open the same company file simultaneously with each user’s activity tracked separately through their individual login.
The step where most users hit a snag is Step 2 (folder permissions) specifically making sure QBDataServiceUserXX has full control of the company file folder. If workstations can’t connect after everything is set up, that’s usually the first place to look. Our QuickBooks Support team is available at +1-888-510-9198 to walk you through any part of the setup or troubleshoot connectivity issues after installation.
Also Read: QuickBooks Error Code 1601, 1603 and 1642
You might also like: QuickBooks Payroll Service – Run Payroll Services for Small Business
Also Read: How to Reinstall QuickBooks by Using Clean Install for Windows?
FAQs
Yes, it is possible to install QuickBooks on multiple computers. However, for this, it is a must to have a multi-user license. Note that the standard QuickBooks pro license allows you to install it on up to 3 computers and every edition has a different number of users allotted, depending upon the subscription.
Yes, you can use the same license for two computers in different locations.
QuickBooks Desktop Pro lets 3 users to work on the same company file. Whereas, QuickBooks Premier lets 5 users to work on the same company file.
To do that, you can install QuickBooks data server manager on your server and enable multi user access, and further the authorized users can access the same QuickBooks company file. Each multi-user has a valid license to use the QuickBooks program, according to Intuit.
They need to be able to reach each other over a network, but it doesn’t have to be a physical local area network. Remote access setups, VPNs, and cloud-hosted environments can also enable multi-user access across different locations. That said, a stable, low-latency connection is important a slow or unreliable network can cause performance issues or errors when multiple users are accessing the same company file simultaneously.
If a workstation (rather than the server) has “Host Multi-User Access” turned on, it can create file access conflicts that prevent other users from connecting properly to the company file. QuickBooks should only have hosting enabled on the server the computer where the company file is actually stored. If you’re experiencing multi-user errors after setup, check each workstation and make sure hosting is turned off on all of them, leaving it active only on the server.