Learn how to resolve “QuickBooks Error 1920: Service QuickBooks Database Manager (QBCFMonitorService) failed to start” when trying to install or update QuickBooks Desktop:
QuickBooks is one of the most trusted accounting software in the world. Right from big companies to small businesses, today almost everyone is using this cutting edge software. Not only does it help in accounting and bookkeeping but also with the overall financial management of the company. Each year new version of this application is launched with new and improved features. Even though it is one of the best accounting software, yet users at times do face technical errors. These technical errors can be managed but at times for the more complicated ones you have seek assistance from the QuickBooks Support service providers.
In this article we will discuss the issue of QuickBooks installation error 1920. In most cases this error occurs when you are trying to install QuickBooks Desktop or a program update. This generally happens when QuickBooks Database Manager Scans installed hard drives for the company to create a connection with those files. As this services tries to access the drive on the desktop and is not able to so the installation is affected.
This error can be experienced due to a bunch of factors, which we will be listing later in this segment. To find the factors triggering this issue and also the quick fixes for the same, make sure to read this piece of writing carefully. One can also consult our tech support professionals for any sort of further support and assistance.
What Causes QuickBooks Error Code 1920?
The below set of factors can trigger such an error in QuickBooks.
- Damaged installation of QuickBooks desktop
- There is Invalid entries in the registry of your windows
- Virus or malware attack on data files
- System power failure
- Deletion of important system files or registry entry
Read Also: How to Create, Edit, or Delete QuickBooks Memorized Transaction?
Steps to Resolve QuickBooks Database Installation Error 1920
Use the below given steps in order to resolve QuickBooks error code 1920.
Condition 1: If you’re trying to install or update QuickBooks desktop
Step 1: Uninstall QuickBooks Desktop
- First of all you need to Press the Windows + S keys
- After that open the Control Panel
- Now choose Programs and Features option
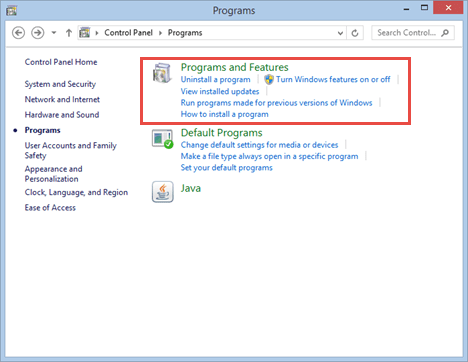
- Hit a click on Uninstall a Program
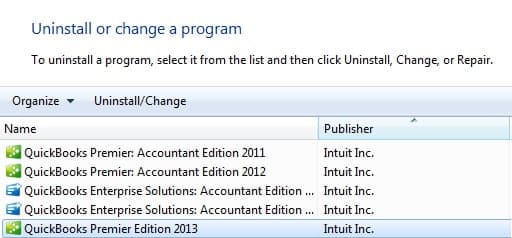
- After that choose your QuickBooks Desktop version from the list of installed programs
- Now select Uninstall/Change option and follow the on-screen instructions
Step 2: Rename the installation folders
Use Windows Explorer to search and rename every folder locations listed for your Version of Windows:
- First of all go to the installation folders
| Windows 10/8/7 | Windows Vista |
| C:\Program Data\Intuit | C:\Program Data\Intuit |
| C:\Program Data\Common Files\Intuit | C:\Program Data\Common Files\Intuit |
| C:\Users\[Username]\AppData\Local\Intuit | C:\Users\AppData\Local\Intuit |
| C:\Program Files\Intuit | C:\Program Files\Common Files\Intuit |
| C:\Program Files\Common Files\Intuit | C:\Program Files\Common Files\Intuit |
- Press Windows + R keys together to open the run dialogue box
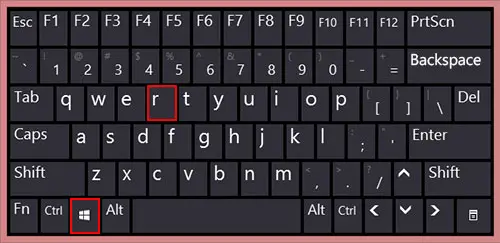
- Enter the location of the folder and hit on Enter key
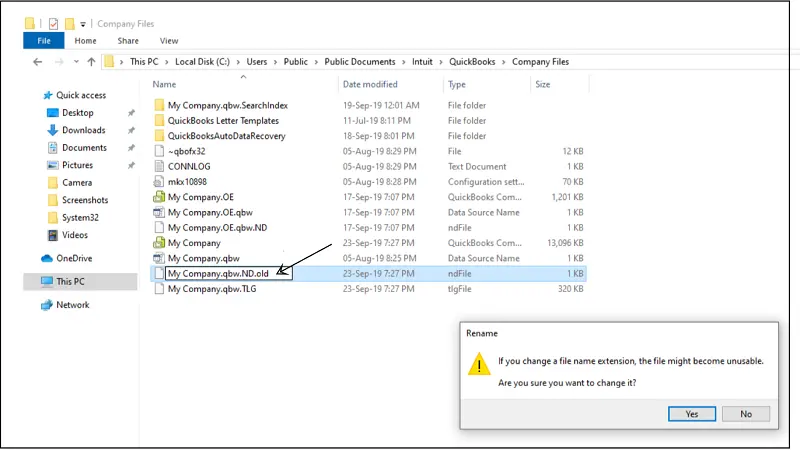
- Hit a right click on the folder and then choose Rename
- Finally Rename the folder to .OLD
Step 3: Manually Resolve the Errors
- First thing to do is rename the QuickBooks Desktop company file.
- After this open your QuickBooks Desktop and then open the company file.
- Now on your keyboard press on F2 or Ctrl+1 keys so as to open the Product Information
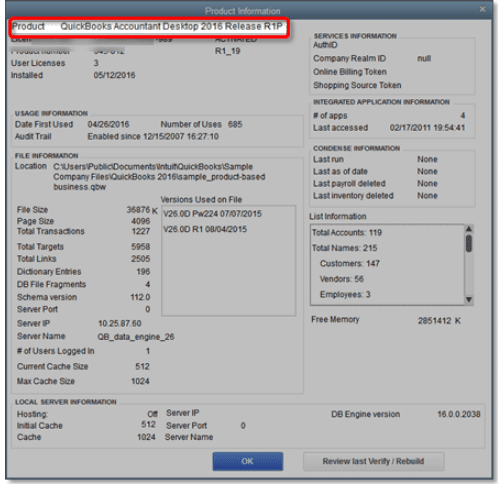
- After this track the location of the company file listed in the File Information.
Important Note: In case the file name is quite long, it will be displayed with and ellipsis.
- Once done close QuickBooks Desktop
- After this navigate to the company file location
- For Windows 10, 8.1 and 8: Right-click on the Windows Start button and then choose File Explorer
- For Windows 7 and Vista: Right-click on the Windows Start Button and then select the Open Windows Explorer.
- Once done you have to right-click on the file and choose the Rename option
- After this type the new name of the company files and click on Enter. In case, Windows asks you confirm you to give confirmation for the action then click on Yes.
Step 4: Set up QuickBooks desktop to use the new company file name
- The very first step is to open QuickBooks
- After that, the user needs to head to the Qb file menu and click on open or restore an existing company
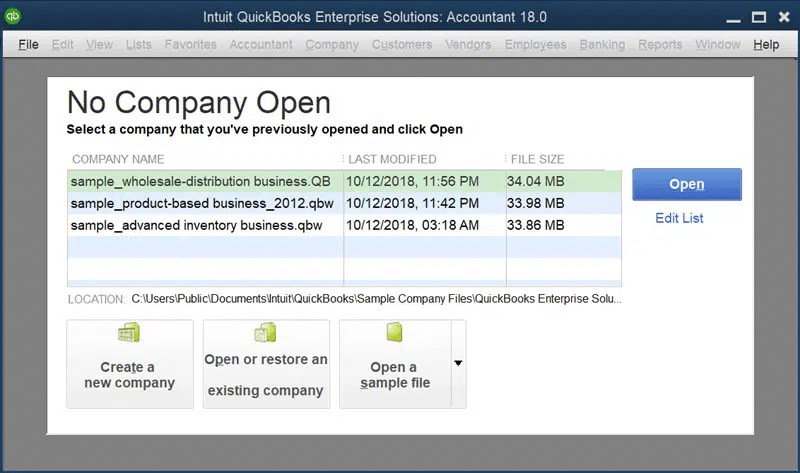
- The user is then required to open a company file and click on next tab
- Also, select a new name for the company file
- Once done with that click on open tab
Step 5: Installing QuickBooks desktop
- The user will first have to prepare for installation of the software
- After that, install QuickBooks
- Here, the user needs to open the downloaded file
- And perform the onscreen steps and accept the license agreement
- Now, select the next tab
- And enter the product and license numbers
- Hit next tab
- And also, decide which install type is right for you
- Choose express install or custom and network install option
- By the end, activate QuickBooks desktop
Also Read: How to Setup Intuit Go Payment?
Condition 2: If you’re trying to update QB Database Server Manager on the server computer
Use these steps if you do not have QuickBooks on your server. You need to share your company file over the network utilizing QBDBMS.
Step 1: Uninstall the QuickBooks Database Server Manager
- First of all you need to Press the Windows + R keys together on your keyboard
- This will open the Run dialog box. Type appwiz.cpl and hit Enter key
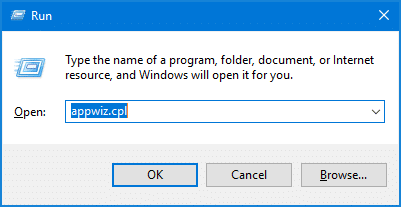
- Press OK
- Choose the QuickBooks Database Server Manager
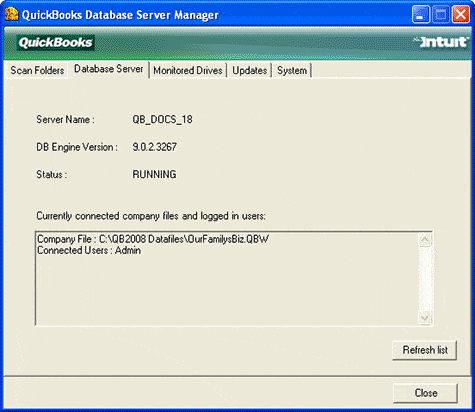
- Now Choose Uninstall/Change option and the follow the onscreen instructions
Step 2: Rename the installation folders
If you have other Intuit apps installed on your computer system, you need to only uninstall or rename the QuickBooks versions folder located in the Intuit folder: C: \ Program Data \ Intuit.
- Go to the installation folders. Refer to the chart below.
| Windows 10/8/7 | Windows Vista |
| C:\Program Data\Intuit | C:\Program Data\Intuit |
| C:\Program Data\Common Files\Intuit | C:\Program Data\Common Files\Intuit |
| C:\Users\[Username]\AppData\Local\Intuit | C:\Users\AppData\Local\Intuit |
| C:\Program Files\Intuit | C:\Program Files\Common Files\Intuit |
| C:\Program Files\Common Files\Intuit | C:\Program Files\Common Files\Intuit |
- Press Windows + R keys together to open the Run command
- Enter (or copy and paste) the location of the folder, and then hit on Enter key
- Right-click on the folder, then choose Rename
- Rename the folder to .OLD
Step 3: Reinstall QuickBooks Database Server Manager
Database Manager is a part of QuickBooks Database File and allows you to share your company files with other systems connected to the same server. Uninstalling and installing the Database Server Manager can help you fix QuickBooks Error 1920. Following are the steps to follow:
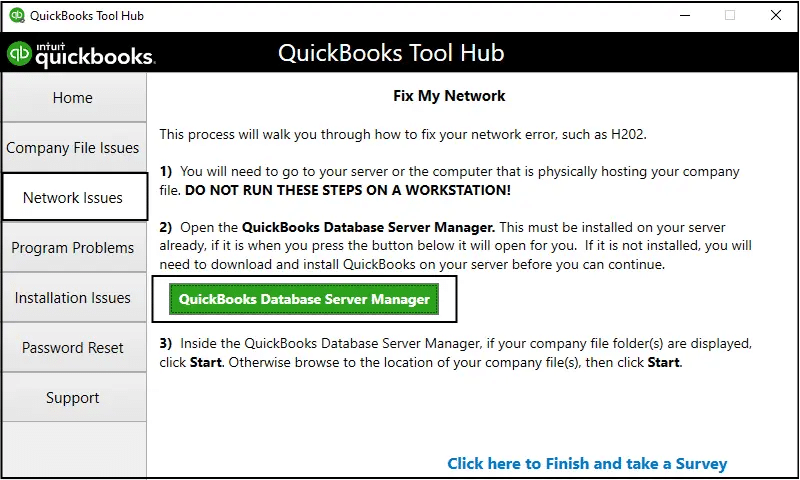
- Uninstall QuickBooks Database Service Manager
- Download QuickBooks Database Manager
- Install QuickBooks Database Manager
- Close all open applications and programs on your server computer, including QuickBooks
- Open the file (Setup_QuickBooks.exe) you downloaded
- Follow the on-screen prompts
- Select either Custom or Network Options when QuickBooks asks you to pick an install option
- Next, choose Next
- Select the best option for your setup (except Express) and press Next
- Both the options install the Database Server Manager
- Choose “I’ll be using QuickBooks Desktop on this computer, AND I’ll be storing” if you want both Database Server Manager and QuickBooks Desktop on your server computer
- Select “I will NOT be using QuickBooks Desktop” if you only want Database Server Manager on your server computer
- Follow the on-screen instructions and select Install
- Allow permission when Windows asks for permission
Final Words..!
Tackling errors in QuickBooks becomes easy, once you know the right steps that are to be performed. However, if you still face the problem “QuickBooks database installation error 1920″ even after following the above steps then you can seek assistance from QuickBooks error support team. Our accounting expert technicians are available 24/7 to provide you solution to your problems as well simple tips to avoid in the near future. Contact us at +1-888-510-9198 today.
FAQs – QuickBooks error 1920
QuickBooks error code 1920 is often seen when the QuickBooks database server manager service is unable to launch during the QuickBooks installation. This error is often associated with a warning message that states “Error 1920: Service QuickBooks database service failed to start”. If you are experiencing the same issue, then make sure to perform the right set of steps to eliminate it.
In order to manually start the database manager service, make sure to perform the steps below:
1. The very first step is to press windows + R to open the run dialog box
2. After that, enter services.msc and also click on enter tab
3. The user is then required to look for the QuickBooks database manager service in the services window
4. Now, right click the QuickBooks database manager services
5. And also, click on properties ab
6. The user is now supposed to change the startup type to automatic
7. Once done with that, press start tab to manually start the service
8. And lastly, click on ok tab
The user can try to fix the issues related to QuickBooks installation, using the steps below:
1. Start with downloading and installing QuickBooks tool hub on the system
2. After that, download he QuickBooks hub file
3. Also, save it where it can be easily accessed
4. Furthermore, update windows
5. Install QuickBooks desktop using selective startup
Read Another Articles
How to Fix QuickBooks Installation Errors?
How to fix QuickBooks Installation Error for Windows and Mac?


