Did you see a warning message appearing on the screen stating: Your QuickBooks Subscription has lapsed? Well, we all know that QuickBooks works on a subscription basis. However, at times due to some unexpected reasons, the software might show your subscription lapsed even when it hasn’t. This is basically an indication that you are unable to charge the billing account for the subscription. QuickBooks Subscription has lapsed error can easily be fixed by updating the billing information in your customer account management portal. You can witness the following warning message:
| Error: | Sorry, we need to verify your subscription before installing QuickBooks desktop |
| Error: | Sorry it looks like you need a subscription to install QuickBooks desktop |
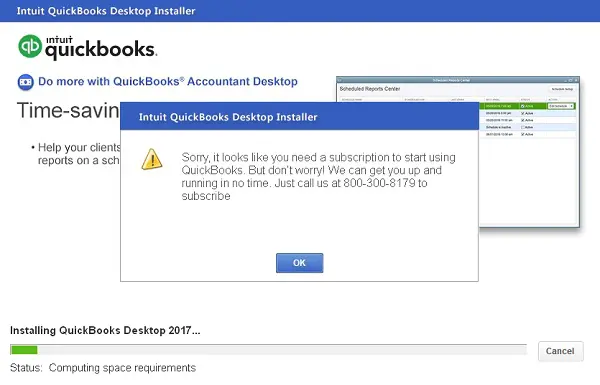
There can be a bunch of reasons behind the occurrence of QuickBooks desktop subscription errors, which we have elaborated on later in this segment. Just in case you land into such an error on one particular workstation and not on all workstations, then it usually indicates an issue with a Windows user or third-party application blocking the QuickBooks processes. To help you in dealing with such an error successfully, we have come up with this segment right here sharing the complete information related to the error along with the fixes for the same. To know more stick around this segment carefully, or you can also get in touch with our technical support team at +1-888-510-9198, and we will ensure that all your queries are addressed immediately.
Also Read: How to Rectify QuickBooks Delivery Server Down Error?
What factors can cause QuickBooks subscription has lapsed error?
There are a bunch of factors that can land you in QuickBooks subscription has lapsed error. Let us evaluate each of the reasons causing QuickBooks desktop subscription error one by one:
- The credit card on file was invalid or outdated
- The card issuer declined the payment
- The payroll update to the latest tax table failed
- The subscription actually expired
- The billing information is incorrect
- Any issues related to connectivity when processing payment for renewal
- Outdated version of QuickBooks
- Intuit server that manages QuickBooks subscription is having some issue
How to fix QuickBooks subscription has lapsed error?
There are a bunch of measures that can be performed to ultimately eliminate the subscription lapsed error. Here are a few main ones. Let us have a look:
Solution 1: Update Billing Info
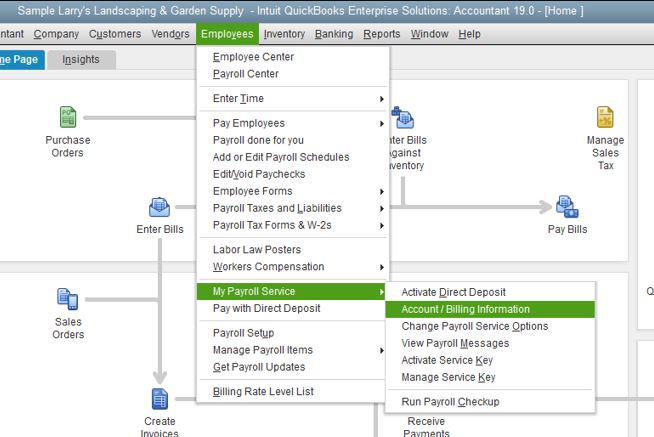
You can update your payment details for your subscription in the customer account management portal i.e., Intuit CAMPs. This can be done as follows:
- You need to sign in to the customer account management portal as admin user
- After that, choose QuickBooks desktop from your products and services
- Further, choose details next to the QuickBooks product
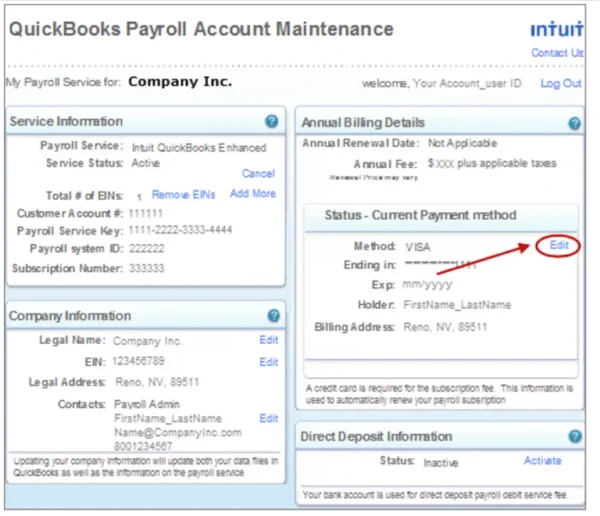
- Once done with that, select edit next to the payment method. Also, update your payment info.
- When done, choose save and close.
- Also, open QuickBooks desktop.
- The last step is to head to the help menu and hover over manage my license and choose sync license data online.
You might find this helpful: How to Troubleshoot Error: Cannot Open QuickBooks Company File?
Solution 2: Install QuickBooks Updates to Fix QuickBooks Subscription Has Lapsed Error
Updating QuickBooks software to the latest release can fix subscription error up to a certain extent. You can try performing the steps related to update QuickBooks to the latest release and check if the QuickBooks desktop subscription error continues.
Solution 3: Run QuickBooks Install Diagnostic tool from Tool Hub
At times, a damaged Windows file prevents QuickBooks from connecting to our online services. You can follow the steps below to download, install, and use QuickBooks Tool Hub.
Step 1: Download QuickBooks Tool hub
The QuickBooks tool hub is designed in a way to help you fix a bunch of errors. You will have to close QuickBooks to use the tool hub. It is suggested to use Tool hub on Windows 10, 64-bit.

- Start by closing QuickBooks
- Further, you need to download the most recent version of the QuickBooks tool hub and also save the file where it can be accessed easily. In case you have installed tool hub before, then you can find out which version you have.
- Go for the home tab and you will see the version at the bottom.
- The next step is to open the file you downloaded i.e., QuickBooksToolHub.exe
- Now, perform the onscreen prompts to install and agree to the terms and conditions.
- After the installation ends, you need to double-click the icon on the Windows desktop to open the tool hub.
Also note that, in case you are unable to find the tool hub, then you simply need to look for the same in the Windows search bar and choose the program.
Step 2: From Tool hub, run QuickBooks Install diagnostic tool
- Begin the process by opening QuickBooks tool hub and further opt for the installation issues.
- Choose the QuickBooks install diagnostic tool to repair any Windows files needed to run QuickBooks.
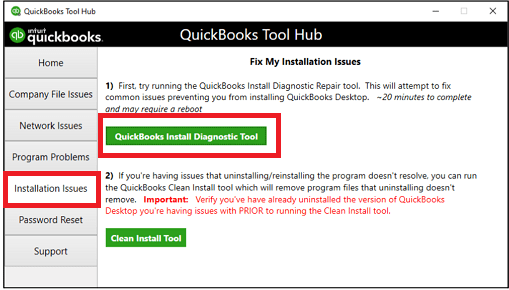
- You are also required to click on ok when the diagnostic tool ends the process.
- Choose the QuickBooks software and open the data file.
Also Read: QuickBooks Migration Failed Unexpectedly [SOLVED]
Solution 4: Restore the product and license file to fix QuickBooks account has lapsed error
It should be noted that QuickBooks software saves a file having the license and product info to the hard drive. In case there is a problem with it, then the file is easy to restore.
- You should get your product and license info at first.

- Further, close QuickBooks.
- After that, open the Windows start menu.
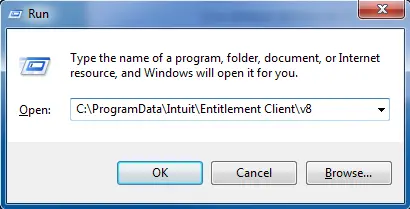
- Further type run into the search box and hit the same.
- You now have to enter C:\ProgramData\Intuit\Entitlement Client\v8 and then hit the enter tab.
- In case this doesn’t open a folder, then you will have to enter C:\ProgramData\Intuit\Entitlement Client\v6 instead.
- Now, look for the EntitlementDataStore.ecml and also right-click the same, and choose delete.
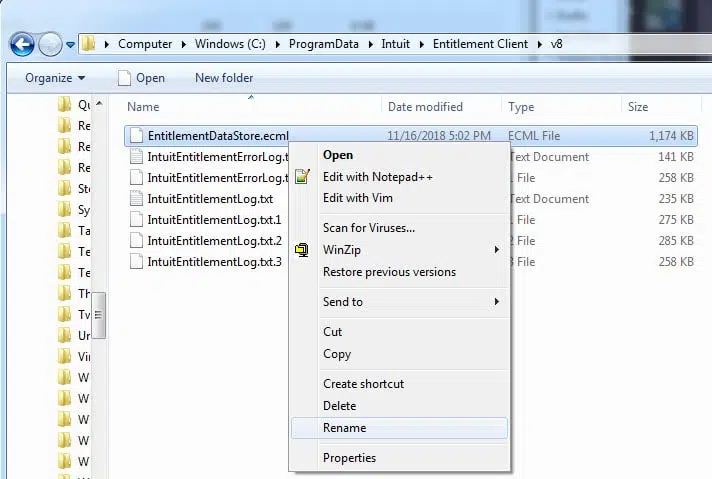
- You also need to click on Yes.
- The next step is to open the QuickBooks desktop and the company file.
- Lastly, carry out the onscreen steps to register QuickBooks again with the product and license info.
Solution 5: Check the internet connection settings
In case you come across a subscription error even after performing the steps above, then make sure to confirm that you have a stable internet connection. And also configure the internet connection settings in QuickBooks.
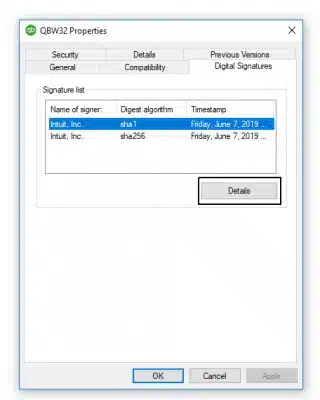
Solution 6: Install digital signature certificate
You can perform the below steps to install certificates using Google Chrome:
- Simply start by heading to the https://ratable.qbdt.intuit.com/ website.
- And further, from the address bar, select the padlock symbol.
- The next step is to opt for the view certificates option.
- Also, in the certification path tab, you need to choose the Symantec class 3 secure server CA-G4 item.
- And, choose the view certificate option and install the certificate.
- The user will then have to follow the default options to import.
- Now a window prompting successful import will appear on the screen, where you need to click on the ok tab.
- The last step is to close the certificate window and retry installing and updating.
Related Article to Read: QuickBooks – Application with Revoked Certificate
Steps to install certificate using Internet Explorer
Perform the onscreen prompts to complete the installation and import. This can be done using the steps below:
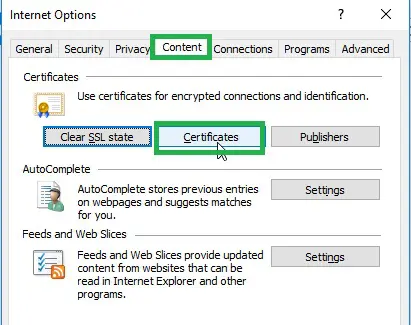
- You need to first visit the tools menu and choose the internet option.
- Once done with that, head to the content tab and choose the certificates option.
- The next step is to head to the intermediate certification authorities tab.
- Also, choose the Symantec class 3 server CA-G4.
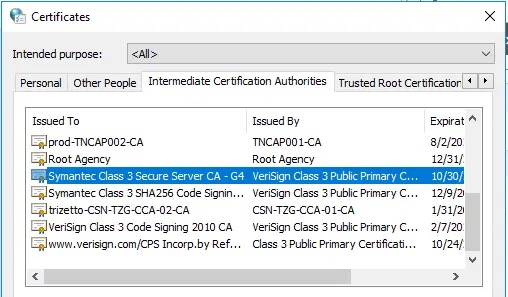
- Then, select the view certificate and click on the install tab.
- Toward the end, retry installing or updating.
Solution 7: Reset the Internet Explorer settings
- Under this method, you simply need to open the internet explorer
- After that, head to the tools menu and select the Internet option.
- Hit the Alt tab.
- And choose the reset or restore defaults tab from the advanced tab.
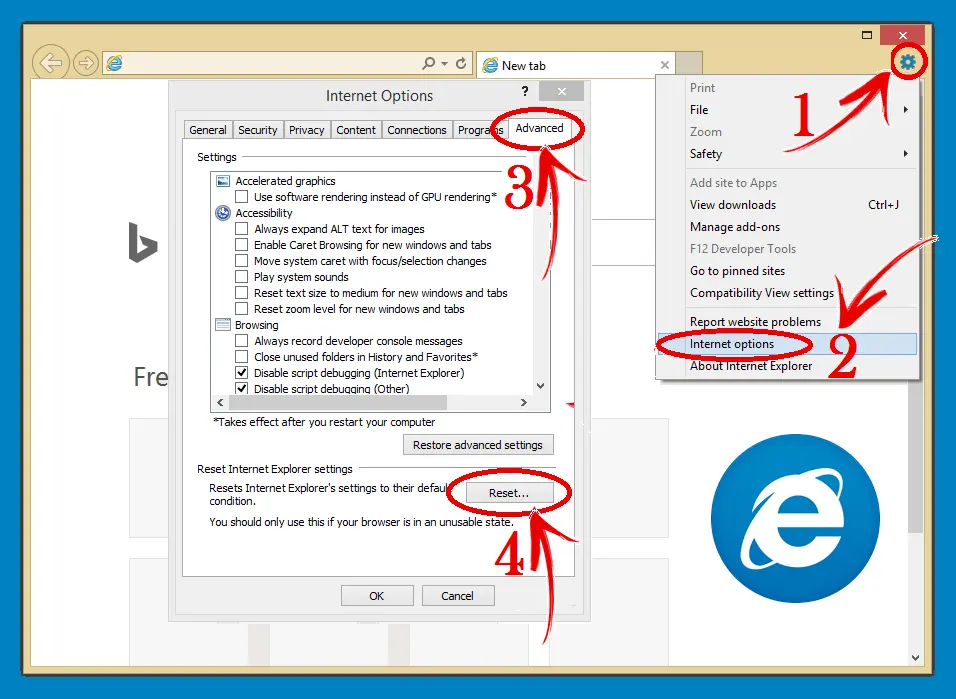
- And towards the end, you simply need to click on the Apply and ok tabs respectively.
Solution 8: Disable the firewall
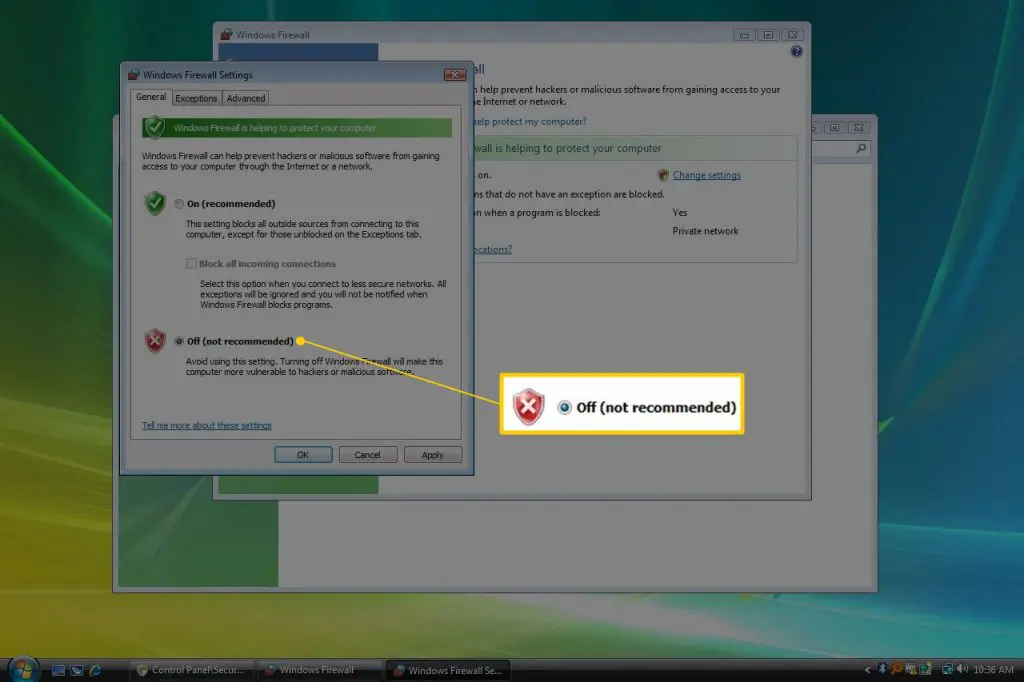
- This process requires you to disable the firewall at first.
- Furthermore, turn off the antivirus software and note that sometimes the antivirus software cannot be disabled, then in that case you might require some rights to make changes.
- You will need to locate the con for the third-party antivirus in the system tray at the bottom right of the desktop.
- After that, right-click the icon and opt for the disable option.
- Toward the end of this post, you need to install QuickBooks desktop or run the update again.
Solution 9: Configure QuickBooks Folder Permissions
QuickBooks can also experience subscription issues in case the software fails to access the license and the product files during launch. This usually happens in case the file’s location is restricted for non-admin Windows account. The software won’t be able to verify the subscription, in case it can’t access the product and the license file and keeps displaying Subscription has lapsed in QuickBooks desktop. In order to deal with this issue, it is suggested to run QuickBooks using admin access. You can further make QB folder contents accessible by configuring Windows permissions.
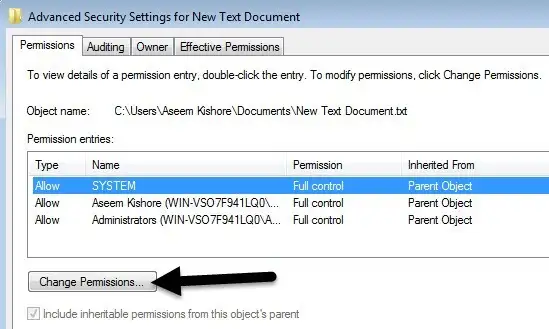
- You need to first head to the QuickBooks folder location using the file explorer and then right-click on it.
- After that, choose the properties tab and head to the security option.
- You now have to choose the Windows account from the pre-shared list and provide permissions like Read, write, modify, etc.
- Also, click on full control.
- And then, save the settings and close the properties.
- Re-perform the task that performed the subscription lapsed issue earlier.
Solution 10: Change QB’s License Number and Product Code
QuickBooks can fail to verify subscription in case Intuit servers can’t process the software’s license number or product code. QuickBooks won’t run properly as the subscription lapsed message shows every time the license file is processed or Intuit servers try to authenticate subscription of the user account.

You will have to change the license number to access the company file and perform the tasks. This can be done with the help of the following steps:
QB Desktop for Windows
- You need to first head to help menu and choose Manage my license.
- Once done with that, click on change my license number and also enter the new license number.
- Click on next and finish tabs respectively.
QB Desktop for MAC
- Here, you need to head to Manage my license option in the QB menu and further click on deauthorize this computer
- Now, click on the Deauthorize and quit option and also relaunch QuickBooks.
- Complete the registration process to enter a different license number.
You can easily purchase or check license number by signing in to the Intuit account and visit the products and services section.
Change the product code in QB enterprise
In case you use QuickBooks pro, premier, or Enterprise in five or fewer systems, then you can simply change the product code by reinstalling the software. In case you are not comfortable reinstalling QuickBooks, then simply change the product code by editing the qbregistration.dat file in QuickBooks Enterprise.
- You need to first press F2 and F3 keys to launch the tech help window.
- Now, select the DAT in the open file tab and also click on open file to launch the file in notepad.
- After that, move to the notepad’s file menu and save the file on the desktop from the Save as tab.
- Reopen QBREGISTRATION.DAT file from the tech help window and close QuickBooks.
- Now, press ctrl + H and enter your old product code in the find what
- You need to enter the new product code in the replace with field and also click on replace all.
- Once done with that, save changes and consider closing the file.
- The product code will be updated in the product information window when you relaunch QB.
Also Check This Out: Configure Firewall Ports and Security Settings for QuickBooks
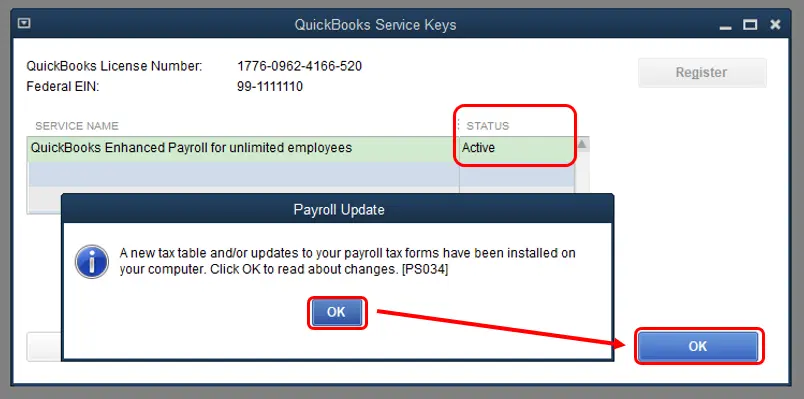
Issue in Verifying QuickBooks Payroll Subscription
An issue in verifying QuickBooks payroll subscription can be experienced when trying to update the payroll tax table. This issue can be experienced due to the following reasons:
- One of the basic reasons can be an inactive payroll subscription.
- Or if more than one active payroll agreement is present with an inactive direct deposit agreement.
- Another possible reason can be if there is any sort of data damage in the company file.
- In case the product is not updated, then such an error can be seen
- Or if the employer identification number in the company file is incorrect.
- Or if the PSID in the company file is incorrect.
- You can also come across the same issue if the version of QuickBooks doesn’t support the version of Windows.
- Or when the status of the payroll subscription in QuickBooks shows as an invalid number
You can try to rectify the issue by verifying the QuickBooks desktop payroll subscription using the steps below:
- Begin with ensuring that you have the latest QuickBooks release downloaded and also the latest tax table.
- You now have to open a payroll account management portal.
- And then, close the page.
- Once done with that, reboot the system.
- Download the payroll update again.
- And lastly, you need to reset the QuickBooks desktop update.
In case you are using the direct deposit for the company file having the issue, then you can contact professionals. You can also open the payroll account management portal and check if the issue payroll service is active or not. Another alternative can be to perform a clean installation of QuickBooks in selective startup mode.
Conclusion!
Once you’ve resolved the QuickBooks subscription lapsed error, take a moment to verify a few things before diving back into work. Confirm that your billing information in the Intuit CAMPs portal is up to date, check that your QuickBooks version is on the latest release, and if you use payroll, run a payroll update to make sure your tax tables are current. These quick checks can prevent the same error from showing up again unexpectedly.
If the error keeps coming back or you weren’t able to resolve it using the steps above, it may be connected to a deeper issue like corrupted license files, folder permission conflicts, or a product code mismatch that needs closer attention. Our support team at +1-888-510-9198, is available 24/7 to help you get to the bottom of it. We’ve helped thousands of QuickBooks users with subscription and licensing issues, and we can usually get things sorted in a single session.
Frequently Asked Questions (FAQs)
This message means QuickBooks was unable to verify your active subscription. It doesn’t always mean your subscription has actually expired it can also appear due to outdated billing information, a failed payment, a corrupted license file, or a connectivity issue that prevented QuickBooks from reaching Intuit’s servers to confirm your subscription status.
The fastest fix is to log in to the Intuit CAMPs portal (camps.intuit.com), update your billing information, and then go to Help > Manage My License > Sync License Data Online in QuickBooks. This forces a fresh subscription check and resolves the error in most cases. If that doesn’t work, restoring the EntitlementDataStore.ecml file or running the QuickBooks Install Diagnostic Tool are the next best steps.
This is more common than you’d think. The most frequent reasons are: your payment was declined by the bank even though funds were available, the billing info on file is outdated (like an expired card), or there was a temporary issue with Intuit’s servers when QuickBooks tried to verify your subscription. Syncing your license data online or updating your payment method usually clears it up.
Yes, and when it does, it almost always points to a local issue on that specific machine such as a Windows user account that doesn’t have the right permissions to access QuickBooks license files, or a third-party application like antivirus or firewall software that’s blocking QuickBooks processes on that computer. Configuring folder permissions or temporarily disabling the firewall usually resolves it.
Your company file data is stored separately and is not deleted if your subscription lapses. However, you may lose the ability to open the software, process payroll, or access certain features until the subscription is verified again. Once you fix the error and QuickBooks confirms your active subscription, everything goes back to normal.
This file stores your QuickBooks license and product information on your local system. If it gets corrupted or out of sync with Intuit’s servers, QuickBooks can’t verify your subscription correctly and shows the lapsed error. Deleting this file forces QuickBooks to create a fresh copy the next time you open it, which usually resolves the verification problem. Don’t worry deleting this file doesn’t affect your company data.
Keep your billing information updated in the CAMPs portal, especially before your credit card expiry date. Make sure QuickBooks is always on the latest release, and periodically sync your license data from the Help menu. Also ensure your firewall and antivirus software are configured to allow QuickBooks so they don’t silently block subscription verification in the future.

