When it comes to accounting and bookkeeping, the software that people prefer is QuickBooks. It is loaded with features and functionalities and lets all sized businesses easily perform their accounting and financial activities. If you are already using this software, then you might be well versed in company files. It is basically a file that contains the complete company information and other sensitive data. In this article, we are going to discuss the steps that can be performed to set maximum number of QuickBooks company files. If you are interested in knowing these steps, make sure to read the article till the end or you can also talk to our experts at our toll-free number i.e., +1-888-510-9198. Our experts will guide you through the complete process and any related information required. Having said that, let us check out the steps to set maximum number of QuickBooks company files.
A company file is a crucial element in QuickBooks that saves all your financial info and grows with you. In QuickBooks, you can save multiple company files for multiple businesses. And each business consists of its own company file. A company file carries .qbw as file extension and should be backed up on a timely basis to avoid any sort of data loss. Let us explore the steps to set maximum number company files in QuickBooks.
Steps to Set Maximum Number of QuickBooks Company file
The user can perform the below steps to set maximum number of QuickBooks company file.
The very first step is to open QuickBooks and then ‘login‘ to any file on the server.
Now go to the ‘File‘ then ‘Open Previous Company‘ and then ‘Set number of previous companies‘
Important: Be informed that the Set Number of the previous file is available only when the Server has more than two QuickBooks.
Furthermore, on the dialogue box choose the number of files that you want to set.
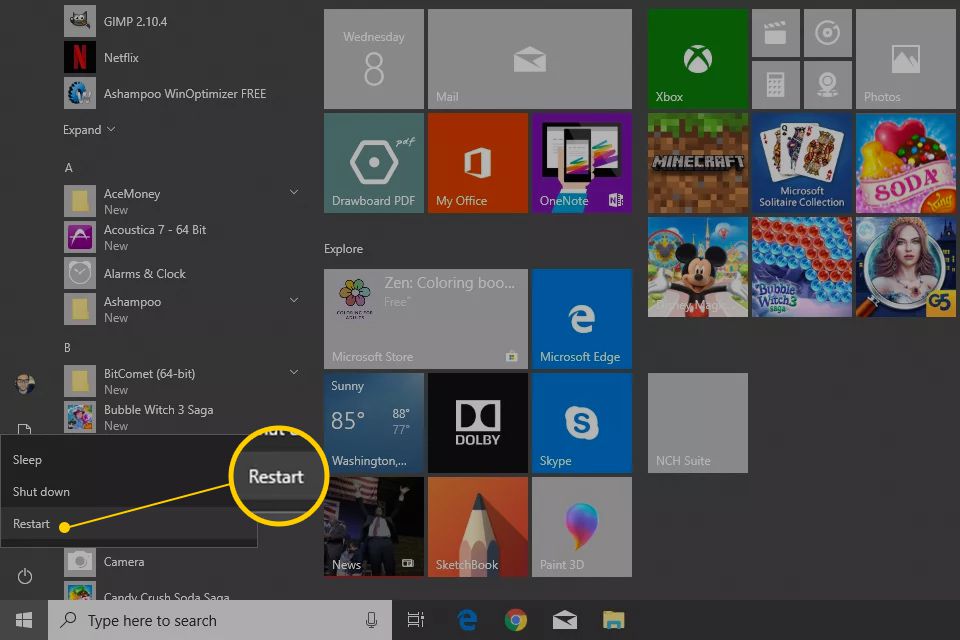
Finally click on “Ok” and then close QuickBooks and again “Reopen‘ it.
Setting the maximum number of company files is just a matter of some steps that we have tried to elaborate on in this article. However, if you are stuck at any point of time or need our assistance in setting up the limits, then feel free to talk to our QuickBooks Customer Support team. You can get on a call at +1-888-510-9198 and our Intuit Certified ProAdvisors will provide you QuickBooks training, tutorials, online courses and much more. We are a team of technically advanced QuickBooks support professionals who work round the clock to provide the best assistance for all QuickBooks related issues.
FAQs Related to Set Maximum Number of QuickBooks Company Files
How many company files can you have in QuickBooks?
When we talk about QuickBooks Online, it only allows one company per subscription. To add another company, you’ll need to purchase and sign up for a new account. You can use the same login credentials when signing up and switching between companies.
What is the maximum size of a QuickBooks company file?
A limit is being allotted to a company file to store the data. Pro & Premiere: Company file limit of 250MB. Enterprise: Company file limit of 1.5GB.
Can you have 2 company files in QuickBooks desktop?
With QuickBooks Accountant or QuickBooks Desktop Enterprise, you can have 2 company files open in 2 different versions of QuickBooks Desktop.
How Many Companies Can You Set Up in QuickBooks?
QuickBooks allows you to create up to 99 company files in a single installation of the software. If you exceed the number of companies allowed in a single installation, you will have to open a new installation of QuickBooks for each additional company. Note that the company files have to be subscribed individually.
QuickBooks accounting software is loaded with tons of features and functionalities, one such feature is to undo or delete reconciliation in QuickBooks. Often when the user reconciles an unwanted transaction or enters a wrong date or an incorrect statement date, the need to undo or delete the reconciliation arises. This is when the QuickBooks users make use of this feature. Another situation where the user might need to undo reconciliation is when the QuickBooks balance sheet doesn’t match the bank statement following a monthly reconciliation. There are certain steps that can be performed to undo or delete reconciliation in QuickBooks, which we will be discussing later in this segment. To unleash the steps involved, make sure to read the segment till the end. Moreover, you can also connect with our tech personnel at +1-888-510-9198and ask them to help you with the undo or deletion process.
At times, it becomes obligatory to undo reconciliation or delete a reconciliation in QuickBooks, especially when the QuickBooks balance sheet doesn’t match the bank statement. Here are a few situations when you might need to undo a bank reconciliation. Let us have a look:
The payment was recorded for an inaccurate date.
A transaction was appropriately checked off and discovered that it had not cleared yet.
The bank reconciliation was forced and now requires it to be corrected in a proper method.
The bank statement date was incorrect or not an actual day.
It should be noted that small changes can unbalance your accounts. You can minimize the impact by reconciling transactions one at a time.
Benefits of Account Reconciliation
Reconciling accounts ensures accuracy and various other perks. Here are a few perks associated with account reconciliation.
Reconciliation allows you to look for any sort of error in account and bookkeeping activities.
It prepares you for any further activity. For example: In case you pay a check to any vendor, and he/she continues to delay the payment, then in such case, it is probable that you might miss out to deduct it from the account. Whereas, using reconciliation can help you in keeping track of all the transactions.
You can further keep the business deposits correct with reconciliation.
Follow the below steps to undo or delete a reconciliation of an account
Below are the following steps to undo or delete a reconciliation of an account
The first thing to do is go to Banking in the left menu.
After this select Banking on the top
Now choose the Account at the top.
After this above the Action column select Go to Register/Account History
Now search for the transaction that you require to reconcile but one at a time.
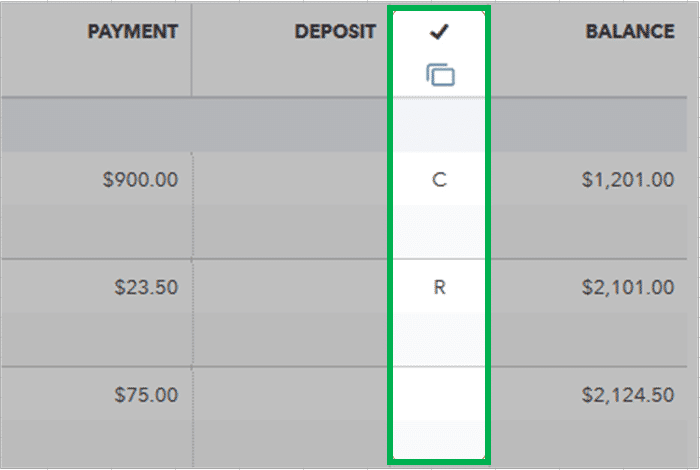
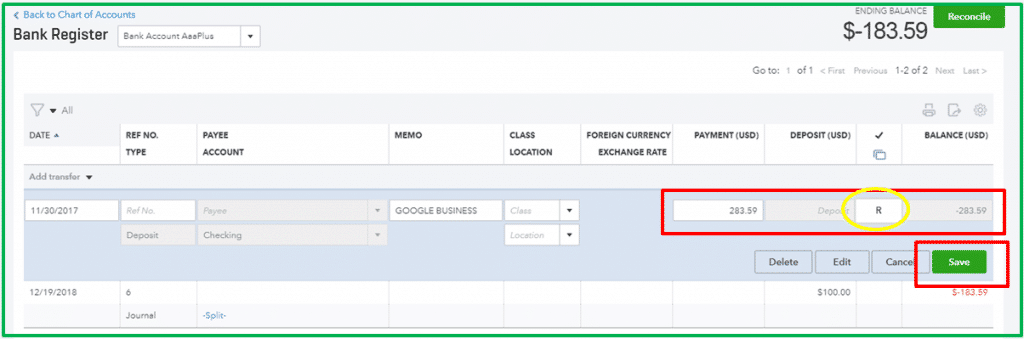
Then highlight tab on the transaction.
After this tap on the R which is on the top line of the transaction which is situated between the Amount and Deposit or charge and payment amount.
By clicking in this field will allow you to change the status of the transaction to the desired status from Blank=unreconciled to C=Cleared
Now click on Save.
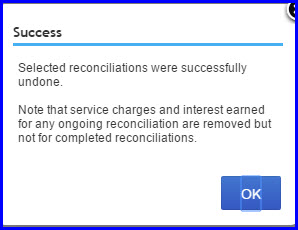
A pop up will display as the image you are showing in below:
The QuickBooks Online reconciles the transactions separately and that’s why you have to reconcile one at a time.
In the start, you need to select Registers from the Banking Menu and after that choose the Account from the Register Name drop-down menu.
After this, you have to tap on the transaction that you want to reconcile and then delete R at the top of the transaction in order to modify its rank to the unreconciled.
In case you want to reconcile each part of the transactions for a period of time then it may help to print a list of the reconciled transactions by using the reconcile alternative from the banking menu.
In QuickBooks Desktop Versions
If you have QuickBooks Desktop version like QuickBooks Pro or QuickBooks Premier, then you can unreconciled a complete reconciliation by tapping on Reconcile Now from the Banking screen and then choose Undo Last Reconciliation. But before do it you have to click on Locate Discrepancies so as to produce a list of discrepancies to find the mistake. Well, the process to undo reconciliation in QuickBooks desktop is the easiest amongst all. The steps below will help in undoing reconciliation for QuickBooks desktop versions like QuickBooks pro, premier, and enterprise. The steps involved are as follows:
The user needs to first launch QuickBooks and then move to the banking option
Once done with that search for the transaction that you wish to reconcile
The next step is to hit the Reconcile Now tab
End the process by opting for the option to undo the last reconciliation
Steps to undo reconciliation manually
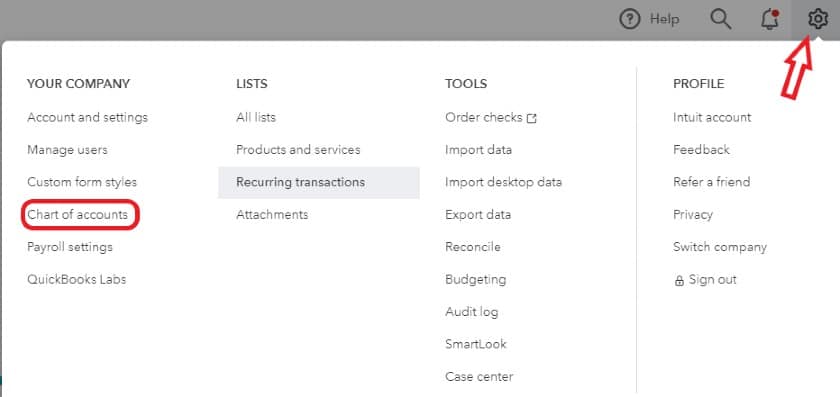
The very first step is to hit the gear icon and also pick the chart of accounts tab
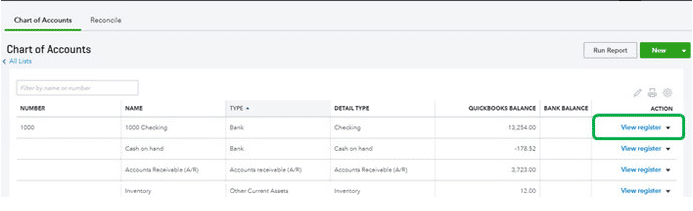
Later on, look for account row that you wish to see
Once done with that go for account history/view register
Furthermore, spot the particular account you wish to edit and then head to the reconcile status shown by the checkmark
The last step is to select the top mark to change it. It is suggested to choose the acronyms: C(Cleared), R (reconcile), and blank (neither cleared not reconcile)
Undo an entire reconciliation
Before you begin, you need to download any attachments tied to the reconciliation. When you undo a reconciliation deletes all existing attachments.
Important points:
When you undo an earlier reconciliation, it also undoes all of the reconciliations that follow. For instance, in case it is May and you undo January’s reconciliation, then you will also have to undo Feb, March, and April, as it may cause errors. You need to start with the most recent reconciliation and work your way backward.
Further, undo reconciliation doesn’t work on manually reconciled transactions. The transactions that remain in the register for the dates that were undone might have changed manually. You can also check the transaction audit history.
You need to sign in to QuickBooks Online Accountant.
Further, find and open the customer’s QuickBooks online company.
When you are in their company file:
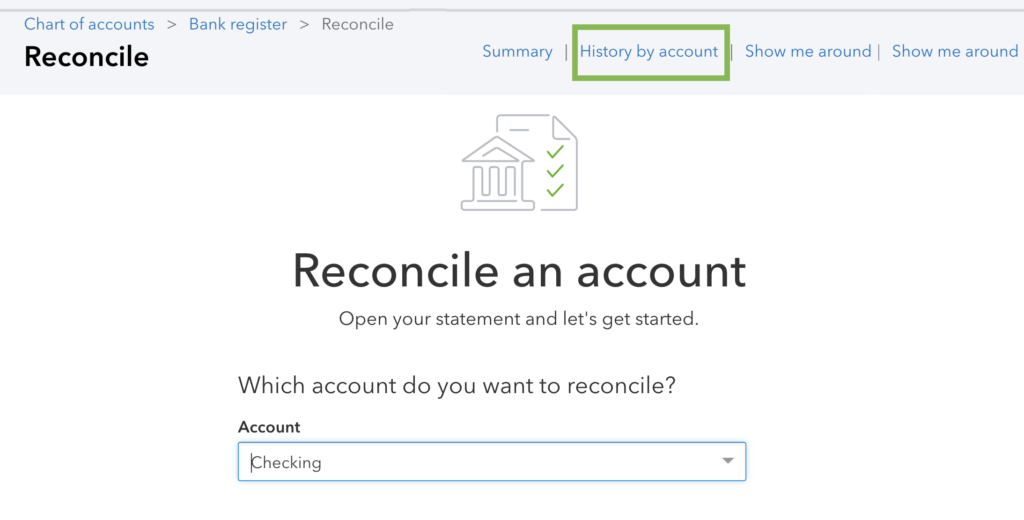
Firstly, head to the accounting menu
After that choose reconcile tab.
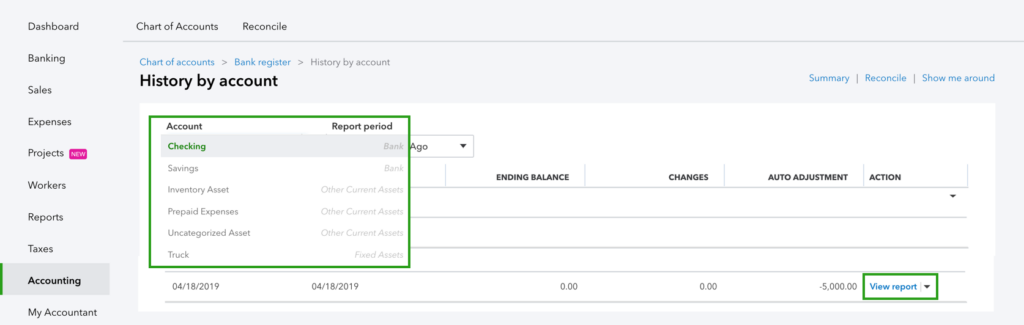
You now have to choose history by account.
Choose the account you want to reconcile and date range from the dropdowns.
Now, find the reconciliation on the list.
You now have to opt for view report to open the reconciliation report.
Furthermore, review any discrepancies and changes your client wants to make.
When you are ready, choose the dropdown in the action column and further choose undo.
The last step is to choose yes tab and undo to confirm.
It should be noted that, if you do not see Undo, ensure that you have opened your client’s company file from QuickBooks Online Accountant. Now you are you client can redo the reconciliation if required.
Winding Up
If you are still unable to Undo or Delete Reconciliation in QuickBooks then you should seek assistance from the QuickBooks Payroll Customer Service experts. They will in no time help you with the whole process. You can call us at +1-888-510-9198 in case you are facing any issue in your QuickBooks Desktop.
FAQs Related to QuickBooks Reconciliation
How to undo past bank reconciliation in QB online?
In case you are using QuickBooks online accountant, you can use the undo reconciliation feature to unreconcile previous transactions without manually editing individual transactions from within the register.
How to remove one transaction from reconciled account?
It is recommended to make sure that you have opened the client’s company file. and then: 1. Go to QuickBooks in the toolbar. 2. Choose the client’s QuickBooks company and open it. 3. After accessing their books, go to the accounting screen and open the reconcile tab and click on the history by account. 4. Select the account you want to reconcile and specify the date range. 5. Find the appropriate reconciliation and press its view report option. 6. Review the discrepancies/changes the clients want to make. 7. Use dropdown in the action column and click on undo. 8. Choose yes and also click on undo.
Can anyone tell me how to undo the reconciliation of a bank account?
You can undo reconciled transactions one at a time, using the steps below: 1. Head to the accounting menu. 2. Choose chart of accounts 3. Find the account and go for view register 4. To assist you in focusing on this task, filter the register to only include the last 60 days of transactions. 5. Review the check column and choose the box and click on it till it is blank. 6. Now, go for save and close your register.
Why can’t my accountant undo a reconciliation?
There is a problem with reconciliation in QuickBooks that many users are facing. You can contact our Customer Support Team to further understand the error and find out a quick fix.
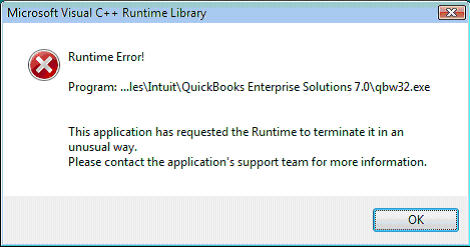
Coming across errors in QuickBooks is quite common and especially when it comes to runtime library errors in QuickBooks. Often when opening QuickBooks, one might end up in QuickBooks Runtime library errors and Microsoft Visual C++ problems. This error may be frustrating as it’s not very simple to fix it. You might come across the following warning message on the screen when such an error appears: This application has requested the Runtime to terminate it in an unusual way. Please contact the application’s support team for more information.
Fixing this particular error might seem to be a tough nut to crack. Thus, here are some troubleshooting steps that you may perform to do away with this error.
Go ahead and launch QuickBooks like you normally would after renaming the QBW file. Hopefully, the new file extension will resolve the Runtime error, allowing you to once again access and use your QuickBooks software.
We hope that this article will help you fix QuickBooks Runtime Errors. If the error still exists or you face any other QuickBooks-related issue, you can call our QuickBooks Error Support team by dialling +1-888-510-9198.
What is a QuickBooks runtime error and what causes it?
A QuickBooks runtime error occurs when the program encounters an unexpected problem that prevents it from functioning properly. This can be caused by a variety of factors, such as damaged or missing program files, issues with system compatibility, or problems with the Windows registry.
I keep getting a runtime error when using QuickBooks. How can I fix this?
If you’re experiencing runtime errors in QuickBooks, there are a few things you can try to fix the problem. First, make sure your software is up-to-date and all necessary updates have been installed. You can also try repairing or reinstalling QuickBooks, or contacting our technical support team at +1-888-510-9198 for further assistance.
How do I prevent QuickBooks runtime errors from happening in the future?
To prevent runtime errors in QuickBooks, it’s important to keep your software updated and to regularly perform maintenance tasks such as cleaning up your system registry and removing temporary files. Additionally, make sure your computer meets the minimum system requirements for QuickBooks and that all necessary software updates are installed.
Can third-party apps or add-ons cause QuickBooks runtime errors?
Yes, third-party apps and add-ons can sometimes cause runtime errors in QuickBooks if they are not properly installed or are not compatible with your system. To avoid this, make sure to only install trusted and reputable third-party apps and add-ons, and check their compatibility with QuickBooks before installing.
How can I get more help with QuickBooks runtime errors?
If you’re experiencing QuickBooks runtime errors and need additional help, you can contact our technical support team at +1-888-510-9198 for expert assistance. Our team can help diagnose and troubleshoot the problem, as well as provide recommendations for preventing runtime errors from happening in the future.
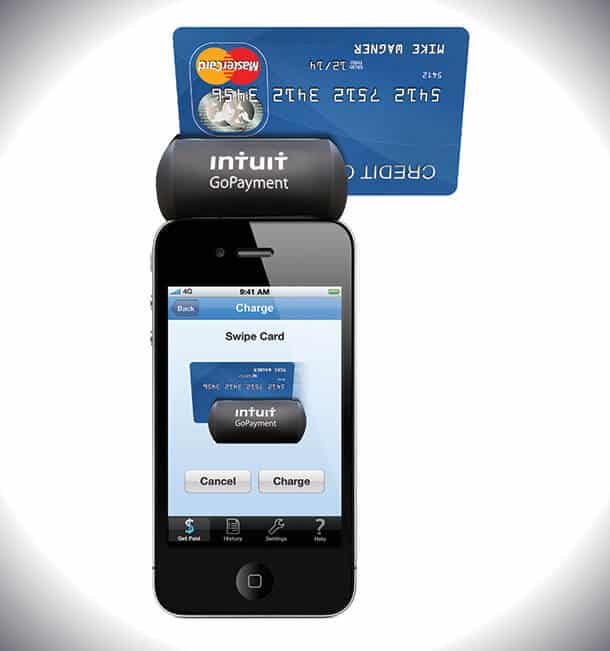
QuickBooks comprises numerous advantageous utilities for the benefit of business owners. One of those features is Intuit QuickBooks GoPayment application, an easiest, simplest, and fastest mode to process the card payments. A card reader with your iPhone or Android device is enough to card payments via GoPayment App. Intuit developed GoPayment, a mobile payment processing service via credit card service for the swift financial transaction within the business.
GoPayment application helps and allows the QuickBooks users to process their credit card transaction by an internet accessible device such as Android, laptop, iPhone, etc. But this whole process takes a little time to process the payment via using a mobile device.
In GoPayment, the users need not to plug-in the card reader. The user can simply scan the card via a camera or enter the card details with the key directly. GoPayment application allows the customer to make payment from anywhere at any time & once the payment is done – you can send the payment receipt to the customer instantly.
QuickBooks GoPayment also leverages the user to customize the payment receipt with logo, text, store information, personalized messages, and social media links.
In case you require any assistance related to QuickBooks GoPayment – you can simply contact the QuickBooks Support team at +1-888-510-9198.
In GoPayment, the QB users need not to plug-in the card reader. The users can simply scan the card via a camera or enter the card details with the key directly.
Instant Payment – Anytime & Anywhere
The customer can suggest you allow the payment right on your device. This process will make you able to receive email or text from the client. This whole process will complete after a minute once you accept the payment.
Enable user to customize
The user can integrate the logo, personalized message, media links, store address, and much more in the payment receipt.
Integrate the list of the products you often sell including the price, picture, or text.
Generate a quick order for the products & enter custom pricing.
You can guide the customer for easy credit card payment.
Operate the Business Swiftly
You can add 50 users at a time to accept the payment from anywhere at any time on your behalf.
To verify the credit card transaction, accept, or refund, simply use the online service center.
Take pleasure in encrypted & safe credit card processing.
The user can sync the transactions to QuickBooks for easy & secure bookkeeping service.
Get Started with 3 Simple Steps
Download & install the free GoPayment application on your device.
Complete the process of the application.
Get approved.
Currently you can easily complete your transaction by credit cards within in mins by the help of GoPayment application.
Never ever miss a sale with mobile credit card handling – QuickBooks GoPayment
Take all repayments types: – Accept and videotape all MasterCard.
If you are approving debit & credit cards in your business, you may likewise wonder if adding mobile to the mix is worth the problem. Or could be your cash-only and also delighted with it. it’s feasible that mobile repayments might not be legal rights for you, yet if any one of the adhering to relates to you, mobile payments are worth considering.
Step 1: – Download the GoPayment application
Download the GoPayment application from mac app store or Google play store from android.
Step 2: – Login to the GoPayment application
Visit into the QuickBooks GoPayment application utilizing the log information because you created your QuickBooks Account during the sign-in process.
Step 3: – Get all set to take your initial payment
Plugin your card up until you hear it click and also show up the volume.
Step 4: – Swipe the card
Now, you prepare to approve credit cards and earn money. Objective swipe your card when mark to obtain your very first payment.
Customers could go into the key, check cards or browse the web to approve credit cards. They can additionally record both check as well as cash money.
Simple, easy, and efficient payment method to receive payments.
Accept all the payments made via mobile or another internet accessible device.
Sync the payment transactions with QuickBooks for secure & easy bookkeeping.
Payments are automatically generated into QuickBooks.
How Setup Inventory to sync to Gopayment?
In case you are looking for the setup process of inventory to sync to GoPayment, make sure to perform the below steps:
To start off with you simply need to visit the item list and select the item you want to give away in Gopayment.
Tap on the edit in the information context box
Choose the sync to mobile
Ensure that you choose save tab to save the changes that you created
How to sync departments to the mobile device?
When setting up the Gopayments application with QuickBooks POS, you need to follow this part for the completion of the process. The steps involved in this process:
Visit the point of sale and click on the inventory and choose the department list
Open the department tab under the department section and change the name of the department
Modify the department name only if needed
Lastly, finish the mobile supply
Completing mobile sync in Gopayment
You can learn the process of completing the process of completing the mobile sync in GoPayment. The steps involved are as follows:
At first, head to GoPayment application that you downloaded on the mobile
Register yourself on QuickBooks payments account
Move to the menu bar and choose the settings tab
Tap on the sync items in the sync settings
Verify the Gopayment device
Before using the application, you can test the functioning of the application. The steps involved in this process are as follows:
Choose the option new payment for testing the GoPayment device in QuickBooks POS
Choose the items and department to verify the list
After verification, you can start using the Gopayment application
Winding Up
We hope that this technical blog post helps our readers to know insight of QB GoPayment correctly & accurately. But if it isn’t, you require any help or suggestion related to QuickBooks GoPayment, you can make a call on our toll-free number @ +1-888-510-9198. Our Intuit Certified team will help you and resolve your all problems within minutes.
Frequently Asked Questions!
What is GoPayment in QuickBooks?
If you use QuickBooks Payments, then the consumers can pay their invoices by using a credit card or ACH bank transfer. When you become a GoPayment user you can pay your bills through a credit card in any place of the world under the surveillance of the internet.
How can I download the Gopayment application on my iPhone?
You need to go to the app store and search for the GoPayment application then click on the application. To download the application, you need to use your fingerprints or face id whatever you used to unlock your iPhone. If the password is asked then you need to add your apple id password.
Is GoPayment free with QuickBooks?
GoPayment is available for both Android and iOS devices and the app is free. There are no monthly charges for GoPayments. You need to pay charges per transaction. 2.4% + $0.25 swiped, dipped, tapped and contactless transactions. 3.4% + $0.25 per keyed-in transaction. 2.9% + $0.25 per invoice transactions.
Learn how to resolve “QuickBooks Error 1920: Service QuickBooks Database Manager (QBCFMonitorService) failed to start” when trying to install or update QuickBooks Desktop:
QuickBooks is one of the most trusted accounting software in the world. Right from big companies to small businesses, today almost everyone is using this cutting edge software. Not only does it help in accounting and bookkeeping but also with the overall financial management of the company. Each year new version of this application is launched with new and improved features. Even though it is one of the best accounting software, yet users at times do face technical errors. These technical errors can be managed but at times for the more complicated ones you have seek assistance from the QuickBooks Support service providers.
In this article we will discuss the issue of QuickBooks installation error 1920. In most cases this error occurs when you are trying to install QuickBooks Desktop or a program update. This generally happens when QuickBooks Database Manager Scans installed hard drives for the company to create a connection with those files. As this services tries to access the drive on the desktop and is not able to so the installation is affected.
This error can be experienced due to a bunch of factors, which we will be listing later in this segment. To find the factors triggering this issue and also the quick fixes for the same, make sure to read this piece of writing carefully. One can also consult our tech support professionals for any sort of further support and assistance.
What Causes QuickBooks Error Code 1920?
The below set of factors can trigger such an error in QuickBooks.
Damaged installation of QuickBooks desktop
There is Invalid entries in the registry of your windows
Virus or malware attack on data files
System power failure
Deletion of important system files or registry entry
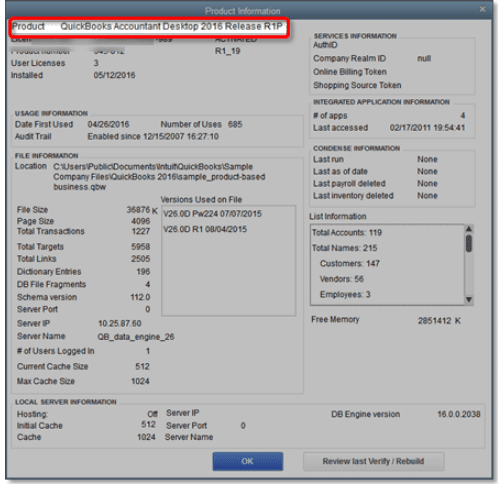
After this open your QuickBooks Desktop and then open the company file.
Now on your keyboard press on F2 or Ctrl+1 keys so as to open the Product Information
After this track the location of the company file listed in the File Information.
Important Note: In case the file name is quite long, it will be displayed with and ellipsis.
Once done close QuickBooks Desktop
After this navigate to the company file location
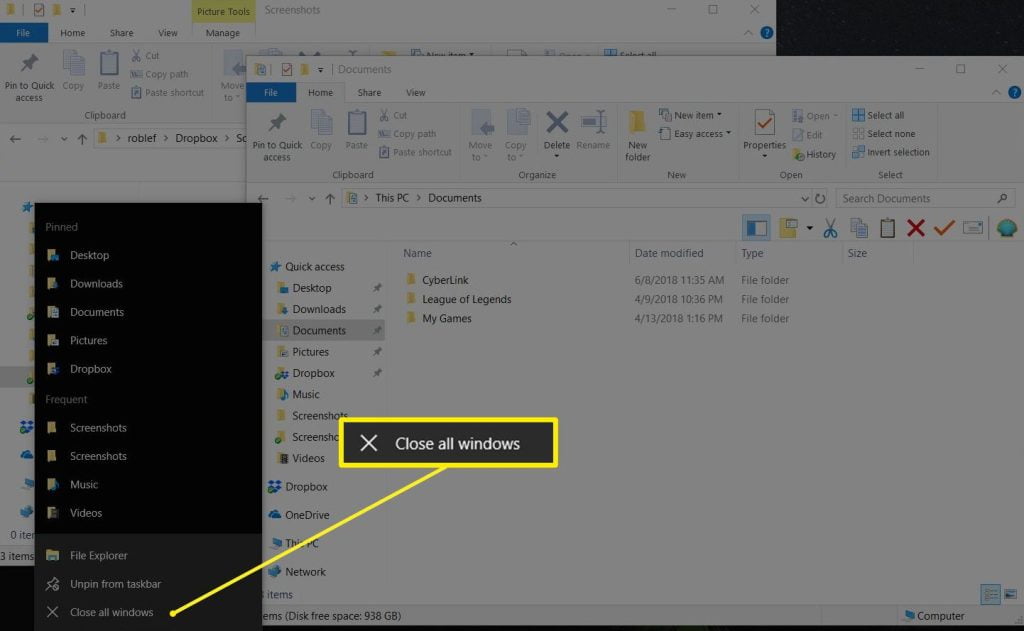
For Windows 10, 8.1 and 8: Right-click on the Windows Start button and then choose File Explorer
For Windows 7 and Vista: Right-click on the Windows Start Button and then select the Open Windows Explorer.
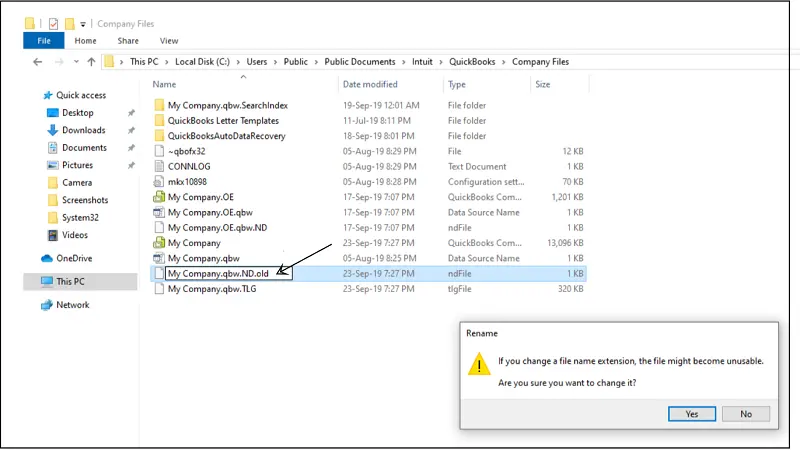
Once done you have to right-click on the file and choose the Rename option
After this type the new name of the company files and click on Enter. In case, Windows asks you confirm you to give confirmation for the action then click on Yes.
Step 4: Set up QuickBooks desktop to use the new company file name
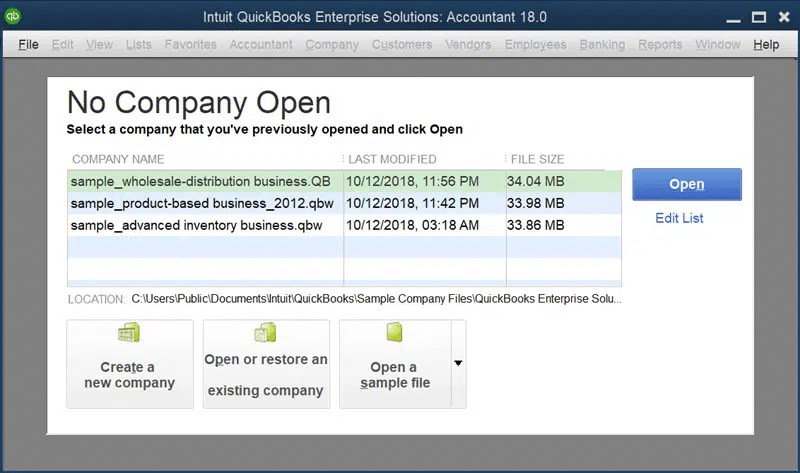
The very first step is to open QuickBooks
After that, the user needs to head to the Qb file menu and click on open or restore an existing company
The user is then required to open a company file and click on next tab
Also, select a new name for the company file
Once done with that click on open tab
Step 5: Installing QuickBooks desktop
The user will first have to prepare for installation of the software
After that, install QuickBooks
Here, the user needs to open the downloaded file
And perform the onscreen steps and accept the license agreement
Now, select the next tab
And enter the product and license numbers
Hit next tab
And also, decide which install type is right for you
Choose express install or custom and network install option
If you have other Intuit apps installed on your computer system, you need to only uninstall or rename the QuickBooks versions folder located in the Intuit folder: C: \ Program Data \ Intuit.
Go to the installation folders. Refer to the chart below.
Windows 10/8/7
Windows Vista
C:\Program Data\Intuit
C:\Program Data\Intuit
C:\Program Data\Common Files\Intuit
C:\Program Data\Common Files\Intuit
C:\Users\[Username]\AppData\Local\Intuit
C:\Users\AppData\Local\Intuit
C:\Program Files\Intuit
C:\Program Files\Common Files\Intuit
C:\Program Files\Common Files\Intuit
C:\Program Files\Common Files\Intuit
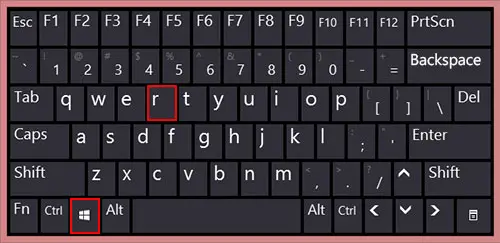
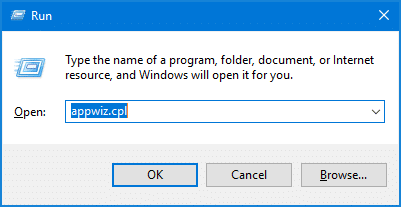
Press Windows + R keys together to open the Run command
Enter (or copy and paste) the location of the folder, and then hit on Enter key
Right-click on the folder, then choose Rename
Rename the folder to .OLD
Step 3: Reinstall QuickBooks Database Server Manager
Database Manager is a part of QuickBooks Database File and allows you to share your company files with other systems connected to the same server. Uninstalling and installing the Database Server Manager can help you fix QuickBooks Error 1920. Following are the steps to follow:
Uninstall QuickBooks Database Service Manager
Download QuickBooks Database Manager
Install QuickBooks Database Manager
Close all open applications and programs on your server computer, including QuickBooks
Open the file (Setup_QuickBooks.exe) you downloaded
Follow the on-screen prompts
Select either Custom or Network Options when QuickBooks asks you to pick an install option
Next, choose Next
Select the best option for your setup (except Express) and press Next
Both the options install the Database Server Manager
Choose “I’ll be using QuickBooks Desktop on this computer, AND I’ll be storing” if you want both Database Server Manager and QuickBooks Desktop on your server computer
Select “I will NOT be using QuickBooks Desktop” if you only want Database Server Manager on your server computer
Follow the on-screen instructions and select Install
Tackling errors in QuickBooks becomes easy, once you know the right steps that are to be performed. However, if you still face the problem “QuickBooks database installation error 1920″ even after following the above steps then you can seek assistance from QuickBooks error support team. Our accounting expert technicians are available 24/7 to provide you solution to your problems as well simple tips to avoid in the near future. Contact us at +1-888-510-9198 today.
FAQs – QuickBooks error 1920
What is QuickBooks installation error code 1920?
QuickBooks error code 1920 is often seen when the QuickBooks database server manager service is unable to launch during the QuickBooks installation. This error is often associated with a warning message that states “Error 1920: Service QuickBooks database service failed to start”. If you are experiencing the same issue, then make sure to perform the right set of steps to eliminate it.
How do I manually start QuickBooks database manager service?
In order to manually start the database manager service, make sure to perform the steps below: 1. The very first step is to press windows + R to open the run dialog box 2. After that, enter services.msc and also click on enter tab 3. The user is then required to look for the QuickBooks database manager service in the services window 4. Now, right click the QuickBooks database manager services 5. And also, click on properties ab 6. The user is now supposed to change the startup type to automatic 7. Once done with that, press start tab to manually start the service 8. And lastly, click on ok tab
How do I fix QuickBooks installation errors?
The user can try to fix the issues related to QuickBooks installation, using the steps below: 1. Start with downloading and installing QuickBooks tool hub on the system 2. After that, download he QuickBooks hub file 3. Also, save it where it can be easily accessed 4. Furthermore, update windows 5. Install QuickBooks desktop using selective startup


![How to Setup Intuit GoPayment? – [Uses and Benefits]](https://www.hostdocket.com/wp-content/uploads/2018/08/Intuit-QuickBooks-GoPayment-Support-Pro-Accountant-Advisor.jpg)