Learn how to resolve data damage on your QuickBooks company file
Company file in QuickBooks is one of the core elements. It stores your crucial and sensitive data. However, at times, this crucial data file can get damaged or corrupted due to some reasons, which not just puts your data at risk, but also hinders the smooth working of the software. You can experience data damage in QuickBooks due to performance failures, disk failures, power surges, and much more. To help you out in dealing with such annoying errors, we have designed this piece of writing, sharing the complete details about data damage and data corruption issues.
Thus, stick around this piece of writing for further information or you can further connect with our QuickBooks enterprise support team at +1-888-510-9198, and get answers to all your queries from the professionals.
Data damage errors in QuickBooks company file often occur when the software is unable to read the company files properly. It can further be experienced due to various external and internal reasons. You might get an error message or see an unusual behavior in case any sort of data damage occurs. Data corruption or data damage can be a common yet annoying error experience for QuickBooks users. Thus, it is suggested to make regular backups of QuickBooks company files, to avoid any sort of data loss.
Identifying signs for data damage in QuickBooks company file
The signs and symptoms of data damage in QuickBooks company file. Let us have a look:
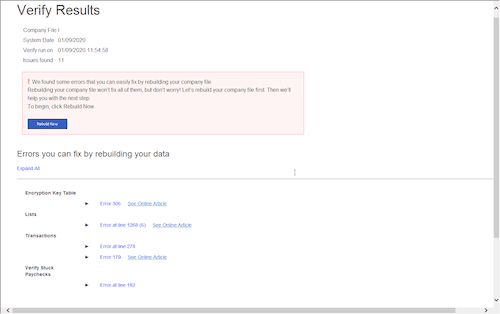
Issues like a data problem prevents QuickBooks from continuing, in the verify data utility or verify target: values in minor do not match the major on the screen.
Moreover, if there is a negative balance in the transaction history.
Another reason can be if any of the transaction and entry is missing from the lists.
One can also experience a similar issue if the bills paid or invoices are shown unpaid.
Also, if the software runs sluggishly.
In case there are any errors in the balance sheet.
If the user opens the send feedback online and while moving to the bug report window.
Fix data damage on your QuickBooks Desktop company file
Mainly there are two steps to resolve this problem. You can take help from your IT professional or contact our error support team in case you get stuck somewhere by following given steps.
Step 1: Run the Rebuild Data Utility
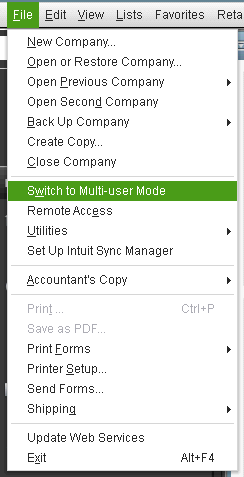
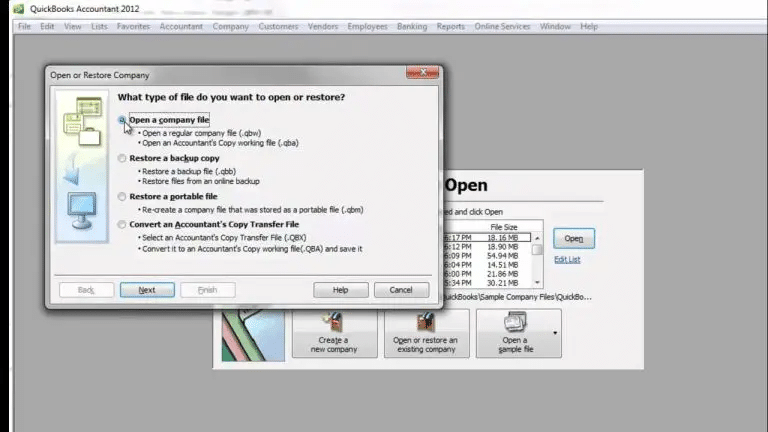
Go to File menu, choose ‘Utilities > Rebuild Data‘
Select ‘OK‘ button in the backup of the data of QuickBooks company file.
(There are chances that your computer will show that QuickBooks is not responding.) But if the cursor is moving, it means that Rebuild is going on. Let it complete.
Go to ‘File menu‘ and choose ‘Utilities > Verify Data‘
Select ‘OK‘ if you get the message ‘QuickBooks detected no problem with your data‘.
If there is an issue with the data, you will get the prompt ‘Rebuild Now‘ or ‘View Errors‘.
Now, choose ‘Close‘ and perform the steps below:
Important Note: You can follow the steps below if you find yourself comfortable in reviewing the QBWin.log or QuickBooks.log file.
Find QBWin.log or QuickBooks.log files
Go to the ‘Tech Help‘ window if you are working with a support agent. Go to ‘Open File‘ tab, highlight the log file and select ‘Send log files‘ to Intuit Support. This will send the file as well as enable the agent to view the log files.
Now, check the log file
For Mac: Scroll down to the most recent verify information
For Windows: Search for start verify and locate the most recent file
In the opened file, you need to search by pressing ‘Ctrl+F keys’ for the start ‘Verify‘
Now, find the line which is LVL_ERROR, and look for it in check QuickBooks Learn & Support Site. Also you can see that there is a data damage top LVL errors library
Why should you use Verify and Rebuild features?
Encountering fatal errors while using QuickBooks Desktop
Discrepancies on invoices, bills and other reports that post negative values
Already deposited payment showing in the payment to deposit window
Step 3: Use QuickBooks file doctor from Tool Hub Program
If you are unable to fix the issue using the above rebuild and verify data utility related steps, then try performing the steps associated with file doctor tool to get rid of the issue successfully:
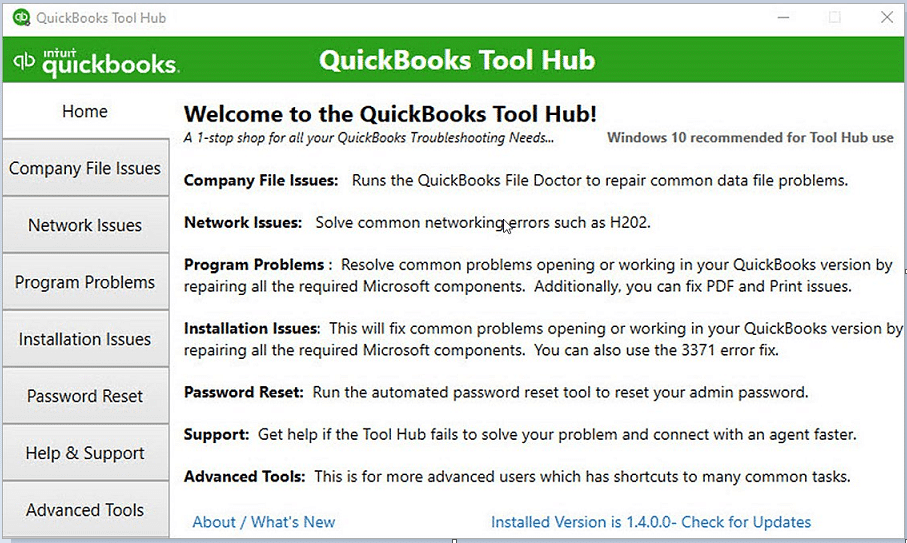
If the users haven’t downloaded it already, then download the QuickBooks tool hub.
After that, open the company file issues tab from there.
You now have to opt for run QuickBooks file doctor.
This might take a minute or so.
Now choose the company file from the drop-down menu and if the file is not identified, go to the browse and search tabs to find the file.
Once done with that, choose check the file option and click on continue tab.
You will then have to enter the admin password for QuickBooks and also click on next.
The scanning process might take some time, depending upon the file size. And once the scan ends, open QuickBooks and the company file.
Step 4: Deletion of Customer Reports and memorized transactions
Another method you can try out for QuickBooks Desktop data damage is deleting customer reports and memorized transactions.
To delete memorized transactions:
Move to the lists, where the user should move to memorized transaction.
After that, click on the edit tab and select deleting the memorized transactions option.
You now have to click on ok tab.
Delete customer reports
You need to click on the reports menu and further select the reports center.
Once done with that, select X.
Also click on ok tab.
Data damage troubleshooting for QuickBooks desktop Mac
If you are a QuickBooks Mac user then the below given steps will help you to resolve the data damage issues of QuickBooks:
Step 1: Re-Sort Files
Re-sorting the lists will help you put your records back in order. In case you have changed the order of a list, resorting will do the needful.
Go to ‘Reports menu‘, and select ‘Company & Financial‘ > ‘Balance Sheet Detail‘
Now, select ‘Options‘, choose ‘Accrual or Cash‘.
If you find that the total assets do not get equal with the liability and equity in all the reports, then you better determine the transaction which is causing the problem.
Take a backup of the company file, ‘Delete and re-enter‘ the transaction
After this, compare the Account report totals to the balances on Chart of Accounts:
Compare the open invoices to accounts receivable balance on the ‘Chart of Accounts‘.
Compare the total in ‘Unpaid Bills report‘ to the ‘Accounts Payable balance‘ on the ‘Chart of Accounts‘
To balance the transaction, rebuild will put out-of-balance transactions in this account. You may also see voided checks in this account
Other than voided checks, you will also find the transactions. Now, again delete and re-enter the transactions.
Undeposited Funds:
Go to ‘Activities‘, select ‘Make Deposits‘ and then, select all. Make sure that the total amount is equal to the balance shown for ‘Undeposited Funds‘ on ‘Chart of Accounts‘. Also, ensure that there are no deposits showing on the deposit.
Step 4: Merge the Damaged Accounts/Items/Names
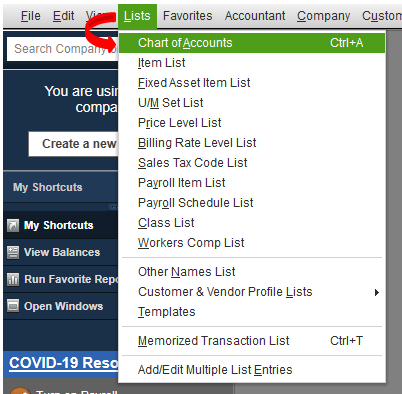
Go to ‘Lists‘ and select ‘Chart of Accounts‘.
In the control key, select the account that has been damaged. Click on ‘Edit Account‘
Make sure you put an asterisk (*) on the name of account
Then, click on ‘Cancel‘
While holding the ‘Control Key‘, select any account and click on ‘New Account‘
Choose the type and enter the original name of the account having problem
Click ‘OK‘
Hold the ‘Control key’ and select original account. Choose ‘Edit Account‘
Now remove the asterisk and select ‘OK‘ button
Click on ‘YES‘ as this will confirm that you desire to merge the accounts
To merge items and names, the same steps will be followed as the ones followed for merging accounts
We hope that the above-prescribed information is helpful for you to resolve data damage on your QuickBooks company file. In case, you are unable to perform the systematic steps of the solution or you seek expert assistance – dial our QuickBooks data recovery number i.e. +1-888-510-9198.
FAQs Related to Data Damage in QuickBooks Company file
How do I repair a QuickBooks desktop data file?
You can try fixing the data file in QuickBooks using the steps related to repair company file with rebuild data tool. 1. The first step is to move to the file menu. 2. Move to the utilities tab and choose rebuild data. 3. The next step is to let the tool repair the file. 4. Click on the ok tab and head to the file menu. 5. Also, let the tool check your file for data issues.
What causes data damage in QuickBooks desktop?
Data damage usually indicates that the company file can’t be read correctly by QuickBooks. This can be caused by factors within QuickBooks or some external factors, especially the ones where the file is located. The majority of data damage issues include LVL errors in the QBWin.
How do I quick fix my file in QuickBooks?
You can fix your file from the tool hub and choose the company file issues and also go for the quick fix my file option. Once done with that click on ok tab when it completes and launch your QuickBooks.
Did you see QuickBooks error 6073 99001? Well, this particular error is often experienced when multiple users try to open the company file at the same time. It further shows up if QuickBooks fails to read the company file. This error can be further experienced in case the company file is already in use by another application or if there are some network-related issues. As a result of QuickBooks error code 6073, you might fail to open the company file, and face issues in invoicing, payroll processing, and other financial tasks related to the company file. Due to this error the QB users are usually not able to open the company file. And get an error message on their display.
QuickBooks is unable to open this company file. It may have been opened by another user…
Error codes: (-6073, -99001)
To help you out in tackling this particular error in QuickBooks, here we are with this segment sharing the complete set of steps to get rid of the QuickBooks error 6073, 99001. However, if you need any sort of technical guidance in eliminating this particular issue in QuickBooks, then in that case, feel free to ring us at +1-888-510-9198, and we will provide you with the required guidance.
What are the possible causes of QuickBooks error 6073, 99001?
This error can occur due to any of the following:
When a user opens this file on another computer in a single-user mode.
The file is located as to read on another network folder.
All files are hosted via the Linux server & then use any more rather than one’s set as to login the credentials and sign into as shared folder.
The file is being accessed through remote access software technology (LogMeln, GoToMyPc, etc). We host the computer and still see that the client is already logged into it.
Comply below-mentioned point to troubleshoot the QuickBooks Error 6073, 99001 or contact to our QuickBooks enterprise customer support team to get instant help from our U.S based tech Advisors.
Solution 1: First download and run the QuickBooks File Doctor
The very first step in this process is to download the most recent version of QuickBooks tool hub and then save the file where it can be accessed easily
Open the file that is mention in the above step.
Perform the onscreen steps and install and agree to the terms and conditions
Now, double click the icon on the windows and open the tool hub
Choose the company file issues tab from the tool hub
However, if you are still not able to get rid of from this QuickBooks error code 6073 or facing any other issue related to QuickBooks then contact to QuickBooks support & help numberi.e., +1-888-510-9198 and talk with USA’s best accounting professionals that experienced and has excellent work knowledge in resolving countable hindrances avails for all-time.
Don’t know how to deal with script errors in QuickBooks? We are here to help you. QuickBooks accounting software is loaded with various features and functionalities; however, the only drawback of this accounting software is the fact that it is prone to certain errors. In this article, we are going to learn in detail about QuickBooks script error. These errors might appear in a multitude of formats such as script error, error in script, script error line #### character ## object ####. Such errors in QuickBooks often occur due to the script functions processing being blocked or if the script software is damaged and/or related data is incompatible.
For more information related to fix script error when accessing QuickBooks, let us go through this piece of writing carefully. However, if you feel that you need expert guidance and support in this, then you can get in touch with QuickBooks Error customer support expert at Host Docket team at +1-888-510-9198.
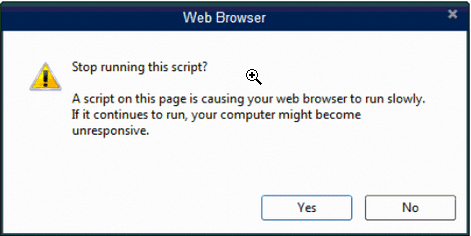
Script error in QuickBooks is often seen when there is a problem executing a command that involves the application on the computer trying to access a web-based internet feature. If you try to access QuickBooks or look at a webpage from the QuickBooks Program during a script error, the webpage you are opening may not load or you may not be able to use the webpage successfully and accurately. A pop will appear- ‘A script on this page is causing your web browser to run slowly‘. If it continues to run, your computer might become unresponsive.
You can experience the following error messages on your screen:
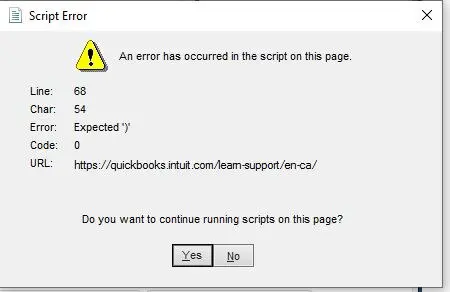
Script Error: An error has occurred in the script on this page. Line 22 char 2 error…
Script Error: QuickBooks script error for line 7 char 5
Script Error: QuickBooks script error unable to get property length of undefined or null reference.
Since this script error when accessing QuickBooks is a small one, you need not worry about the safety of your information and data or if some file is broken. Please note that this script error will never break the files or cause any damage or loss of your necessary data.
The image as shown below is similar what appears on your desktop.
Possible reasons behind the occurrence of script errors in QuickBooks
One might come across the following script error when accessing QuickBooks due to the below-stated factors. Let us have a look:
You can experience this issue if data import is attempted from a non-existing account.
Another possible reason can be importing an invoice having different account details from assets or accounts due.
You can also experience a similar issue, in the case of a corrupt Windows user.
In case the data file is damaged, then experiencing this issue is common.
Moreover, if the Active X components got damaged, they could trigger this issue.
Any sort of malware can also land you in such a situation.
Another possible trigger can be if the script debugging feature is enabled.
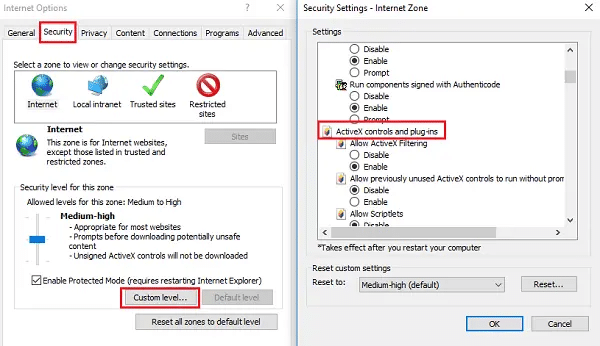
Most importantly, the script errors are often associated with the Internet Explorer settings. Thus, make sure to configure it properly.
Method 5: Clear the cache data folder of Microsoft Internet Explorer or the default browser
Start with opening the Internet Explorer browser.
Go for the Tools option.
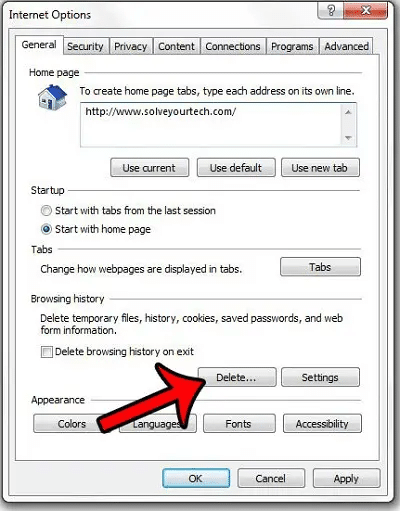
Click on the Internet options and then click on the General tab.
Now choose the Delete option under the browsing history.
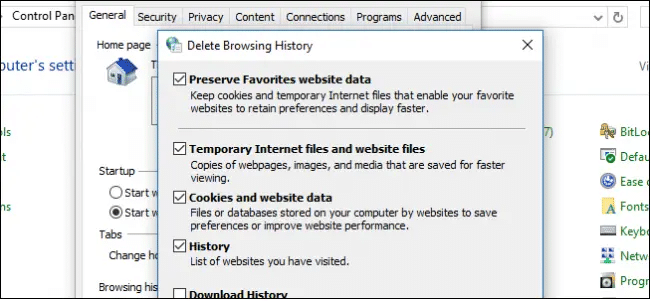
You are now required to place a checkmark beside Cookies and website data, History & temporary internet files.
Hit Apply and OK options respectively to end the process.
Method 6: Turn off Notifications for QuickBooks script errors
Another effective measure to eliminate QuickBooks script error 1159 or any other related script errors in QuickBooks is to turn off notifications for QuickBooks script errors.
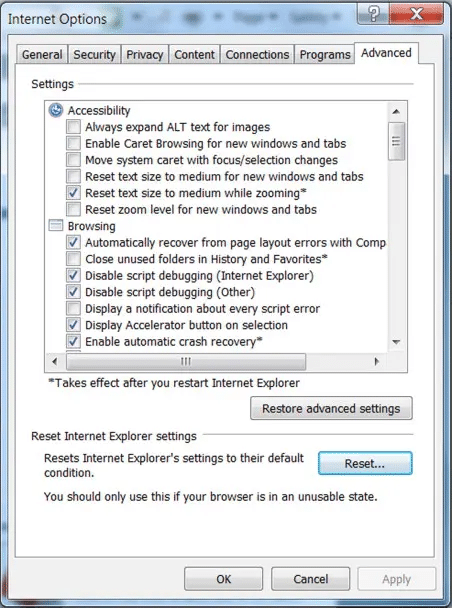
This process demands opening Internet Explorer first.
Followed by heading to the Tools tab.
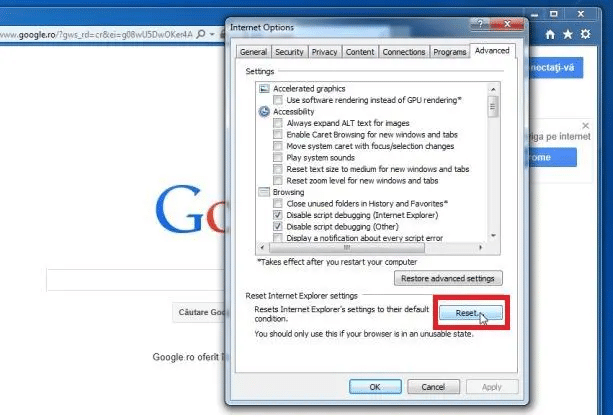
Select Internet Options and then go to the Advanced tab.
Moreover, click on the option to clear the Display notification about all Script errors option.
End the process by clicking on OK to save changes.
Still unable to fix taxes It is suggested that the steps scribbled below are to be performed by the business IT department.
Operating system files check
You need to initially head to the start menu and choose the search tab.
Once done with that, enter the command SFC/Scannow to inspect all of the system files. In case there is a problem, then perform the steps as indicated.
Note that, this process might take several minutes to run, as the process is very long.
Disk Error Checking
On the Windows start menu, you simply need to choose the computer
After that, right-click the C:/drive and head to the tools tab
For Windows 7: you need to choose properties to see tools
After that, under the error-checking section, you need to choose the Check Now tab.
Also, note that on the check disk window, leave the two boxes unchecked unless otherwise indicated by the business IT department.
Final Note.!
These steps to fix QuickBooks script error will easily fix all errors and you will be able to use QuickBooks. But in case you are unable to fix the problem, you can get in touch with our QuickBooks support team of certified experts.
Feel free to contact our customer support helpline number i.e. +1-888-510-9198 and our team will help you out with your concerns.
FAQs Related to Script Error in QuickBooks
How do I remove the script error in QuickBooks Desktop?
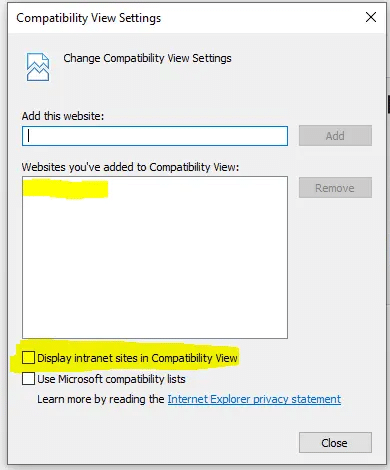
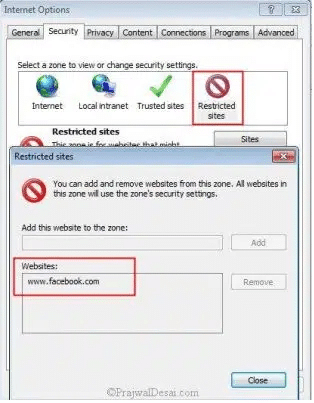
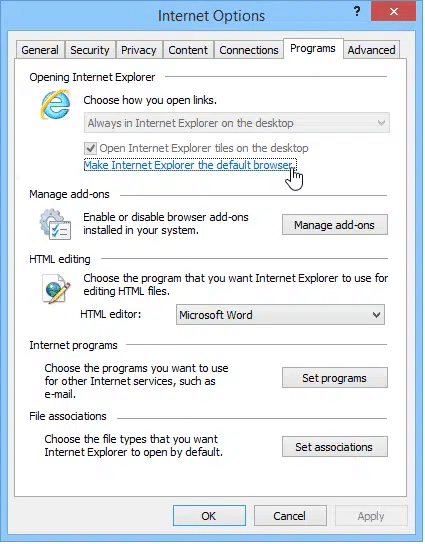
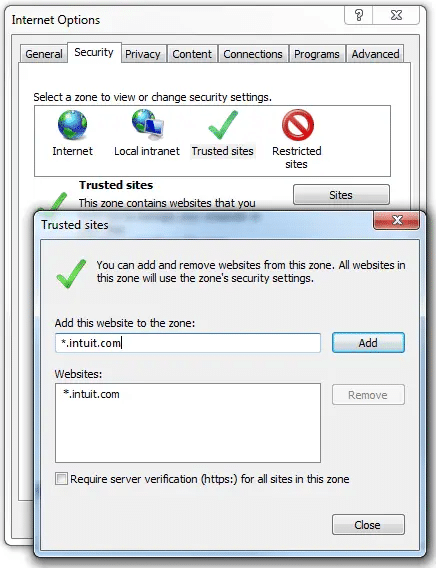
You can try fixing the script errors by performing any of the methods below: 1. Configure Internet Explorer in the compatibility view. 2. Add the URL to the restricted websites list. 3. Turn off add-ons in the Internet Explorer. 4. Verify the active scripting and uninstall Active X.
What is an error in script?
Script error is what browsers usually send when an error originates from a JavaScript file served from a different origin.
What is the source of script error?
Script error happens when an uncaught JavaScript error crosses domain boundaries in violation of the cross-origin policy.
What causes a script error in QuickBooks?
Script error occurs in QuickBooks when there is an issue in executing the command that involves applications on your computer trying to access a web-based feature.
Trying to eliminate QuickBooks error code C=272 and can’t find the right way to do that? Well, QuickBooks error C=272 is often encountered when the user tries to run the verify and rebuild data utility in QuickBooks. This error isn’t commonly seen, which makes it a bit challenging to tackle for QuickBooks users. QuickBooks error C=272 is usually experienced when you run verify and rebuild data utility and it further shows an error message. As this error is related to the company file only, it is essential to ensure that there are no data damages before implementing the fixation steps for the same. There are a few reasons behind the occurrence of this issue, which include issues with the memorized reports, any sort of data issues, etc.
However, to make the procedure to eliminate the error C=272 in QuickBooks easier, here we are with this piece of information, sharing the causes and fixes to this error in detail. Thus, if you are interested in learning further about this error, make sure to read this article till the end. Or you can ring us at +1-888-510-9198, and we will provide you with the best support services immediately.
Check out the causes of QuickBooks Error Code C=272 and here we have mentioned some of them below:-
The QuickBooks Error Code C=272 may take place by data damage or if the QB software tries to move a report or report-like data
QuickBooks software restarting and repeating the same action may not resolve the error code & it possibly pops up again. Due to this error, the QuickBooks data file probably gets damage or corrupt
Error C=272 may also arise when 1099 & W2 forms (V6.OD R1 [M=1477, L5203, C=43, V=2(2)) are printed
If running the memorized report was produced by an earlier QuickBooks version and could not convert appropriately
The Verify or Rebuild utility stumbles upon a target “bit set” that is outside of the anticipated range
Steps to Troubleshoot QuickBooks Error Code C=272
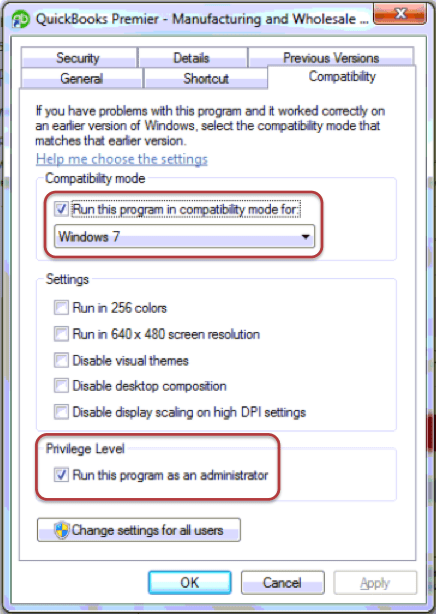
To fix this QuickBooks issue, first, try to open a QuickBooks sample company file if the data is corrupt. If the error persists, then immobilize the Windows compatibility mode.
Step 1: Open the QuickBooks sample company file
First of all, Open QuickBooks and press and hold the “Ctrl” key on the keyboard.
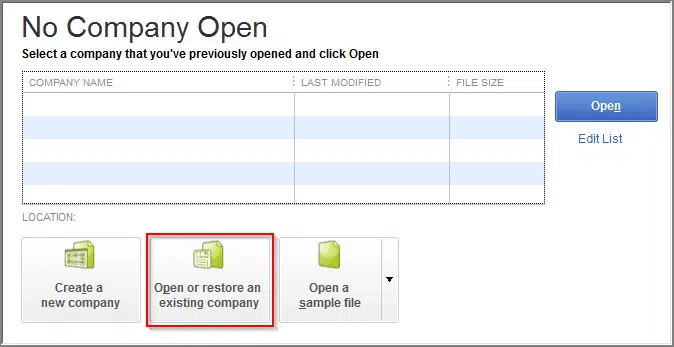
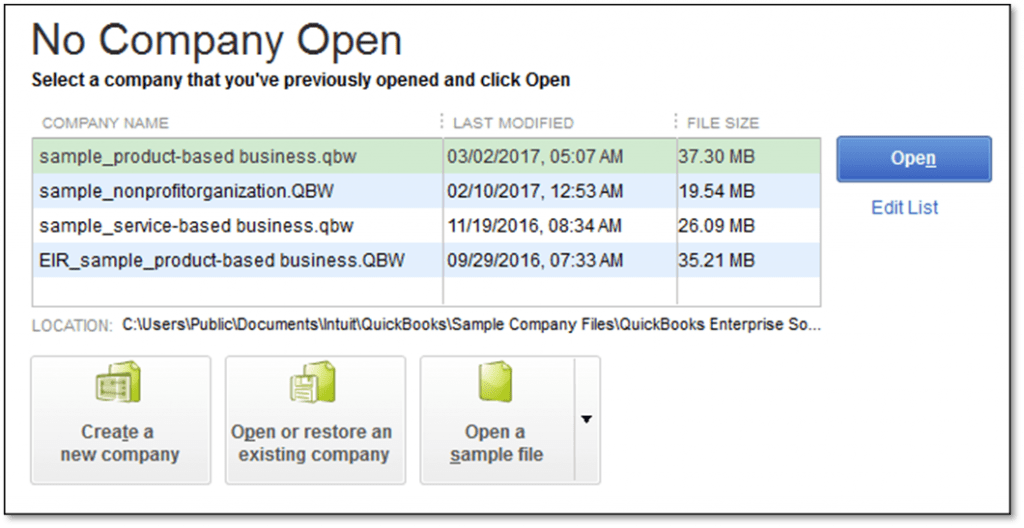
Whenever the “No Company Open” window appears, release the “Ctrl” key.
If the error code arises before the “No Company Open” window appears, then proceed to the next step.
Choose the “Open a sample file” in the “No Company Open” window. Hit onto any of the sample files in the list.
Your QuickBooks company file may be distorted/ damaged if the sample company file opens without displaying any error code. Refer to “Verifying and rebuilding QuickBooks company data” or restore your QB company file from the backup.
If the error appears while opening the sample company file, you may proceed with the next step to immobilize the Windows compatibility mode.
Finally, you need to open your QuickBooks software and the company file to ensure that the error is no more permanently.
Final Words..!
I hope you find this article helpful and you have easily resolved QuickBooks error code c=272. If still having difficulties contact immediately to our QuickBooks error support team immediately at +1-888-510-9198.
We, Host Docket are the top-notch technical support and services provider around the world with thousands of award projects. We are proficient in solving QuickBooks errors associated with Data Recovery, Installation, Updates, and others. Our support executives will be happy to help you out with your all accounting-related issues.
Some FAQs Related to QuickBooks Error C=272
What is QuickBooks error C272, and what causes it?
QuickBooks error C272 is a common error that can occur when attempting to open or use the QuickBooks software. It is typically arises due to issues with the company file or a problem with the software installation. Some users have also reported that the error may be related to their antivirus or firewall software.
How can I fix QuickBooks error C272?
There are several potential solutions for QuickBooks error C272, depending on the root cause. Some users have had success with repairing their QuickBooks installation or uninstalling and reinstalling the software. Others have found that restoring a backup of the company file or running the QuickBooks File Doctor tool can resolve the issue. If you’re still struggling to fix the error, you may want to consider reaching out to QuickBooks support services via www.hostdocket.com for further assistance.
Can I get help with QuickBooks error C272 from www.hostdocket.com?
Yes, www.hostdocket.com offers QuickBooks support services that can help you diagnose and resolve errors like C272. Our team of experts is familiar with common QuickBooks issues and can provide personalized assistance to help you get back up and running as quickly as possible.
What other QuickBooks errors can www.hostdocket.com help with?
In addition to QuickBooks error C272, www.hostdocket.com can provide support for a wide range of other QuickBooks errors and issues. Our team can help with everything from installation and setup to data recovery and optimization. Plus, we offer flexible support options to fit your schedule and budget, including phone support, chat support, and email support.
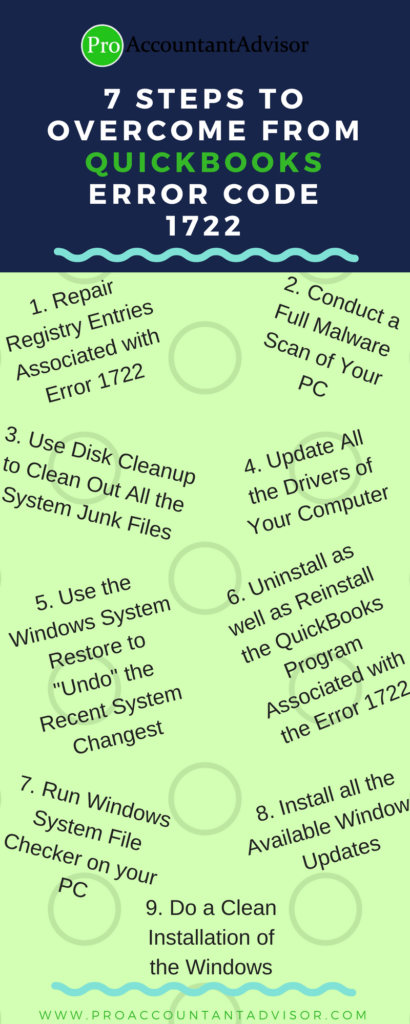
Like many other software, QuickBooks is also prone to many error and QuickBooks Error Code 1722is one of them. This QuickBooks error appears when there are issues in coding while structuring the software. But don’t worry, it’s fixable. You can follow the troubleshooting steps mentioned in this article to iron out this issue. If you need help, Contact QuickBooks Error Support team and talk with Intuit certified experts. Dial our toll-free customer support number i.e., +1-888-510-9198, in case you need any sort of technical guidance.
Following are the common reasons behind the occurrence of this error which include:
Incomplete or Damaged Installation of QuickBooks software
The damaged windows may be registered from a recent QuickBooks related software modification
Virus or malware infection might corrupt the windows system files or any QuickBooks related important program files
In case, any other program deleted QuickBooks files maliciously or mistakenly
QuickBooks error code 1722 can occur at Run-time and so often it is called Run-Time Errors. There may be various causes for this error and so it important to troubleshoot each of the possible causes to fix and prevent it from happening in the near future.
Symptoms of QuickBooks error code 1722
There are few symptoms as well which suggest that your software is witnessing this error:
Your PC starts crashing with this error frequently
Moreover, due to this error the PC may crash frequently when running the same program
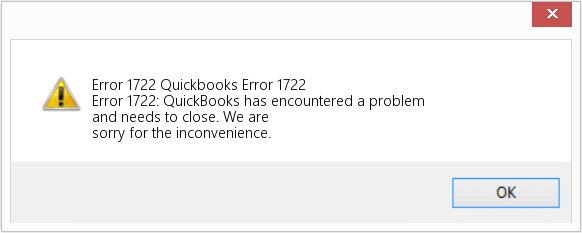
“Error Code 1722” is displayed on the computer screen
Windows runs slowly and responds late to mouse/keyboard input
The system freezes for few seconds
Users can get the error message during the installation of the program or also when any Intuit related software application like QuickBooks is running when Windows is starting up or shutting down. It is very important to know where the error is occurring and this will actually help in fixing the issue.
Unlike other error codes of QuickBooks desktop error Code 1722 is also a run-time error which can be resolved easily through “Windows Restore Method“.
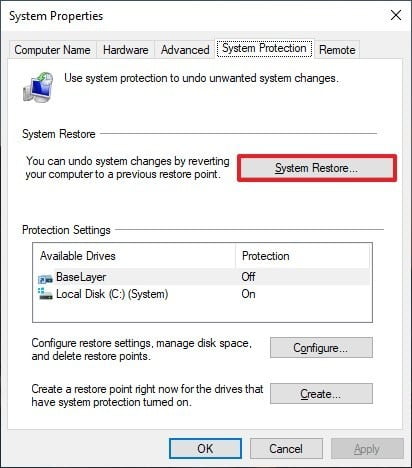
Method 1: Restore your System to an Early Point
In this method, you need to choose the restore point from the most recent backup of you computer system that you created in past. And then the files and programs will be saved on the system and to the restore point that has been chosen by you. With this easy and swift method, you can be assured that your hours of troubleshooting the error are saved.
Follow the below given steps:
Firstly, Go to “Start“ button and type in “System Restore“ and then Press “Enter” key.
A result window will appear. Click on “System Restore” option.
Enter the system “Administration Password” (User ID and Password).
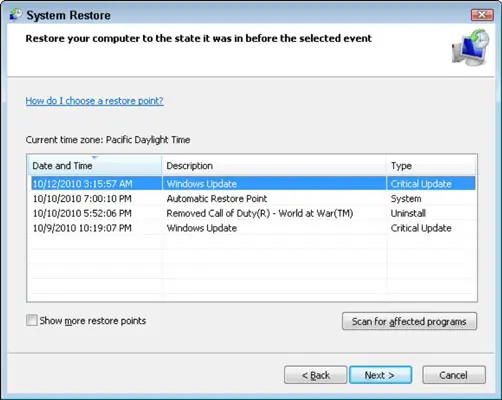
A wizard window will open. Follow the screen prompted instructions and choose the restore point as desired.
After this, restore your computer and start your QuickBooks software.
Install All the Windows Updates Available on Internet
Perform a “Clean Installation“ of windows
Method 3: Perform a clean install of windows
Uninstall and Reinstall the QuickBooks Program Associated with QuickBooks Error code 1722. Reinstalling QuickBooks software can be a fix if the error 1722 is related to a specific program.
Steps for Windows 7 and Windows Vista
Press “Start key“ and go to “Programs and Features“
Go to “Control Panel“
Select “Programs“ option
Select “Programs and Features“
Search and “locate QuickBooks Error 1722“ associated programs and files under the name column
Click on the “QuickBooks-associated entry“
Select the “Uninstall“ on the top menu ribbon
Follow the on-screen instructions to complete the un-installation of your Error 1722 associated program
For Windows XP:
Press “Start key” and go to “Programs and Features“ menu
Go to “Control Panel“ settings
Select “Programs“ option
Click “Add or Remove Programs“
Search and locate “QuickBooks Error 1722“ associated programs and files under the Name column
Click on the QuickBooks-associated entry
Hit the “Remove” button on the right side
Now, follow the on-screen instructions to complete the un-installation of your Error 1722 associated program
Instructions for Windows 8:
Take the cursor to the bottom left of the computer screen to click on the “Start Menu“ image
Right-Click for the Start “Context Menu“
Select “Programs and Features“
Search and locate “QuickBooks Error 1722“ associated programs and files under the “Name column“
Click on the QuickBooks-associated entry
Click on “Uninstall/Change“ on the top menu ribbon
Now, follow the on-screen instructions to complete the un-installation of your “Error 1722“ associated program
Reinstall the program according to the Intuit Inc. Instructions post uninstalling your Error 1722 associated program such as QuickBooks
You need to perform a windows system file checker: “System File Checker” is a highly useful Windows inbuilt tool as it allows you to scan for corruptions in Windows system files (including those related to run-time errors such as Error 1722).
Ways to run System File Checker (Windows XP, Vista, 7, 8, and 10):
Press the “Start” button
Type “Command” in the search box but don’t press “Enter“ key
Press and hold “CTRL and Shift keys“ on your keyboard simultaneously and now hit “ENTER“
You will be receiving a permission dialog box
Click “Yes“
A black box will show up on your screen with a blinking cursor
Type “sfc /scannow“ and press “ENTER“ key
System File Checker will scan for Error 1722 and other system file problems (this process may take a while)
Follow the on-screen commands
Method 5: QuickBooks Repair Tool
If you are aware of the QuickBooks File location, tap on the “Select File” tab
If you are unaware of the QuickBooks File location, tap on the “Search File” tab
Next, click “Scan File”
Click on the “Company” to see the preview of the scanned company details
Tap on the “Repair” button
Click on “Customer”’ button to see customer-related details
A “Save as” dialogue box will show up, select version, path
Click on “Vendor” button to see vendor-related details
After the repairing process is complete, you would receive a message on the screen
Click on “Employees” button to see employees-related details
Next, click on “Start” option to instigate the repairing process
Press “OK” and close the window
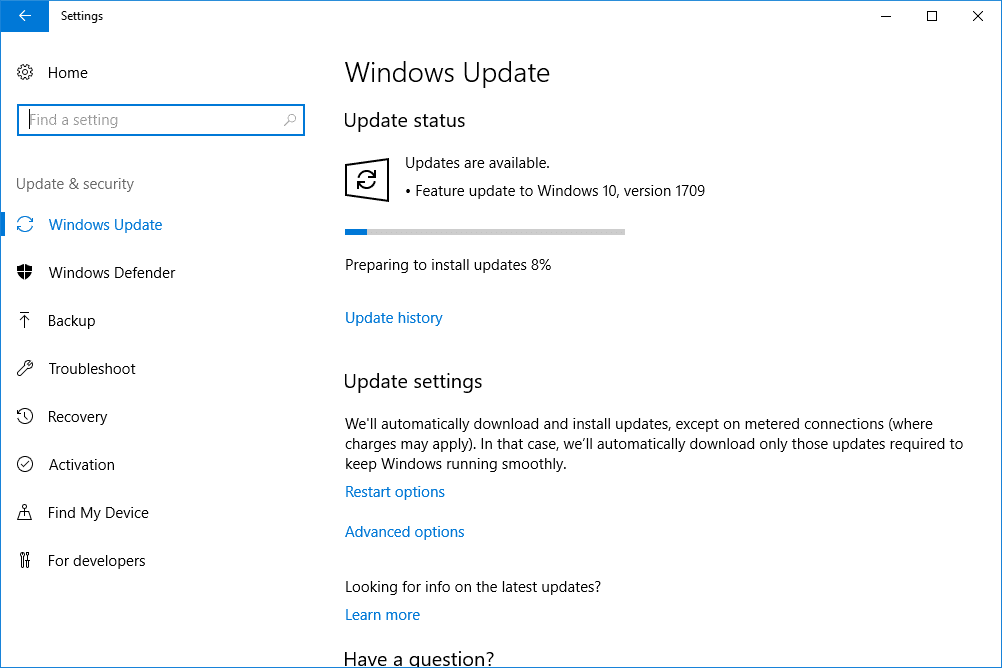
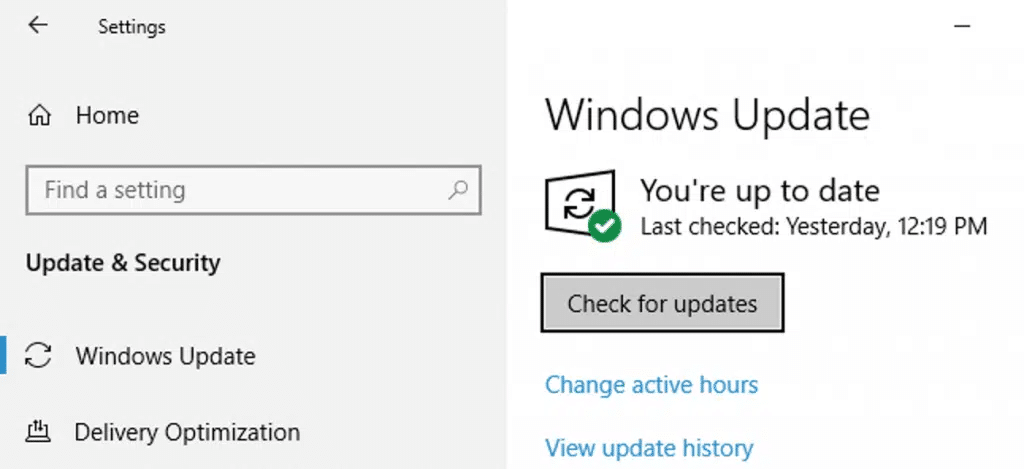
Method 6 : Update Windows
At first the user should click on the start tab
After that click on Settings tab.
Now, go for the Update and security tab.
Click on Windows update section and click on Check for updates.
Look for any updates if available
The updates will start installing automatically if available.
The last step is to reboot the system
Method 7 : Run QuickBooks Install diagnostic tool
At first, download the QuickBooks tool hub.
QuickBooksToolHub.Exe File will be downloaded after which you need to save it where it can be accessed easily
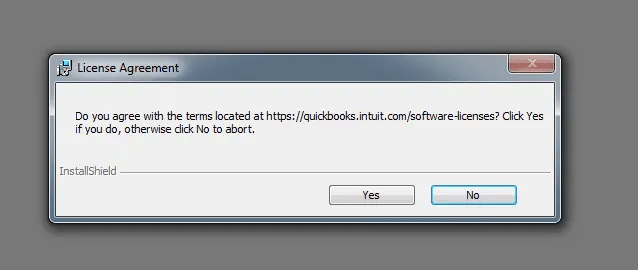
Click on the file to install it
And also click on Yes again for Accepting the license agreement.
Hit on Next and Install tab.
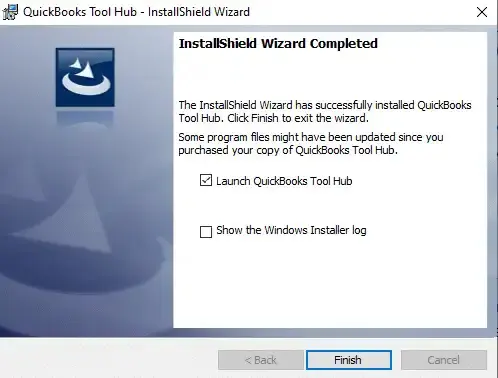
Perform the necessary steps to install tool hub
After that click on the Finish tab after the installation process ends.
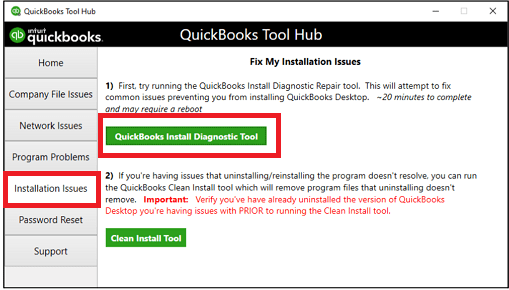
Now, open QuickBooks tool hub program.
And head to the Installation issues tab and click on the Install diagnostic tool.
Run the tool
And wait for to configure
Let the tool evaluate and perform necessary actions
Lastly, reboot the system
Method 8: Restart system in selective startup
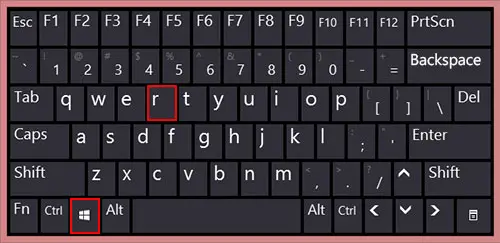
The very first step is to press windows + R keys, which would show the run box on the screen
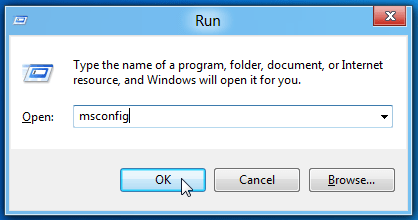
After that type in MSCONFIG into the run box where you will have to click on ok tab
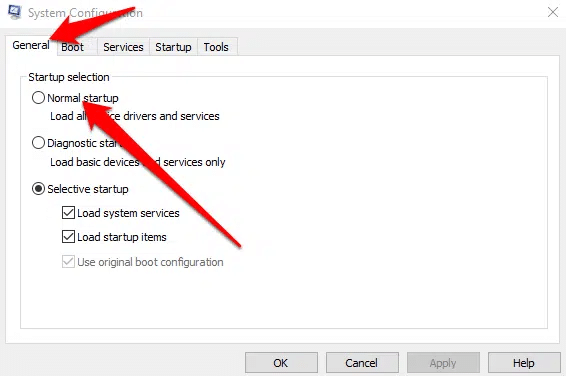
The user is required to chose the selective startup option in the general tab and also ensure that you have unchecked the load startup items options
The user needs to click on ok tab and select the restart tab if asked
Now, end the process by uninstalling and reinstalling QuickBooks
After reinstalling, make sure to get back to the normal mode, using the steps below:
The user needs to press windows + R and open the run window
After that, type MSCONFIG into the run box and click on ok tab
Also, choose the normal startup option and click on apply and ok tab
I hope that the above steps are to be followed for OS Windows XP, Windows 10, Windows 8, Windows 7 and Windows Vista. If the QuickBooks system error 1722 still does not resolves, this means that you need to contact the QuickBooks enterprise support team to get immediate help.
You can connect with our representatives at our customer care helpline: i.e. +1-888-510-9198. We will be pleased to help you out in your concerns.
FAQs
How do I fix error 1722 in QuickBooks?
The steps to fix the error code 1722 in QuickBooks are as follows: Run QuickBooks install diagnostic tool 1. Close QuickBooks 2. Download tool hub 3. Open the file you downloaded 4. Now, perform the onscreen steps
How do I restore a network connection failure in QuickBooks?
The user can try to restore a network connection failure in QuickBooks using the steps below. 1. The first step is to choose the reload button or press F5 to download the entire page 2. If the problem persists, and restart the browser and then log in to QuickBooks online 3.If refreshing the browser doesn’t work, check if the system is running any firewall software. 4. If you are still getting the error message, then make sure to contact QuickBooks online customer support team
What is error code 1722?
QuickBooks error 1722 signals issues with the structuring of the software. It shows that the Microsoft components have reached the stage where they are incomplete with QB software.