Solutions to some of the QuickBooks Enterprise 2017 Frequently Asked Questions
QuickBooks have gained immense popularity all over the world. In fact, it is considered one of the premier accounting software to be used by small and medium businesses today. Not only does it help users with accounting and bookkeeping but also manages their overall finances and even sales. We are discussing several of the frequently asked questions being asked by the users. You can ask more questions associated with QuickBooks Enterprise Solutions or any other software of Intuit i.e. QuickBooks Pro, Premier and Payroll. Our QuickBooks Enterprise Support team will get back to you very soon.
In this article we are discussing the frequently asked questions which are generally asked by the users of QuickBooks. So here are a few of the most common questions asked. Let’s have a look at some of the enterprise related issues with their perfect solutions. You can reach out to us at +1-888-510-9198, and get answers to all your queries from professionals.
Question: My Company File was created in the Enterprise 2015 version and now want to work in QuickBooks Pro 2016. Is it possible to work with the updated version?
Answer: Officially you cannot move data from QuickBooks Enterprise to QuickBooks Pro. However, if you try doing this, you may end up losing your data. So, in this case you would require third party software to import or export data to Enterprise of the Pro version.
Question: How to set reminder for my overdue invoices in QuickBooks?
Answer: Follow the below mentioned steps.
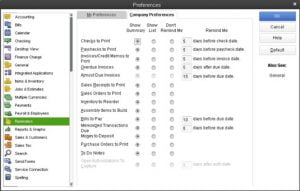
First Choose the ‘Company‘, reminders and then click on the ‘Set Preference tab‘.
Select ‘My Preference‘ tab then click on ‘Show Reminder List‘ when opening the company file in the ‘preference tab‘.
Once you have selected the company on the ‘Preference tab‘ now click on the ‘Show list‘.
With the help of this tab, you can choose the overdue invoices.
A very important thing to note is that you have to ‘Enter the number‘ to be notified of overdue invoices before their end due date.
Question: After I updated QuickBooks Enterprise 2014 to the 2016 version I am facing a lot of errors. Please provide a solution for any QuickBooks Enterprise 2016 errors and freezing.
Answer: There are many reasons for the problems discussed in the question and here are few of its causes.
Disruption of Network Connection with the host of the computer.
Question: I was using QuickBooks Enterprise a while ago. Suddenly my desktop crashed. This occurs few more time. How do I solve this problem?
Answer: This issue generally occurs while attaching a company file and if it happens quite many times then it is a problem. The system crashes when users click attach a file. This is a very common issue with QuickBooks Enterprise version 14.0 on Windows server 2012.
Follow the below mentioned steps to resolve this problem:
First thing to do is go to ‘Start‘ and then to ‘Run‘.
In the cmd (Command Prompt), type in etc. ‘pl.cpl‘ This will display your internet properties window.
Now click on the ‘Advanced tab‘ at the top of the screen.
Try to locate the memory protection to remove the chance of online attack.
Go to the checkbox in the ‘Security section‘ and do ensure it is unchecked.
Locate the enable memory protection to help mitigate online attacks checkbox in the security section and make sure it is unchecked.
Question: How many users can use QuickBooks Enterprise?
Answer: QuickBooks Desktop Enterprise is available in 1-10 user, and up-to-40 user licenses. To add more licenses, you can reach out to our professionals, they will guide you through the process.
Question: Can QuickBooks Enterprise have multiple companies?
Answer: One can have multiple companies under the same QuickBooks online account. Each company file has its own paid subscription. However, you access them with the same sign in info. This further lets the user to easily switch and manage everything.
These are a few more questions being asked by QB users related to QuickBooks Enterprise Solutions.
If you have any other queries, any issues, error codes or any business-related problem with QuickBooks Enterprise Solutions, then you can reach us in our QuickBooks support phone number .i.e. +1-888-510-9198 and our dedicated and well-trained experts will answer all your queries.
QuickBooks error 100060 isn’t something common. It actually is a QuickBooks Point of Sale error that indicates that the system is not able to create the required accounts. This error has a number of reasons behind it for its occurrence and along with this, there are various steps to resolve it as well. In this short article we are going over concerning QuickBooks Point of Sale Error 100060. There are different factors behind this sort of error yet the excellent point is that we could resolve this problem simply by adhering to general actions in QuickBooks Financial software. For Further assistance, you can call our QuickBooks error support helpline i.e., +1-888-510-9198.
What is QuickBooks POS Error 10060 and Why it Occurs?
You receive error 100060 when there are necessary accounts which cannot be created and the error occurs when you try to run a Financial Exchange, the first time for an account. There are two reasons due to which this error can occur:
While you made your first Financial Transaction may be the account was already active in the QuickBooks Pos.
When a user logs into QuickBooks but does not have QuickBooks administrator permissions.
Error 100060: QuickBooks POS Could Not Create Some Necessary Accounts
Fixing QuickBooks Point of Sale Error 100060
To fix QuickBooks Point of Sale Error 100060, follow the below given steps:
Solution 1: To Continue using account numbers in QuickBooks Desktop
Open the QuickBooks Financial software.
Go to ‘Edit‘, select ‘Preferences‘ and then go to ‘Accounting‘.
Go to the ‘Company Preferences‘ and clear the ‘Use account numbers’ checkbox.
You need to click ‘Ok’ tab.
From QuickBooks Point of Sale, perform a ‘Financial Exchange‘.
Go to ‘Edit‘, then preferences and then accounting.
Now, click on ‘Company Preferences‘ and select ‘Use account numbers‘ checkbox to reactivate the account number feature.
Solution 2: Log in as an admin in QuickBooks Desktop
At first, move to the file menu and choose close company/logoff.
Once done with that, log in to the company file as admin.
And further, move to the window menu and choose close all.
The next step is to head to the file menu on QuickBooks desktop point of sale, choose preferences and then company option.
You now have to select accounts under financial. And further ensure all the accounts under the basic and advanced tabs have no brackets.
In case you have any account field with brackets, but are unable to find the appropriate account from the dropdown list, then simply create the account in QuickBooks desktop.
This can be done by heading to the lists menu on QuickBooks desktop and further choose chart of accounts.
From the account drop down, choose next tab.
And also go for the right account type and hit continue.
Enter the required information and choose save and close.
On QuickBooks point of sale, close and re-open the company preferences window. Select Accounts, and check both the basic and advanced tabs. There should be no brackets at this time.
Condition 3: If you find that the accounts still have brackets and you are not able to find the appropriate account, then you can create a new account in QuickBooks:
Go to QuickBooks, click on ‘Lists‘ and choose ‘Chart of Accounts’.
Click on Account in the lower left portion of the screen and then choose ‘New’.
This will open the account types you want to open.
Then, choose an appropriate account type and give it a name. Fill in the required details.
This will help you in resolving the error. After the above steps, go to POS, close and reopen the ‘Company Preferences window‘ and then choose ‘Accounts checking‘ both basic and advanced. Make sure that this time, there are no brackets at this time. For further assistance or help, you can get in touch at our QuickBooks Point of sale support helpline .i.e. +1-888-510-9198. Our experts are available 24*7 and are extremely qualified and experienced to resolve all your queries.
FAQs Related to QuickBooks Point of Sale Error 100060
How do I fix point of sale in QuickBooks?
You can try fixing point of sale in QuickBooks by performing the below repair steps: 1. At first, close QuickBooks point of sale. 2. After that, open windows start menu. 3. You now have to enter control panel in the search bar and hit enter tab. 4. Once done with that, choose your version of QuickBooks desktop point of sale. 5. After that, perform onscreen instructions to repair the program.
How do I set up POS in QuickBooks?
You can create a purchase order in QuickBooks desktop for windows using the steps below: 1. In case you haven’t already, turn on purchase orders. 2. Now, move to the suppliers and choose create purchase orders. 3. After that, in the supplier dropdown, choose the supplier you would like to create a purchase order for. 4. Enter the rest of the fields and add the items you would like to order.
Does QuickBooks generate POS?
QuickBooks point of sale is a retail point of sale system suitable for small business such as clothing and shoe stores, small franchises, sporting goods stores, etc. It further offers inventory and customer management tools, merchandise planning and a tablet-compatible POS.
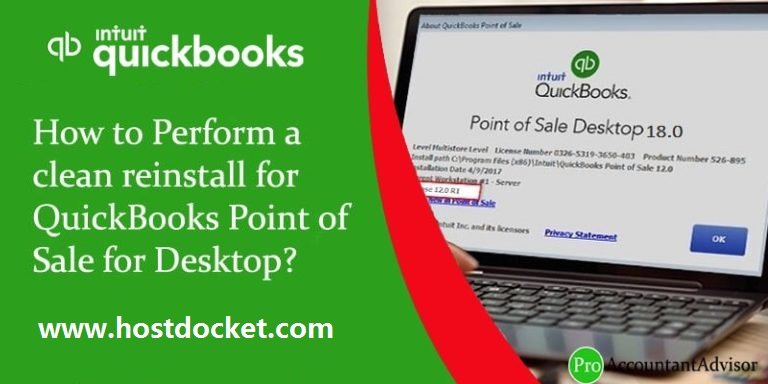
All that you need to know about performing a clean reinstall for QuickBooks point of sale for desktop
QuickBooks accounting software has turned out to be revolutionary accounting software. This accounting software makes it easy for the businesses to carry out their accounting, bookkeeping, and other activities in the smoothest possible way. Today, it is being used by small and medium businesses all over the world as it comes with many perks. Many QuickBooks users look for a step by step guide to perform reinstall for QuickBooks point of sale for desktop.
In this article, we will be discussing how to uninstall and then reinstall for QuickBooks Point of Sale desktop, as well as how to resolve data file and program problems. We have come up with a comprehensive guide to perform a clean reinstall for QuickBooks POS for desktop. Reading this article till the end, can help the QuickBooks users to perform clean install without any hassle. For more details, you can get in touch with our QuickBooks support team via our toll-free number i.e.
In this article, we will be discussing how to uninstall and then reinstall for QuickBooks Point of Sale desktop, as well as how to resolve data file and program problems. We have come up with a comprehensive guide to perform a clean reinstall for QuickBooks POS for desktop. Reading this article till the end, can help the QuickBooks users to perform clean install without any hassle. For more details, you can get in touch with our QuickBooks support team via our toll-free number i.e. +1-888-510-9198.
Also, the user will need to login as ‘Windows Administrator‘ before you proceed for the next steps.
And lastly the user should also make sure that the system the user will be using should or can be restarted.
Steps to Clean Reinstalling for QuickBooks POS desktop
At times it becomes necessary to uninstall, reinstall QuickBooks Point of Sale Desktop. This is done mainly when POS gets damaged for some reason or just require simple reinstalling. The entire process can be named as clean install or a clean reinstallation. Before the user performs this process, it is important to take a backup, in order to avoid any further mess.
In QuickBooks Desktop Point of Sale 10.0:
To begin with, the user needs to save all the files that the user has opened and then exit all the programs.
The next step is to click on the Windows logo, followed by clicking on ‘Control Panel‘.
Moving ahead, the user needs to view ‘drop downs‘ and opt for ‘icons‘.
Jumping to the next step, the user needs to tap on ‘Programs‘
Now, right-click on ‘QuickBooks Desktop Point of Sale‘ and then select ‘uninstall‘.
If the ‘User Account Control’ window is shown on the screen, then the user needs to click on ‘Continue‘ and then proceed with the removal of the program.
Once the uninstallation process is complete, the user needs to visit the ‘Windows Explorer‘ and then rename the folder of ‘QuickBooks Point of Sale V10.0‘.
If the user is unable to see any folder then select ‘Tools‘ and ‘Show Hidden files‘.
In QuickBooks Desktop Point of Sale 9.0
Now in this process, the user needs to save all file you have opened and the ‘Exit‘ them.
After that, the user is supposed to click on the ‘Windows logo‘ button and then hit ‘Control Panel‘
In the ‘View‘ section, the user needs to use the drop down and then opt for small icons.
The next step is to click on ‘Program or program features‘
Now the user right click on the ‘QuickBooks Desktop Point of Sale 9.0‘ and then choose ‘uninstall‘.
In case the user encounters the ‘User Account Control‘ displayed then hit ‘continue‘.
Coming to the next step, the user is required to remove the ‘Windows login’
Steps to Perform a clean uninstall of QuickBooks POS
Want to know the steps for uninstalling QuickBooks Point of Sale for Desktop? If yes, then check out the steps listed below:
First of all, the user needs to press ‘Windows + E‘ keys.
And then, the user is supposed to click on ‘uninstall or change a program‘
The next step is to select the Point of Sale by double clicking and then ‘uninstall‘.
Once done with this, the user needs to follow the instructions to ‘uninstall POS‘.
Rename of Sale Folders
First of all, copy the Point of Sale data folder, and then later on paste it to the desktop.
The next step is to rename the ‘User folder‘ as well as ‘user login‘.
And lastly, reboot the system.
Restore the company file
First thing is to open QuickBooks Point of Sale and then after that create a new company file with your choice of name and then restore the backup created.
Once the file get restored, then verify if the user can close and reopen Point of Sale without any kind of error and also connect with QuickBooks desktop.
The next step is to register QuickBooks Point of Sale again.
After this, the user needs to move to the location where QuickBooks Desktop Point of Sale was save and then click on ‘POS file‘, in order to run the Point of Sale Installation.
The next step is to click on ‘Yes‘ and then overwrite the existing extracted files
Once done with that, the user needs to click on next, and begin the installation.
Also, make sure to read the ‘Software License Agreement‘.
To agree select the ‘I accept the terms in the license agreement‘ and to proceed click on ‘Next‘.
The next step is to enter the ‘license and product numbers‘
After which, the user needs to click on ‘Yes‘.
The final step is to select the number of computers to be used for POS.
QuickBooks Desktop Point of Sale Connectivity Tool
POS Warning 180063: Unable to start the database service
Firewall configuration for QuickBooks Point of Sale
A firewall is basically the one, which is used to prevent the unauthorized access or connectivity network. A firewall in the workstation can block communication between it and QuickBooks POS. When the connectivity is blocked the Desktop POS automatically configures the QuickBooks firewall. In case the firewall is configured manually do check the right sections of the manual that has supplied with firewall program. Click here to know configure firewall for QuickBooks Point of sale.
We hope, the above given write-up will be worthy and helpful for you to understand the clean reinstall for QuickBooks point of sale. If you intend to know more or if you are seeking for ideal support from professionals, feel free to contact QuickBooks accounting solution team anytime. In case you want to talk with Intuit certified ProAdvisors, then you can call at +1-888-510-9198.
For further queries related to your QuickBooks accounting software, call us or chat with our experts at www.hostdocket.com. We will feel more happy to help you to out in this.
FAQs Related to Clean Install QuickBooks POS
How do I clean up company data in QuickBooks point of sale?
From the file menu, you need to choose utilities tab and further go for clean up company data. Once done with that checkmark the compress data box and further hit ok. In the non-history documents window, and choose the list you wish to remove from your file and hit next.
Where is QuickBooks point of sale data stored?
The POS data file on the system is stored in C:\drive in the program data to Intuit folder, the POS data folder usually named by QuickBooks POS XX. QuickBooks POS 10.0 for version 10 and QuickBooks POS 9.0 for version 9.
How do I repair point of sale in QuickBooks?
For this: 1. Close QuickBooks point of sale 2. Open windows start menu 3. Enter control panel into the search bar and hit enter tab 4. After that choose the version of QuickBooks point of sale 5. Perform the onscreen instructions to repair your program.
Does QuickBooks POS track inventory?
With QuickBooks point of sale, you can keep a track of the inventory levels in real time. This feature is essential for businesses selling products that have a limited shelf life.
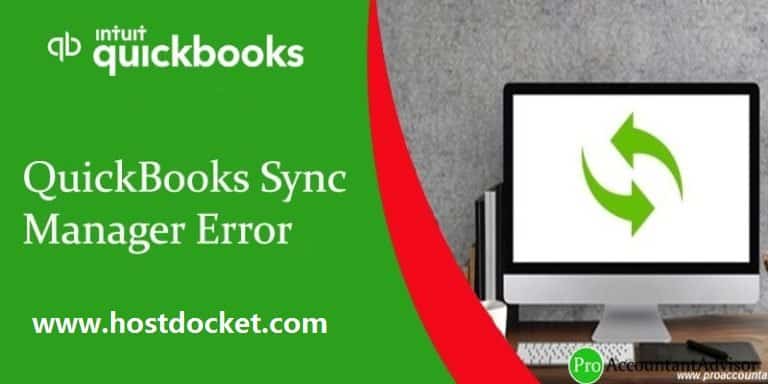
Here are few steps to resolve QuickBooks sync manager error
QuickBooks is financial and accounting software which can be used by small and big businesses and helps them manage their data. The software helps companies manage their data properly and keep their data in an organized way. There are times when you face QuickBooks Sync Manager error.
You can go with this infographic or read out the full description given below:
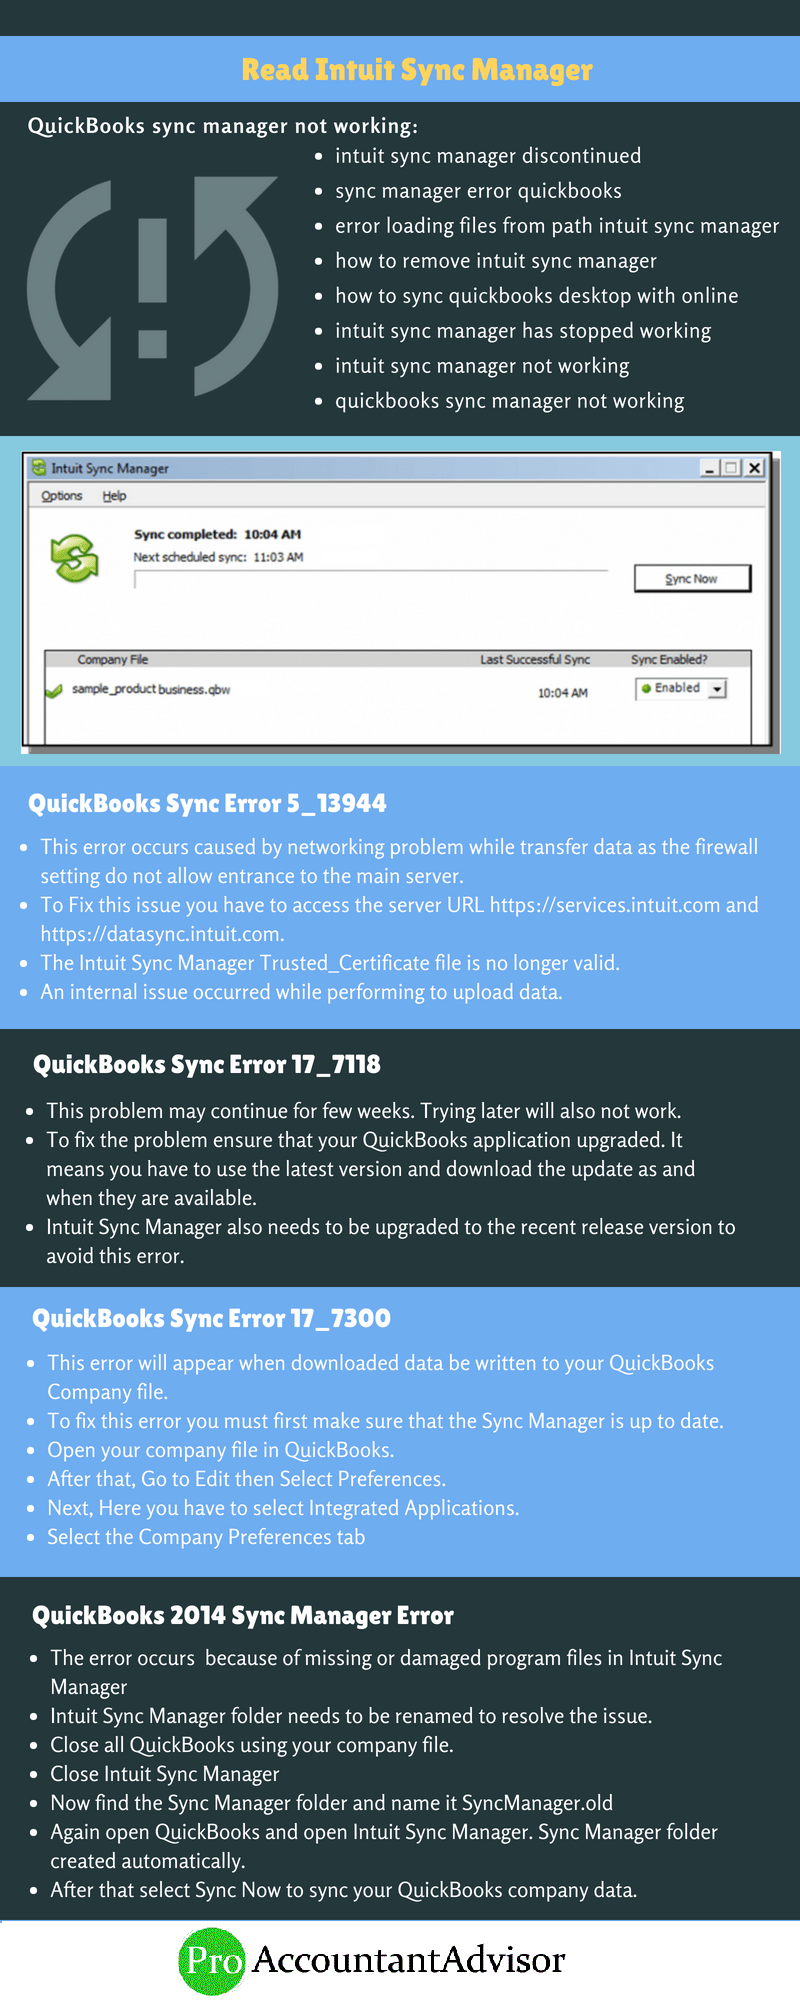
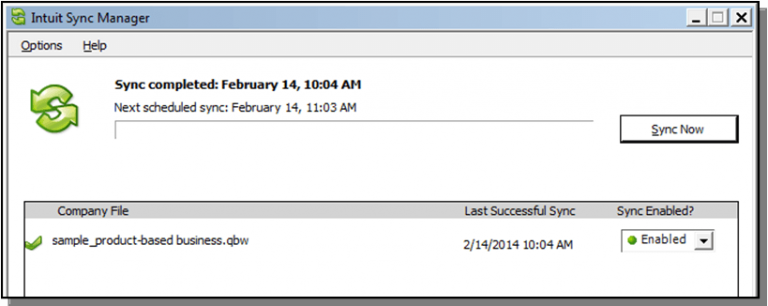
QuickBooks Sync Manager is basically a program which runs along the desktop application and helps you exchange data between the desktop and the version that has been stored in the cloud server. Thus, it is now clear that whenever you make changes to your desktop database or the server, the changes will be automatically updated with another version, and you will have to permit for the same.
In this blog context, we are going to review on QuickBooks Sync Manager and It’s Errors. Know how does it functions as well as why it is not working while accessing your company file? Also, we will discuss the instructions, so you can settle these types of errors on your own without obtaining any type of issues.
When QuickBooks Sync Manager not working problem occurs?
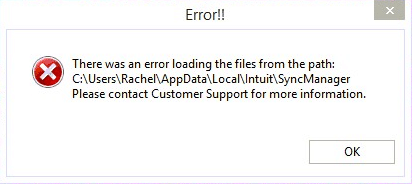
When QuickBooks Sync Manager error occurs, it hampers the opening of the QB software. The main reason behind this error is the damaged program files or the missing program files, and this is considered as one of the most critical issues. You can contact our QuickBooks helpline number at +1-888-510-9198 for quick resolution of QuickBooks Sync Manager Errors. You may get one of the following error messages in your desktop screen when there is any sync manager error running on your QuickBooks.
There are a bunch of factors that trigger the sync manager errors in QuickBooks:
One of the basic triggers can be lost program files
Another possible trigger for the same is corrupted program files
You can also experience these errors in case there are any sort of networking issues experienced at the time of data transfer
Another possible trigger can be firewall settings not allowing access to the main server
One can also experience a similar issue if the QuickBooks error code 3003 is experienced.
Common Sync Manager errors and their solutions
Sync manager errors prohibit the software from working and at times end up due to damaged or missing program files. Thus, it becomes crucial to eliminate these errors as soon as possible. Let us check out a few commonly experienced QuickBooks sync manager errors.
QuickBooks Sync Error 5_ 13944:
This error occurs while one is uploading the data:
Network problems cause this error while you transfer the data. It happens because the firewall setting does not allow entry to the main server.
This error may continue for weeks and to fix this error, you need to be sure that the QuickBooks application is upgraded. For this, use the latest version of QuickBooks or download the update.
Also upgrade the ‘Intuit Sync Manager‘ to the latest version.
64-bit version C:\Program Files (x86)\Intuit\QuickBooks (year)
There are chances that you will not be allowed to rename the file, in that case you can follow the below steps:
Right-click on ‘Windows Taskbar‘ and click on ‘Task Manager‘.
Choose the ‘Processes Tab‘.
Choose the ‘column heading‘ with ‘Image Name‘ and select the ‘alphabetical order‘ in which the process will take place.
Under the image name column, you will find the following files and you have to select the same: ‘QBDBMgrN.exe, QBDBMgr.exe, QBCFMonitorService.exe, Qbw32.exe‘
Click on ‘End Process‘.
You will get a message “WARNING: Terminating a process can cause undesired results including loss of data and system inability.” Select ‘Yes‘.
This error occurs when a program file has been damaged or missed in ‘Intuit Sync Manager‘.
To resolve the issue, you need to rename the ‘Intuit Sync Manager folder‘.
Close ‘Intuit Sync Manager‘ and name it ‘SyncManager.old‘
Open QuickBooks and ‘Open Intuit Sync Manager‘. Then, a Sync Manager folder will be automatically created.
Select ‘Sync‘ which will all your company data.
Fix QuickBooks Sync Manager Error in Windows 10
It should be noted that if you upgrade from any previous version of Windows to Windows 10, then it is possible that you might end up with Sync manager errors. This can be due to compatibility issues, damaged or corrupted sync manager component. The steps involved here are as follows:
The very first step is to close the QuickBooks software and also the QB company files.
You are then required to make use of the task manager.
Ensure that QuickBooks accounting software is updated to the latest release. Furthermore, open QuickBooks.
Once done with that, close the sync manager and head to the system tray and right click on the sync manager.
Choose the exit option
Followed by, finding the sync manager folder on the system’s local disk C\Users\Username\AppData\Local\Intuit.
Here, you can find the folder and then add old in the name of sync manager folder name.
Reboot the system and start QuickBooks again.
Lastly, again try to sync the information and check if the issue gets resolved or not.
Reset and Configure Intuit Sync Manager
One can also try to reset the entire sync manager and reboot from scratch again. The steps involved in this procedure are as follows:
The very first step is to open the QuickBooks desktop software
Furthermore, open the help menu and choose the manage data sync option
Once done with that, reset the intuit sync manager and also click on the reset data sync option when asked.
Towards the end, you need to sign into the sync manager with correct credentials.
This way, you can resolve the sync manager error and in case, in any of the steps you face problem, you can get in touch with us and resolve the issue quickly. You can contact us on our QuickBooks error support phone number i.e. +1-888-510-9198. Our experts are always ready to help QuickBooks users so feel free to call us to get instant and quality service.
Frequently Asked Questions!
How do I uninstall sync manager?
You can try to remove the intuit sync manager using the steps below: 1. The very first step is to click on edit from the menu bar. 2. After that, select preference from the drop-down menu. 3. Once done with that, choose integrated applications. 4. Followed by, choose the company preferences tab. 5. The user needs to then click on intuit sync manager and choose remove tab.
Why did Intuit discontinue Sync Manager?
The Intuit sync manager was not using the latest technology. Intuit continues to increase the number of applications for customers, and it wants to make sure it provides the latest technology to its users. Therefore, it decided to discontinue the service for a better customer experience.
Why is QuickBooks not syncing between computers?
It is important for the user to check if both the systems are connected to the same network. Another option available for you is to uninstall and reinstall QuickBooks on both system and then make use of QuickBooks on both systems with the right options.
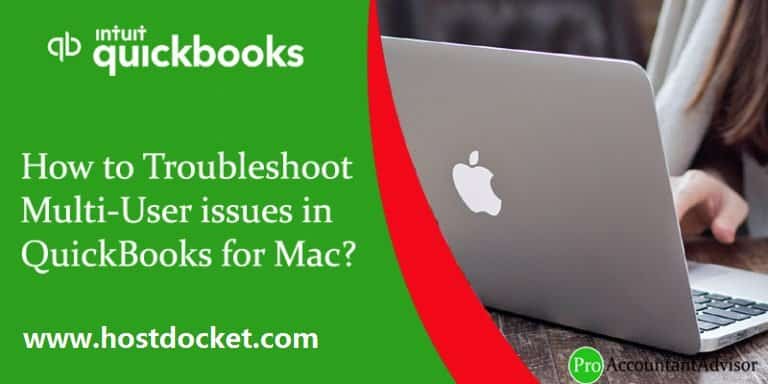
Get to know all about troubleshoot multi-user issues on Mac
Switching to multi-user mode in QuickBooks is by far one of the finest features available that lets multiple users work on the same company file together. This feature is also available for QuickBooks for Mac. Note that you might require extra licenses for every user to access multi user mode in QuickBooks. Once you have purchased the licenses, you can simply install QuickBooks and register the users Mac computers. Each user will require an account with correct user and password preferences in QuickBooks desktop for Mac. However, due to certain reasons, one might land up into multi user issues in QuickBooks for Mac, especially when the user tries to share a company file.
Even though this error is pretty common, you might get a bit confused with the fixation procedure. Therefore, to help you out troubleshoot multi-user issues in QuickBooks for Mac, here we are with this piece of writing, sharing the complete information related to multi user mode and its error fixes. Thus, stick around to this piece of writing till the end. Or you can connect with our technical support team at +1-888-510-9198, and they will help you to deal with such errors smoothly.
Important Points before fixing multi user issue in QuickBooks Mac
Before you proceed with the steps to rectify the error permanently, it is important to keep in mind these points.
Did the computer running QuickBooks server go on sleep mode?
In order to keep your computer from going into sleep mode, make sure to change your preferences. You can do that by performing the steps below:
Go for system preferences and further choose energy saver.
Further, choose your energy preferences and close the window.
Did any of the network settings on your computer or QuickBooks server computer change?
It is essential to ensure that the QuickBooks server is sharing the company file and avoid changing the network settings. To check the settings, you can do the following:
Choose system preferences tab and network tab respectively.
In case your settings are correct, close the window.
Or if you need to make updates, then make your changes and choose the apply tab.
Is your computer using Wi-Fi?
Note that your connection to the server might drop due to a weak signal. Move to an area with a strong Wi-Fi signal or use an ethernet connection.
Troubleshoot multi-user issues in QuickBooks for Mac
Now that you know what factors are to consider when performing the troubleshooting steps, it is time to implement the fixation procedure and successfully fix the error. Let us explore each of the methods to fix multi user mode not working in QuickBooks for mac.
Solution 1: Verify if QuickBooks server is running and if the company file is shared
Begin by clicking Go from “Application“.
After that, Double click on the “QuickBooks Server.app” Icon.
Share the file needed:
In case the file you have selected is listed under Not Shared, then select the File” and click on “Start” Sharing button.
In case the file is not listed then click on the “+” button in the left corner and “Add the file“.
Note: It is also important for the host Computer to grant permission and run the QuickBooks server App. The company file that needs to be shared also needs to be saved on the same computer that has the QuickBooks Server App installed.
Solution 2: Check Mac OS Firewall Settings
First of all, Click on “System Preferences” from the Desktop Apple Menu
Choose the icon for “Security and Privacy“
After that Click on “Firewall” Option
Click on “Firewall Options” and then click on “Activate” it.
Ensure “QuickBooks Server App” is set to allow coming Connections.
Solution 3: Ensure that the file sharing permissions are set correctly on the host Computer
Firstly, Click on “System Preferences” from the “Desktop Apple” Menu
Click on the “Sharing” icon
Next, Tick on the “File Sharing” Checkbox
Add folder with the file to be shared in the Shared Folder.
Select the “+” button in the “Shared Folder” Column
Select the folder containing the “Company File” and click on “Add”
In the Users column specify to “Grant permission” to Read & Write for Everyone or for the specific users using QuickBooks.
Solution 4: Make sure Bonjour Service is working properly on all Computers
First of all, Select “File” from “New Finder Window“
Make sure the other connected computers using QuickBooks are visible in the Shared Section.
In case the other connected computers are not visible then QuickBooks will not be able to share files with the other computers. For proper working Bonjour needs the following ports to be opened “56565 TCP, 5297 TCP, 5298 TCP/UDP, and 5353 UDP.“
At times your hardware can block communication between QuickBooks and server. Thus, you can try out the below steps:
If QuickBooks and the Server App both are installed in the Host Computer then unplug the ethernet and reboot the computer.
After rebooting Open QuickBooks and try enabling the Multi-User mode.
In case it gets enabled it means the problem is because of network hardware which can at times block communications between QuickBooks and QB Server.
Solution 6: Enable Peer-to-peer direct Connection
Making use of peer-to-peer connection lets you connect two computers together using an ethernet cable. You can try performing the below steps to complete this procedure:
Log out from both computers and connect them with a single Ethernet cable.
Starting both the computers, use the “Bonjour service” to enable the computers to see each other. Make sure the two computers can see each other in the “Shared Section” of the new Finder window.
Choose one computer as a Host” and open the file and enable “Multi-User Mode“.
Open QuickBooks in the second computer from the “Shared Section” and open the “File“.
I hope you find this article helpful. If these quick steps do not work for you to troubleshoot multi-user issues of QuickBooks, then you can seek assistance from our QuickBooks help and support team.
Our team possesses the right experience and knowledge to handle and fix all types of QuickBooks related issues in a very short time period. We are reachable at our toll-free number +1-888-510-9198.
FAQs related to multi user mode for QuickBooks Mac
Ques. QuickBooks Desktop Mac 2020 unable to open company file in multiuser mode?
To fix this issue, perform the steps below: 1. Restart the database server manager 2. Move the file to a different folder 3. Set the power saving option to never
Is QuickBooks server running when the system goes in sleep mode?
You can check this by changing the system preferences. Select the application from energy saver and consider setting the system sleep to never.
How do I fix QuickBooks multi-user mode?
To solve QuickBooks multi-user mode not working error, try performing the steps below: 1. Make use of QuickBooks database server manager 2. Check host mode on each of the user computers. 3. Check if QuickBooks services are running. 4. Ensure that QuickBooks can send data. 5. Create a new company file folder
Why won’t QuickBooks run in multi-user mode?
Multi user mode error in QuickBooks for Mac occurs if QuickBooks is not installed on the server. Also, when the hosting settings have configuration issues.