As we all know that PayPal is a popular payment gateway application for millions of users around the globe use it almost every day. It is the best way to send or receive money nationally & even globally from clients, merchants, customers, and family members. But PayPal is important for the merchants who operate business or businesses overseas. It has been observed that PayPal have more than 100+ millions of active & registered user accounts. Moreover, it allows the users to send or receive payments in more than 200 currencies in 200 marketplaces worldwide.Lets Talk about paypal integration with QuickBooks how can we do it.
QuickBooks is a package of accounting services in the form of software & endows numerous other online solutions. This software can establish connectivity to integrate with tones of web-based applications. To know more insight about the PayPal integration with the QuickBooks, you can contact the QuickBooks Integration support team. In this article, we are going to discuss the PayPal integration with QuickBooks. PayPal has privileged users with easy, quick, and flexible payments mode.
How to Sync & Integrate PayPal with the QuickBooks Online?
There are many benefits of PayPal like pay with flexibility and it’s quick and easy. Simply follow the step-by-step procedure to sync & integrate the PayPal with QuickBooks:
First of all, Open the ‘QuickBooks Online‘ application.
Sign in the QuickBooks Online account.
Go to the “Apps” tab
Click on the “Apps” tab
Enter & search PayPal in the search bar.
Select the “PayPal” app
Choose the “Get App Now” button
Choose the ‘QuickBooks Online company‘
Click on the “Allow/Authorize” tab to connect the app with the QuickBooks
After doing above step and Once setup done, QB Sync with PayPal every 15 minute and also update new transaction from PayPal to QuickBooks Online. One more advantage, You will get everyday summery detail of integration.
Keep in mind: Not connect multiple PayPal account to your QuickBooks Online If connect, you will certainly not able to get information of sales transaction.
Procedure to Import the PayPal Transactions to QuickBooks Online
There are 3 simple & easy ways to import the PayPal transaction to QuickBooks:
With IFF or CSV file, the user can import the accounting product transactions to the QuickBooks.
Use the new PayPal API with drag & drop option. With the help of this new PayPal API, you can simply drag the information to QuickBooks from PayPal.
Use the PayPal Bank Feed machine to import transactions to QuickBooks swiftly.
Mapping and Settings
In the program settings, you will be required to edit or see the loan from PayPal to ensure it can be mapped to the correct account of QuickBooks Online. Smart mapping technology is chosen by default for categories so they can choose how to create PayPal account mapping using the QuickBooks Online. Advanced QB users can alter those settings with no difficulty in the entire setup.
Review your transactions after importing
You’ll have the ability to assess your transactions as soon as they import by subsequent tabs at QuickBooks Online.
Sales Transaction
Transactions > Sales
Expenses
Transactions > Expenses
Bank Transfers
Transactions > Chart of Accounts > Select your preferred bank account
Once the installation process is done, QuickBooks Sync with PayPal in every 15 minute and update the new transaction from PayPal into QuickBooks Online. Also you will also receive a daily summary detail of integration process.
We regularly post how to’s articles on all the versions of QuickBooks such as Pro, Premier, and Enterprise. If any QB users have problems related to QuickBooks Integration, they can contact the Intuit certified QuickBooks ProAdvisors at +1-888-510-9198. We assure the best QuickBooks solutions whether it’s related to QuickBooks error codes, QuickBooks installation issues, or anything.
What is the process for integrating PayPal with QuickBooks?
To integrate PayPal with QuickBooks, you’ll need to connect your PayPal account to QuickBooks and then import your PayPal transactions into QuickBooks. This will allow you to see all of your PayPal sales and fees in QuickBooks, and to match and categorize them with your other financial data.
I’m having trouble integrating PayPal with QuickBooks, who can I call for help?
If you’re having trouble integrating PayPal with QuickBooks, you can call our toll-free number for assistance: +1-888-510-9198. Our support team will be happy to help you troubleshoot any issues and get your integration up and running.
Can I still use QuickBooks if I don’t have a PayPal account?
Yes, you can still use QuickBooks even if you don’t have a PayPal account. QuickBooks is a standalone accounting software that can be used to manage your finances, create invoices, and track expenses. However, if you do use PayPal to process payments, integrating it with QuickBooks can help you keep your financial data organized and up-to-date.
Can I import my PayPal transactions into QuickBooks in real-time?
No, currently PayPal transactions are not imported into QuickBooks in real-time. However, you can set up automatic imports of your PayPal transactions into QuickBooks on a daily, weekly, or monthly basis. This will help you stay on top of your finances and avoid manual data entry.
What information do I need to get started with the PayPal integration for QuickBooks?
To get started with the PayPal integration for QuickBooks, you’ll need the following information: your PayPal login credentials, the email address associated with your PayPal account, and your QuickBooks account information. You’ll also need to have administrative access to your QuickBooks account in order to set up the integration. If you need help, you can always call our toll-free number for assistance: +1-888-510-9198.
Simple Steps to Setup Microsoft Outlook Email Integration in QuickBooks
One of the most advantageous features of QuickBooks software is that – a QB user can integrate a wide array of applications in QuickBooks such as PayPal, Microsoft Office, etc. QuickBooks accounting software is highly compatible with such an application. Hence, a QB user can operate the desired application in the QuickBooks altogether.
Possibly, you would like to use the Microsoft Outlook Email along with QuickBooks. To do so, a QB user recommended using the QB Contact Sync application that is available in the QuickBooks Online.
The QB users suppose to download & install the application first. Once the download & installation completed, the user is allowed to adjust the contact list quickly and swiftly. QuickBooks Desktop features some of the web-based services that include – Electronic Payments, Remote Access Ability, Online Banking, etc. Businessmen & corporate sectors widely use the Microsoft Outlooks as an email exchange Server globally.
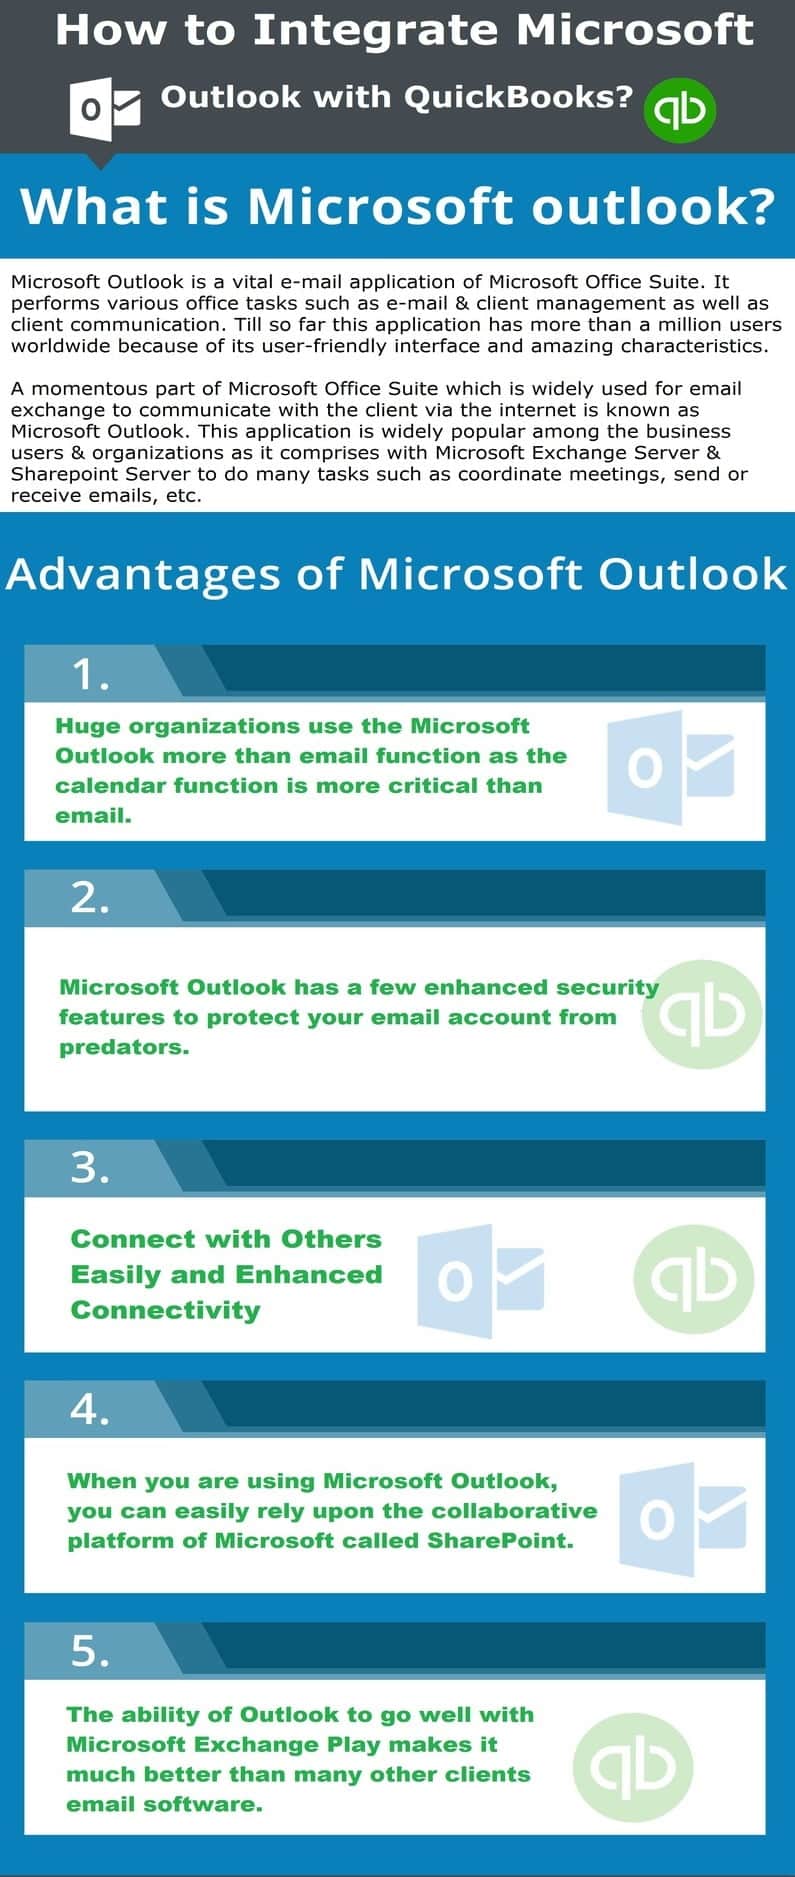
A momentous part of Microsoft Office Suite which is widely used for email exchange to communicate with the client via the internet is known as Microsoft Outlook. This application is widely popular among the business users & organizations as it comprises with Microsoft Exchange Server & SharePoint Server to do many tasks such as coordinate meetings, send or receive emails, etc.
Microsoft Outlook Functions:
Email confirmation
Coordinate & Communicate
Co-operation
Co-ordination and constitution
Significance of Microsoft Outlook Integration in QuickBooks
Microsoft Outlook is a vital e-mail application of Microsoft Office Suite. It performs various office tasks such as e-mail & client management as well as client communication. Till so far this application has more than a million users worldwide because of its user-friendly interface and amazing characteristics.
Check out the list of characteristics which makes Microsoft Outlook different from other email client applications.
Work Offline
Ribbons & Navigation Bar
Inter-Communication
Inbox Clean Up Tool
Customized Calendar
Support Microsoft Exchange Server
Altered Contacts
Tracking Feature
Social Connectivity
Faster Email Processing
Manage Rules and Alerts
Free Import & Export Facility
Shortcut Keys
Email Attachment Reminder
To know more insight about the Microsoft Outlook Integration in QuickBooks, contact the QuickBooks Integration Support. Our Intuit Certified ProAdvisors are highly knowledgeable and has decades of experience in accounting field.
Pros:
Huge organizations use the Microsoft Outlook more than email function as the calendar function is more critical than email.
Cons:
The task management job is quite basic but still cumbersome to use.
No special support for the vacation in calendar feature.
No customization in the dashboard so that the user can fuse the elements such as email, calendar or task to bring the desired outcome.
Booking meetings with the client on the calendar is not possible. There is no support to book a meeting on the calendar.
Tips to Integrate Outlook Email Integration in QuickBooks
There are too many users who are encountering problem in QuickBooks Outlook 2016 and 2015, if you are also facing the same issue, follow listed below action as well as integrate your Outlook with QuickBooks very easily.
Download and Install QuickBooks Desktop Contact Sync for Outlook from official website
Here’s how
Type the correct email address for QuickBooks registration
Choose the “Continue” tab to Download
Save the “QuickBooksContactSync.exe” file in the computer
Perform double – click on the “QuickBooksContactSync.exe” file
Hit the “Next” tab to start the installation
Once the download is completed, choose the desired company file you want to sync with Outlook
Choose “Accept” in the agreement form
Next, Click on to the “Next” tab
Hit the “Get Started” tab, once the sync is complete.
Hit the “Finish” tab
QuickBooks Integration with Microsoft Outlook For Mac
The QuickBooks integration with Outlook for Mac is quite simple. Follow the steps below to integrate the Outlook with QuickBooks:
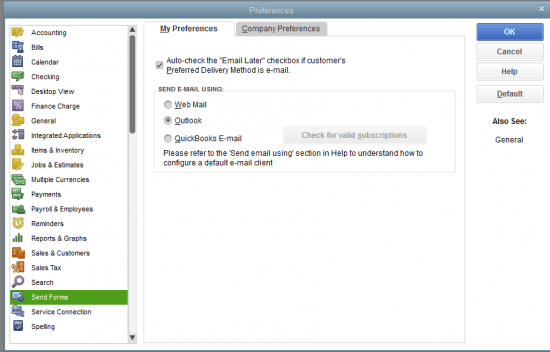
Navigate to Edit => Preferences => Send Forms
A webmail, email, or outlook option will appear. However, if the option does not appear then follow the below steps
Go to the C:\Windows\win.ini
Select & open the C:\Windows\win.ini Add the line at the bottom of the file i.e.
[MAIL], MAPI=1, MAPIX=1
Open the Registry Editor & key. [HKEY_LOCAL_MACHINE\SOFTWARE\Microsoft\WindowsNT\CurrentVersion\MAIL] String Value: “MAPIX”=”1]
Frequently Asked Questions Related to Outlook Email Integration in QuickBooks
Query- What is the procedure to import excel into QuickBooks?
Ans: Excel can be imported into QuickBooks by following simple steps enlisted below:
The first step is to visit the file menu, after that select Utilities
After that, choose the import option, followed by selecting the excel files option
In case the user gets the Add/Edit Multiple List Entries Window, then he/she is required to click on No
Lastly, follow the wizard in importing the files:
First, select the type of data.
Then, the QuickBooks software will open a formatted excel spreadsheet. Once the user has entered the necessary information, he/she is required to save and close the file.
Also, the user will be given the option to Add My Data Now.
Now, review the results and then view the data in the QuickBooks.
Once done with the procedure, the user is required to click on Close.
Query- How can I send invoice from QuickBooks to Outlook?
Ans: Well,
sending invoice from QuickBooks to Outlook is not as difficult as it seems to
be to many of the QuickBooks users. All they need to do is follow some simple
steps:
First of all, mark the invoice as “Email Later”.
Now, click on “Save & Close” or “Save
& New”.
After that, visit the “File”.
Select the “Send
Forms” option.
Lastly, select the invoice, send the mail and
you are good to go.
A quick solution can be getting in touch with our consulting team.
Query- Is there any difference between sales order and invoice in QuickBooks?
Ans: Majority of the times, QuickBooks users think sales order and invoices can be used interchangeably, but in actual they differ from each other. Sales order generally originates with the customer, at the time when they are making a purchase. Whereas, an invoice acts as a bill that is provided to the customer, when the product is delivered or a task is completed. They both widely differ from each other, but both serve as accounting documents post-completion.
Query- Why the error occurs in QuickBooks while sending emails to Outlook?
Ans: Sending mails directly from QuickBooks to Outlook is one of the most convenient features, also it saves time and efforts. But at times, QuickBooks is unable to send the emails to Outlook and this error might occur due to various reasons:
Maybe the user might have set up incorrect email.
Or the user might have updated the QuickBooks .
The file that the user is sending is damaged MAP132.dll file.
Also, it can happen in case the QuickBooks is running as administrator.
Damaged outlook may also be a reason for such error.
Also, in case if the Outlook is open in the background while sending the email.
Conclusion!
It might be possible that you would experience in following the steps accurately or might be missing any step while integrating QuickBooks with Outlook. In that instance, you can simply dial our QuickBooks online support number .i.e. +1-888-510-9198.
It is quite evident that QuickBooks Enterprise is one of the most in-demand & efficient business accounting software. The QB Enterprise comprises of innumerable spectacular and versatile features & functionality. One of its features is Advanced inventory.
With the help of this article, our major concern is to assist and inform the Enterprise users on the topic – “How to turn on the QuickBooks advanced inventory”? It might be possible that the user needs an instant help at that time, for that the user can contact the certified QuickBooks experts at our QuickBooks enterprise support number .I.E. +1-888-510-9198.
QuickBooks Advanced Inventory feature helps the user to maintain as well as track the stock and virtually moving the products from one facility to another including its physical movement. Many QuickBooks users are unaware of this amazing tool. Thus, today we are going to discuss this advanced inventory management system and process to turn on this feature. This advanced inventory management feature enable the users to handle the business swiftly right in QuickBooks.
No other inventory management system, software, or data integration can replace the QB Advanced Inventory. It can manage the wide array & size of inventories simply.
Enables user to track each and every item from a specific location in the warehouse.
Barcode scan facility to grab the data, information, or detail of the specific item quickly & easily.
Manage the specific item or consignment by serial number or lot number.
A feature to transport or transfer the specific items or consignments to/between the inventories.
Significance of the QuickBooks Advanced Inventory
QuickBooks Enterprise Advanced Inventory feature plays a vital role as integration with the same user interface. While using the Advanced Inventory feature, you don’t require any other inventory management system or separate software to perform all these tasks. You can buy or take a subscription of it for your enterprise version of QuickBooks.
Checkout the features below that can save plenty of time of the QB user.
Extract the item/items data via Barcode scanning
There is a flexibility to Track and trace the Lot Number or Serial Number
Track the inventory placed at multiple locations
You can Track & trace the inventory data
Track & trace the Bin Location
Serial or lot numbers
Multiple location inventory
Fifo costing
Work right inside QuickBooks enterprise
Transfer inventory from one location to another location
How to turn on advanced inventory in QuickBooks enterprise?
Follow the steps in ascending order to turn on the advanced inventory in QB Enterprise:
First of all, Go to the “Edit” menu
Choose the “Preferences”
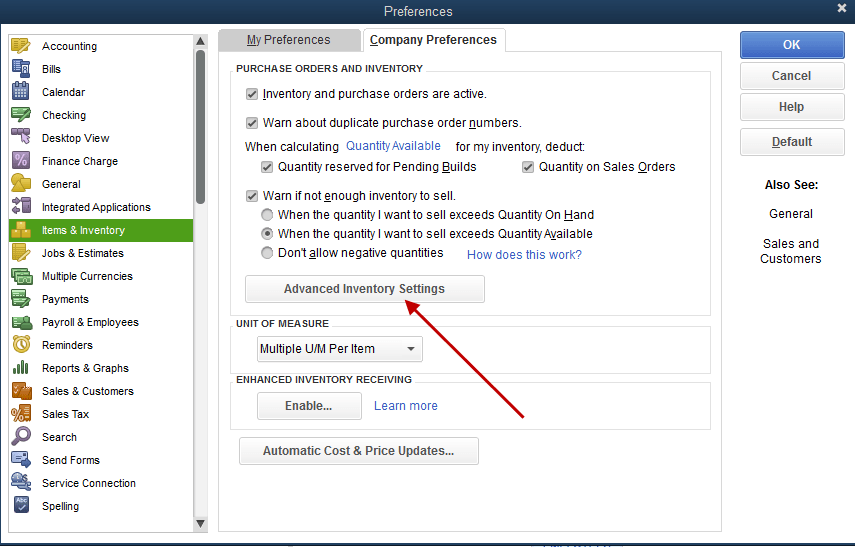
From the left side, select the “Items & Inventory”
Navigate to the “Company Preference”
See the “Inventory and Purchase Orders” are an Active pop-up
Choose the “Advanced Inventory Setting” option. If the advanced inventory option appears as gray, it means that the user has purchased the feature & need to sync the user license data so that it enables the QuickBooks to reorganize it.
In QuickBooks, go to “Help => Manage my License => Sync License Data Online“
Verify that the “Advanced Inventory Settings” is not gray anymore
Important Note: If the syncing fails, the QB user has to follow the below troubleshooting steps. Only for the users who are using the Windows Operating System are recommended to apply the steps, it is not for users with Intuit products. However, If an error occurs while repairing or uninstalling the .Net Framework, the steps might become more complex.
If you find any difficulty in performing the steps, the QB user can contact the QuickBooks Enterprise support team. Our certified QuickBooks experts will resolve the issue instantly. At first, just follow the below steps to resolve it by your own self.
If still you have further queries on your mind related to advanced inventory and how to turn on it on QuickBooks enterprise then you need to get in touch with our QuickBooks customer support team. Our support team is available 24/7 to resolve your all problems related to the QuickBooks Enterprise such as Enterprise error codes, Installation issues, or update errors.
Just dial the toll-free number +1-888-510-9198 for professional assistance. We will be pleased to help you.
FAQs Related to Advanced Inventory in QuickBooks Enterprise
Is Advanced inventory included in QuickBooks Enterprise?
Note that only QuickBooks enterprise platinum and diamond allow for advanced inventory management.
How do I turn on advanced pricing in QuickBooks Enterprise?
You can turn on advanced pricing in QuickBooks enterprise using the steps below: 1. Choose edit tab and go for preferences. 2. The next step is to choose sales and customers. 3. Once done with that select company preferences. 4. And then, in custom pricing, choose enable advanced pricing. 5. Tell QuickBooks how to handle price rounding. 6. Hit ok tab.
How does inventory work in QuickBooks Enterprise?
QuickBooks makes use of weighted average cost to determine the value of the inventory and the amount debited to COGS when you sell inventory. Moreover, the average cost is the addition of all the items in inventory divided by the number of items.
Simple Steps to Fix the Common QuickBooks Point of Sale Errors
QuickBooks isn’t called the leading accounting and bookkeeping software for no reason. The robust software has been assisting millions of business owners across the globe manage and run their business with ease. Connecting your bank account with QuickBooks allows you to manage your bank transactions automatically. This credit card processing is made incredibly simple by adding Payments to your QuickBooks Point of Sale (POS).
Point of Sale is included in QuickBooks and encrypted for the safety of your customer’s data. But sometimes you may face some POS errors and issues with your running devices. This blog is focused on discussing some of the most frequent QuickBooks POS errors and their solutions. To learn further about common point of sale errors, make sure to read this post till the end, or you can further reach out to our technical support team at +1-888-510-9198, and we will provide you with immediate support and assistance.
The Issue with Server Connecting QuickBooks POS Workstation to Data File – QuickBooks point of sale errors
In most cases, the problems in server connection can be fixed by simply rebooting your system. However, if the issue persists after rebooting the system, you can perform the following troubleshooting steps:
Firstly, Switch off the workstation on which QuickBooks Point of Sale is installed.
Reboot the server.
Wait until the completion of reboot process.
Now, reboot your computer.
Start QuickBooks Point of Sale on your computer.
The computer should automatically connect to the QuickBooks POS database file on the server.
Often, this error takes place when you upgrade QuickBooks Point of Sale Errors to a later version or when you try to add additional users or a client license to an existing POS network or in case you enter an incorrect product key.
Here are some simple methods to verify the product code:
Click on ‘Help‘ > ‘About Point of Sale‘
Search for the ‘Product Number‘.
In case the ‘Product number‘ is correct, check if you are logged into ‘Windows‘ as the administrator or a user.
If you have eliminated administrator rights, it means that the files in the ‘POS Client Entitlement folder‘ may be damage.
To repair these damaged files, do the following steps:
Firstly, Click on the ‘Windows key‘ and then ‘Start‘ button and then ‘Control Panel‘.
Select ‘Folder Options‘ and click the ‘View tab‘ and then ‘Show hidden files, folders, or drives‘.
Click ‘OK‘.
Click the ‘Local Disk C : > go to Programdata > click Intuit > open Entitlement Client > v8 [Windows 7 and Vista]‘.
Or
Go to ‘Local Disk C: > Click on Program Data > Select Intuit > Open Entitlement Client > v8 [Windows 8]‘.
Select all the files in the folder and delete them.
Launch QuickBooks POS.
In case the problem still exists, you would have to re-install the Point of Sale software.
Tracking Promotions
QuickBooks users can track their sales report but sometimes the point of sales systems may fail to do this properly and then you should contact to QuickBooks Point of sale support to get the issue fix and get thorough knowledge of the process.
QuickBooks Installation Errors for Specific Update Releases
If QB POS is upgraded from POS 12.0 R1 to R4 and you wish to open the company data file, it may take a while. The process may be slow specifically the first time when the file or data is opened after the R4 installation or any successive patch after R4 from R1.
Follow the given steps to fix this error:
Ensure that the available Disk Space on C Drive is at least three times the size of the company file.
Upgrade all your systems to R4 release in order to avoid connectivity issues or store exchange processes
Don’t cancel the update once the process starts and use POS only after the upgrade of the database is complete.
Access violation error messages
One of the premier causes behind this error is low system resources or an older release of Point of Sale. Another major reason is faulty memory, a damaged device driver, malicious software such as spyware, background processes or if you try to access memory using a program that doesn’t have permission to use.
If the error still occurs then close QB POS and restart your computer.
Note: If the above solution helps you fix the error, you should consider restarting your computer at least once a day.
The second possible reason of this error is damage of data file or program file.
To fix it, do some simple steps:
Switch to the Practice Mode in QB POS using the practicing company included that consists in the software.
Now repeat the same steps in the practicing company that caused the issue in your regular company file.
If the error occurs again with the practicing company, uninstall and reinstall QB POS. After that Switch back from the practice mode to your regular file and repeat the steps there so that the error should not recur.
In case the issue QuickBooks Point of Sale Errors still exists, or you need assistance in regards to any other QuickBooks related issue, you can call our 24×7 toll free QuickBooks POS customer support expert team at +1-888-510-9198.
FAQs Related to Common Errors in QuickBooks POS
How do I fix point of sale in QuickBooks?
You can repair QuickBooks point of sale using the steps below: 1. At first close QuickBooks point of sale. 2. Now, open the windows start menu. 3. Once done with that, enter control panel into the search and hit enter. 4. You now have to choose your version of QuickBooks desktop point of sale. 5. And further perform the onscreen instructions to repair the program.
What is error 193 in QuickBooks point of sale?
This error is often seen due to outdated driver, corrupted system file, or incompatibility with NordVPN. You can try fixing the issue by running the hardware and devices troubleshooter, the system file checker scan, or uninstalling NORDVPN.
How do you avoid negative inventory in QuickBooks point of sale?
This can be done by turning on the preference using the steps below: 1. Move to the edit/preferences/items and inventory on the menu bar. 2. After that, check the warn if not enough inventory to sell check-box. 3. You now have to choose don’t allow negative quantities.
QuickBooks is the world’s most used and sought-after accounting software. This software is mostly used by the small and medium sized business. To start using it, one needs to set it up on the system for which some steps need to be followed. In this post we will discuss about setup quickbooks desktop first time.
Steps to Setup QuickBooks desktop first time
Steps to setup quickbooks desktop first time are given below:
Step 1: Register for QuickBooks desktop
You can register for the QuickBooks desktop is just one minute or even less than that. You can choose any of the QuickBooks package after taking a free trial.
The QuickBooks packages or subscription are:
Simple Start Plan- $5/month: With this, you can create invoices, get estimates and download your bank transactions.
Essentials Plan- $10/month: It gives you access that are offered in Simple Start plan along with the access to manage and pay bills and offers multi-user support.
Plus Plan- $21/month: This plan comes with all essential features, and the access to track inventory, prepare and print 1099’s.
All these features are available on free access for duration of 30 days. You just need to enter your personal details, and you will be able to take benefit of the free online trial.
To use QuickBooks Online, you would need to use a compatible browser which includes. (Chrome, Safari 6.1, Firefox, and Internet Explorer 10 or higher). Once you sign up for the trail, you can login to the QuickBooks and get access to QuickBooks Dashboard.
Step 2: Customize your Company Preferences and the Account Settings
You can display a to do List on the QuickBooks Dashboard. After logging in for the very first time, you will find a number of tutorials that help you setup different parts of your new account. After this, you should set your company preferences that will help you move forward with the QuickBooks.
On the top menu, click on the ‘Company tab‘ and select “Preferences“. Fill or ‘Edit your company’s contact details‘ and changes the account settings in the way you like. These settings may include invoice automation, credit card payments, and time tracking and payroll.
However, if you do not want to change these settings, the version will not pressurize or force you to do so.
Step 3: Import Business Data to QuickBooks desktop first time Setup
This new QuickBooks version allows you to import the data without any hassle. You would not be required to do manual transfers or setups. This software will helps you import data, do transactions from bank accounts, customer data from Excel, and your Excel chart of accounts.
To do all these things, you would be required to click on the ‘Company tab‘ and select ‘More‘ and ‘Import Data‘ from the drop-down menu.
You will get various options to upload the file and you can choose the one as per your preference. Moreover, uploading your customer or vendor list is quite easy with this new software. Just match each field with your QuickBooks field ensuring no error in the list, you can go ahead.
Some of the business data you can import to QuickBooks include customer or vendor data, products & services from excel, chart of accounts from Excel, transactions from your bank, and QuickBooks desktop company data. You may also experience few types of errors while importing but that can be easily troubleshooted.
During this process, you may sense that QuickBooks makes you over-categorize some of the businesses but that is going to help you in keeping your business more organized.
First of all, click on the ‘Banking tab‘ on the top of the screen and it will automatically connect QuickBooks with your bank account. Then, click on ‘Download Transactions’.
After that, a pop-up window will appear where you need to fill your ‘Bank details‘ that you want to sync with the software.
Next, a pop-up window will appear where you need to ‘Fill your bank details‘ that you want to sync with the software. You can use your online banking ‘username and password‘. After few minutes, your account will be synced with the software and all your bank transactions will be imported to the software.
Finally you can attach your ‘Customer and vendor names‘ to each of the transactions. This attachment or organized data will help you keep track of the credit and debit info.
Step 5: Sync your Business credit cards
After bank account, it’s time to ‘sync your credit card accounts‘ as well. Once you ‘Sync your credit card accounts‘, ensure that your credit card information is shown in QuickBooks. This will ensure that you do not record your data manually.
If you wish to sync your credit cards, click on the ‘Banking tab‘ on the top menu bar, select ‘More‘ and then ‘Register’ from the drop down menu. Type your bank account details and choose the ‘Credit Card Option‘ in the pop-up that appears. As you click, QuickBooks will launch a credit card setup wizard that will help you sync your cards in just few steps.
Step 6: Customize your Invoices with Company Banking
Not to mention, a good business has always good looking and well-maintained invoices by which the customers get impressed easily. This can be done only by ‘Customizing QuickBooks invoice‘ with the company logo and branding.
As a user, you would be glad to know that QuickBooks supports ‘customizable invoices‘ and is also quite happy to do so. You can change ‘style, color, font, layout, and size‘. But this need to be kept in mind that complete invoice customization is only available to the users who are the ‘QuickBooks Plus subscribers‘.
Click on the ‘Customers tab‘ to access the customization menu, select ‘Create Invoices‘. Choose your desired invoice template from the drop-down list and make your own. You can also do further changes to the invoice by click on the ‘Formatting tab‘ and then click on ‘Customize Date Layout‘.
Customize the design and the layout. Look for the ‘Use Logo Checkbox‘ and see if your logo looks nice and does not get cropped while you use it in the invoice.
Step 7: Import your contacts to QuickBooks
Making it easy to import the contacts, QuickBooks ensures that you are ready-to-do for everything.
Click on ‘Company > More> Import Data‘ and then select ‘Customers or Vendors‘ (It depends on whose data you want to import).
The data of ‘Customer and vendor‘ can be uploaded in the form of an ‘Excel or CSV file‘. Once the file is imported, QuickBooks will automatically extract data.
But while copying the data, QuickBooks do some errors. Once you have filled all the data correctly, you can ‘Continue and review‘ the data.
If you are setup quickbooks desktop first time, then you should make sure that while using certain tools, you need to follow some tips:
Avoid using invoices and estimates:
As a first time user, you should avoid using invoices and estimates on QuickBooks until and unless you are completely familiar with the software. All the accounting activities are posted automatically when you use these functions. Once you know how the amounts are generated on QuickBooks, you can start using in-built invoices and estimates that will help you make your business QuickBooks account highly accurate.
Separate Business
However, it is a great thing that QuickBooks allows a user to sync the accounts with software but it is recommended to keep your business bank account separate and it should not include any personal transactions.
Let Host Docket to help you
On the basis of your ‘ZIP code‘ or ‘postal code‘, QuickBooks helps you find out the nearby QuickBooks professionals who are certified who can help you with problems related to the software.
Connect QuickBooks with Payroll Software
Calculating payroll manually is now a difficult task and QuickBooks is the most popular software that can help you do payroll quickly and accurately. You can sync payroll software programs with QuickBooks. This will also help you stay updated with the latest tax laws and other changes.
By following all the above mentioned steps and tips, you can become a QuickBooks master in no time and easily able to setup QuickBooks desktop first time. If you have any questions or queries please ask it directly to our experts at +1-888-510-9198. Our QuickBooks Support executives will help you to install, update or troubleshooting of your QuickBooks software in no time.
Some FAQs Related to QuickBooks Desktop first time Setup
How do I set up QuickBooks Desktop for the first time?
To set up QuickBooks Desktop for the first time, follow these steps: Install QuickBooks Desktop on your computer Create a company file and select the type of company you want to set up Enter your company information, including your company name, address, and tax ID number Set up your chart of accounts and add any additional accounts as necessary Enter your opening balances for each account Set up your products and services list Set up sales tax and track expenses
What do I need to get started with QuickBooks Desktop setup?
Before setting up QuickBooks Desktop, you’ll need the following: A computer with a supported operating system A valid QuickBooks Desktop license Your company information, including your company name, address, tax ID number, and chart of accounts Your bank account information to set up online banking Information about your products and services, sales tax, and expenses If you need help with the setup process, you can call our toll-free number +1-888-510-9198 for assistance.
How do I create a company file in QuickBooks Desktop?
To create a company file in QuickBooks Desktop, follow these steps: Open QuickBooks Desktop and click on “File” and then “New Company” Select the type of company you want to set up Enter your company information, including your company name, address, and tax ID number Set up your chart of accounts and add any additional accounts as necessary Enter your opening balances for each account
How do I set up my chart of accounts in QuickBooks Desktop?
To set up your chart of accounts in QuickBooks Desktop, follow these steps: Go to “Lists” and then “Chart of Accounts” Click on “New Account” to add a new account to your chart of accounts Select the type of account you want to add, such as a bank account, credit card account, or expense account Enter the account information and click “Save & Close”
How do I enter my opening balances in QuickBooks Desktop?
To enter your opening balances in QuickBooks Desktop, follow these steps: Go to “Lists” and then “Chart of Accounts” Double-click on the account you want to enter an opening balance for Enter the opening balance in the “Opening Balance” field Save your changes by clicking “Save & Close” If you encounter any issues while setting up QuickBooks Desktop, you can call our toll-free number +1-888-510-9198 for assistance.