QuickBooks crashed again? If QuickBooks error 15242 popped up, we’ll help you fix it—and get back to your work stress-free. QuickBooks update error 15242 basically belongs to the 15000 error series. It appears on the screen due to a bunch of factors. Let us understand further about this error. While you might find this error to be a bit devastating, but once you have the right set of fixes handy, it becomes easy for you to get done with the QuickBooks error 15242. However, if you are in search of some professional guidance, then in that case consulting our tech team at +1-888-510-9198 would help. Our tech professionals have years of experience in dealing with QuickBooks-related issues. Thus, feel free to get in touch with us. Having said that, let us get a detailed view of the QuickBooks error code 15242.
What is QuickBooks error code 15242?
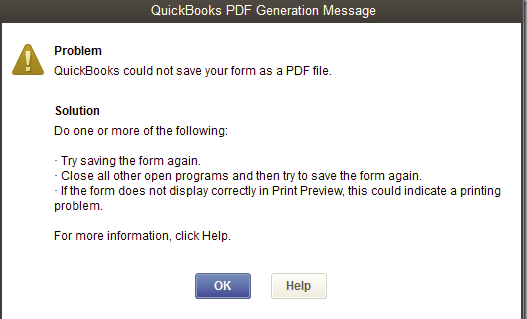
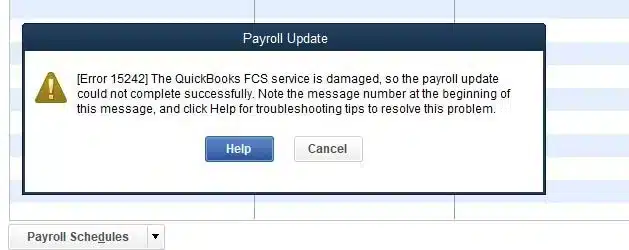
QuickBooks error code 15242 is basically a payroll error that can interrupt the ongoing payroll update. This particular error code occurs when you try to update your payroll. It further indicates that the FCS is damaged. The file copy service is responsible for downloading QuickBooks payroll updates. You might need to verify the status of the payroll subscription and add the correct service key. This error will occur with a warning message that states:
QuickBooks Error 15242: The payroll update did not finish successfully. QuickBooks FCS is damaged or unresponsive.
OR
QuickBooks Error 15242: The update did not conclude successfully. QuickBooks FCS is damaged or not responding.
There are a bunch of factors triggering this error, which we will be elaborating in this segment. Thus, make sure to scroll through this piece of writing carefully.
What instigates the QuickBooks payroll error 15242?
As we mentioned earlier, here are a few factors causing the issue:
One of the basic factors can be QuickBooks file copy service is corrupted.
Another trigger can be if the QuickBooks subscription itself is expired.
You might come across similar sort of issue in case of poor internet connection or QuickBooks file corruption.
Expect the error if the previous installation of QuickBooks was incomplete.
Signs and symptoms of QuickBooks payroll error 15242
Identifying the error code 15242 becomes easy with the below signs and symptoms.
When updating QuickBooks desktop, you might see an error message on the screen which is one of the biggest indicators.
Another indicator for the same can be if the inputs given by the user via the keyboard or the mouse take a lot of time to process.
In case QuickBooks lags excessively and experiences frequent shutdowns.
Possible fixes for the QuickBooks error code 15242
A bunch of fixes can be implemented to get rid of the error code 15242 in QuickBooks. To understand what those are, make sure to scroll through carefully.
Procedure 1: Updating QuickBooks manually
An outdated accounting software version can trigger all possible errors. Thus, it is often recommended to keep the software updated. You can update the software using the set of steps listed below:
Start off the process by shutting down the company files and exit the QuickBooks desktop.
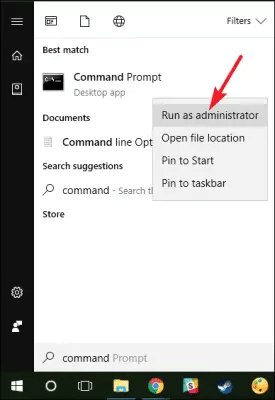
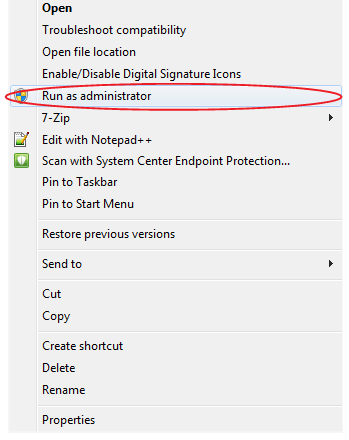
Furthermore, you need to right click the QuickBooks desktop icon and also click on run as admin option.
Once done with that, a message might appear asking whether you want to allow the program to make changes or not. Here, you need to click on yes tab.
After that, download the latest payroll and QuickBooks updates.
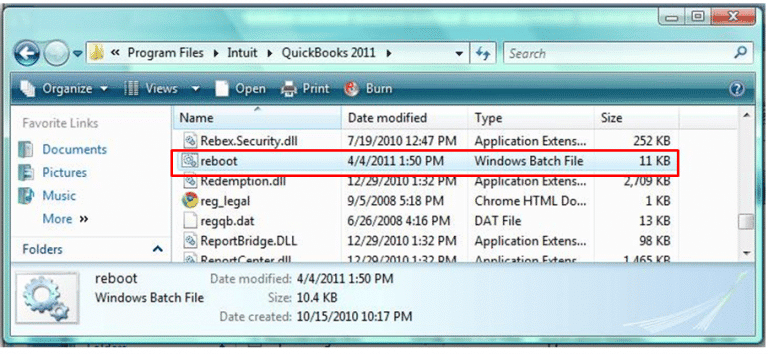
Procedure 2: Run reboot.bat file
Well, performing this process might help in registering all the extensions associated with the software. The steps involved in this particular process are as follows:
Simply start off by heading to the QuickBooks folder
And then, look for and right click the reboot.bat file.
You are then required to click on run as admin option
Also, allow the file to perform its operation.
Procedure 3: Using Quick fix my program
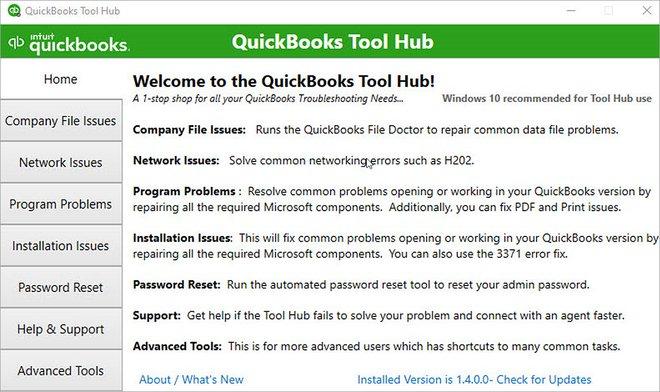
Under this process, you need to start off by downloading the QuickBooks tool hub
Save the file in an easily accessible location
Furthermore, click on the QuickBooksToolHub.exe file and let the install process initiate.
The user should then perform the onscreen install prompts and agree to the license agreement.
Open the tool hub from the icon and scroll down.
Once done with that click on the program problems tab.
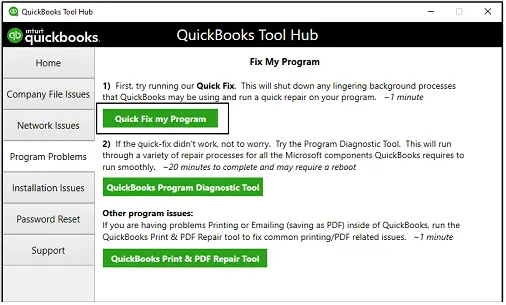
The user needs to click on the quick fix my program tab
Let the tool run and perform the necessary steps
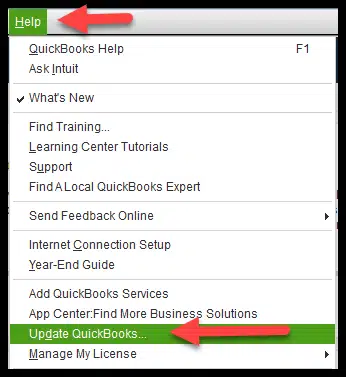
And also, reopen QuickBooks and try updating the accounting program and clicking on the help tab.
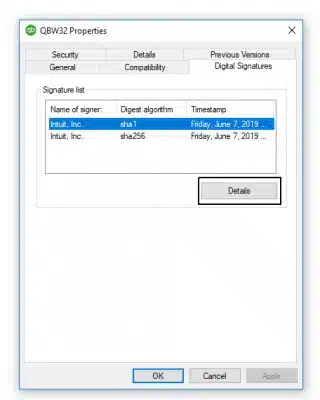
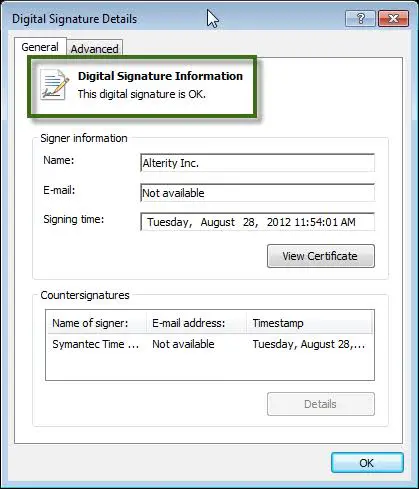
Procedure 4: Install the digital signature certificate
At times, simply installing digital signature certificate can help in eliminating certain errors.
At first, you simply need to head to the installation directory of QuickBooks and then open the QuickBooks folder.
Once done with that, look for and right click the QBW32.exe file.
You are further required to click on properties tab.
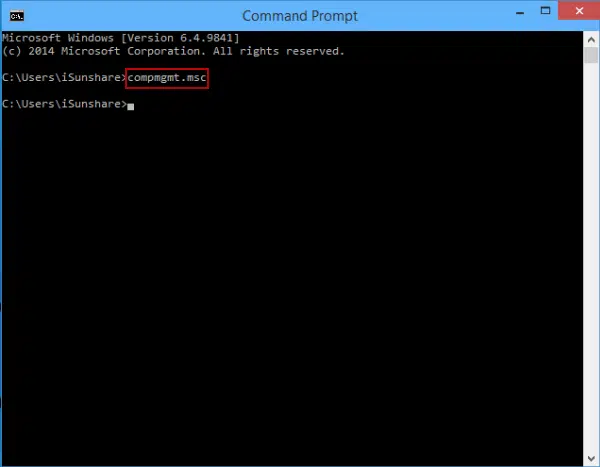
At times disabled FCs can end up in such an error. However, it can be fixed by configuring the file copy service. The steps involved here are as follows:
Initiate the process by pressing windows + R keys to open the run window.
After that, type the command COMPMGMT.MSC and click on enter tab.
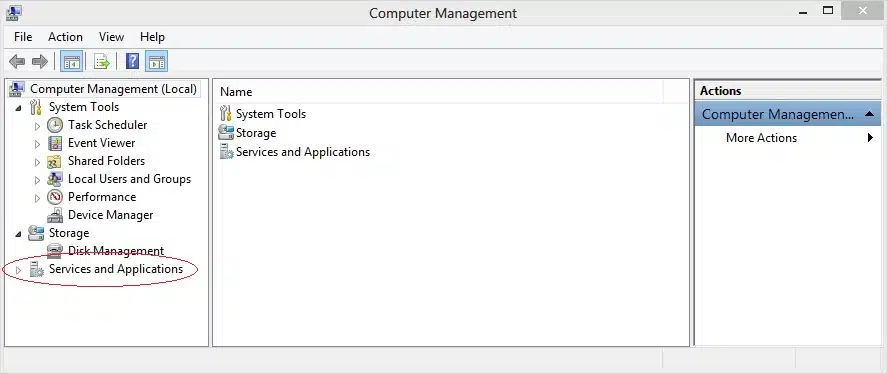
User then needs to Open the computer management window
And also click on services and applications tab
Followed by clicking on the services tab.
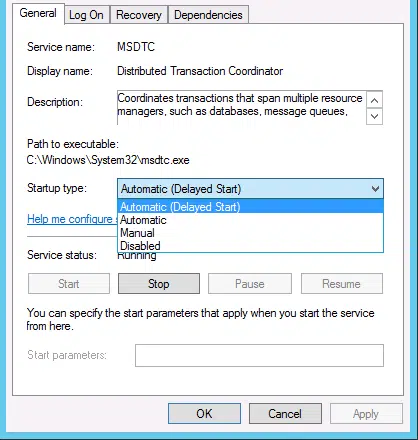
And double clicking on the Intuit QuickBooks FCS
Now, click on the startup type.
And opt for manual
Lastly, click on apply tab and also click on ok tab.
Procedure 6: Checking payroll subscription
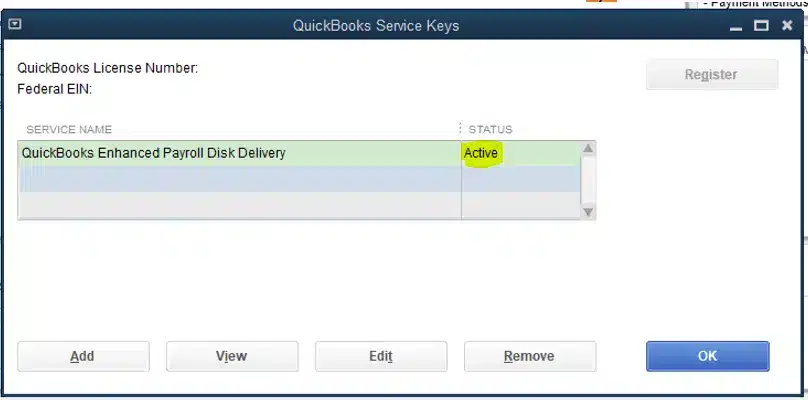
Ensuring that the payroll subscription is active is essential to get rid of such issues in QuickBooks. The steps involved in this process are as follows:
Simply start off by running the QuickBooks as admin.
Furthermore, follow up by advancing to the employees tab.
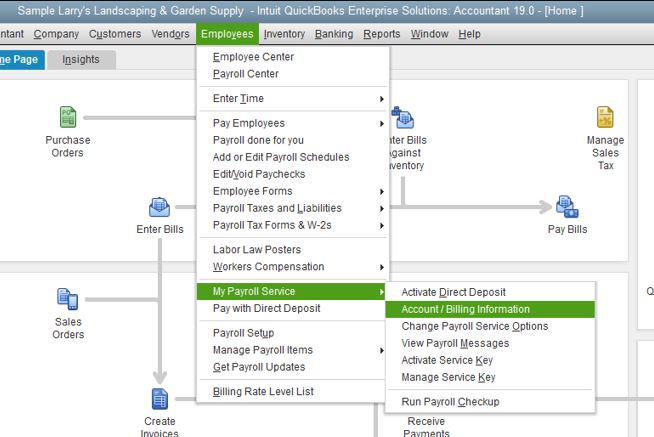
User then needs to click on my payroll service and advance the account/billing information.
This action will open the payroll account maintenance page.
Furthermore, ensure that the payroll subscription is active, and if it is not, then make sure to activate it and try updating once again.
Errors and technical snags can be way more frustrating than they seem to be. Thus, it becomes a necessity to deal with the errors as soon as possible. And so, we expect that the measures discussed above might help in tackling the error code 15242. Just in case you aren’t able to deal with the error even after performing the fixes above, then you simply should get in touch with our QuickBooks support team or give us a call at +1-888-510-9198.
QuickBooks payroll error 15242 often occurs when you try to update the payroll. It indicates that the FCS file is damaged. The FCS is often responsible for downloading the QuickBooks payroll updates. There can be a bunch of steps that can help the user in eliminating this issue in QuickBooks.
What is error 15241 in QuickBooks?
QuickBooks error code 15241 often occurs when the QuickBooks desktop file copy service is not running. The FCS is a service that a responsible for verifying the digital signature of the files. One can try eliminating this error in QuickBooks by performing a bunch of steps.
What factors do I need to consider before fixing error code 15242 in QuickBooks?
You should consider the below factors before performing the fixes for the error code 15242. The steps involved are as follows: Make sure to back up your QuickBooks data and files to secure your data. Note down crucial details about your QuickBooks version to reregister after reinstallation. Update QuickBooks Desktop before downloading payroll updates. Update Windows to ensure compatibility. Ensure sufficient space in the system to download QB updates.
QuickBooks error code 1911 is usually seen when you try to install QuickBooks pro 2016 on a windows server 2012 R2 system. Such sort of errors might make upgrading the accounting software a little difficult. QB error 1911 can be seen due to a bunch of reasons such as error in registry driver and many more. To help you in dealing with this issue easily, we have come up with this piece of writing, where we are going to talk about the complete procedure to deal with the QuickBooks error code 1911.
To learn further about this issue, make sure you look through this piece of writing carefully. Having said that, if you require professional assistance at some point in time, then do not hesitate in contacting our team professionals at +1-888-510-9198 , and our certified QuickBooks professionals with sound knowledge will help you get rid of all sorts of errors permanently.
Before we jump onto the actual steps to eliminate the error, it is better to understand a little about what this error is all about. Talking about QuickBooks error code 1911, it is basically an error that can be experienced when you install or upgrade the software. It often occurs on the screen with a warning message that states:
“We’re Sorry! Something went wrong with your installation.” Or “Error 1911. Could not register type library for file C:\program files(x86)\Common File\intuit\QBPOSSDKRuntime\QBPOSXMLRPLib.dll. Contact your support personnel.”
When such an error occurs, the system might not be functioning properly and one might not be able to perform the upgradation of the software. There are a bunch of factors triggering this issue, also there are a bunch of steps that can be performed to eliminate this error permanently. Continue reading, to understand those factors and fixes better.
What lands you in QuickBooks error code 1911?
There can be a bunch of factors triggering this particular error in QuickBooks. Let us find it out:
One of the basic triggers can be if the registry driver error occurs
Another possible factor can be damaged installation of the QBs software
You can further land into similar issue if you aren’t having proper admin rights
Moreover, when the PsEXec file faces some issues, then this particular error might appear on the screen
Possible indicators of QuickBooks error 1911
Identifying the error becomes easy, once you go through the below signs and symptoms:
Just in case, the windows OS becomes unresponsive, then you can expect this error
Another indication can be if the software starts working sluggishly
Or if the software doesn’t respond to the inputs
Or if the system gets shut down frequently, then you might land into similar error.
Procedures to fix QuickBooks error code 1911
Now that you know the factors triggering the issue and its indicators, it is time to implement some quick steps to get rid of the issue. Let us have a look:
Procedure 1: Modifying the setup editor settings
This method requires you to perform the steps to configure setup editor settings. The steps to be performed here are as follows:
To start off with, choose the tables when you do not have to register your type library file.
Furthermore, click on the type Lib table.
Followed by, putting the row along with the file specified particularly.
Procedure 4: Download and review the PESxec directory
If none of the above steps helped in eliminating the error, then check out the steps below for downloading and reviewing the PESex directory.
Initially, download and install the PESxec directory.
Followed by looking for the QuickBooks installer in the installed directory.
The user is then needs to open the command prompt CMD.
And then, run PSExec. This is basically the QuickBooks installer to install QuickBooks on the system.
QuickBooks install diagnostic tool is stored in the downloads folder and will be titles 1.exe
Conclude the procedure by accessing the installer as normal.
To Summarize!
Reading this segment might help you in dealing with the QuickBooks error code 1911. However, if you land into the same glitch again and again even after performing the set of steps displayed above, you simply need to get on a call with our technical team at +1-888-510-9198 . Our team consists of a bunch of technically sound experts having proper knowledge related to QuickBooks and provide QuickBooks error support. We work round the clock to answer all sorts of queries related to QuickBooks.
QuickBooks error code 1911 often occurs when you try to install specific versions of QuickBooks. This is basically an installation error that arise while updating the software to the newer versions.
How do I fix error code in QuickBooks desktop?
You can try eliminating the QuickBooks desktop errors by running the QuickBooks install diagnostic tool. The steps involved are as follows: Start by opening QuickBooks tool hub and the chose installation issues. Followed by, selecting QuickBooks install diagnostic tool. When the tool finishes, restart your computer and start QuickBooks desktop and then open the data file.
What is a QuickBooks unrecoverable error?
Experiencing QuickBooks unrecoverable error indicates that the software closed unexpectedly due to some technical glitches. You can see this issue when opening or close a file, or saving a portable copy, and selecting any menu option, or clicking on the link in QuickBooks.
How do I fix a corrupted file in QuickBooks?
The rebuild data tool is built-in to QuickBooks desktop and fix the company file data issues. The steps involved are: Head to the file menu and hover over utilities tab and choose rebuild data On QuickBooks information window, choose ok tab. Let the tool repair the file When the tool finishes, choose ok tab Head to the file menu and check if the issue still persists
Over the past few years, QuickBooks accounting software has managed to mark its presence in the accounting industry. Even though Intuit continues to come up with new updates to make the software better, yet people are bound to face issues and this is when QuickBooks users often require professional guidance. Certain errors and technical glitches in QuickBooks can be eliminated only with the help of professionals. In such scenarios, you can simply get in touch with our team using our QuickBooks customer service number i.e., +1-888-510-9198, and our technically sound professionals will clear all your clouds of confusion.
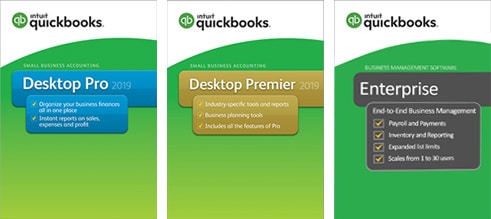
Whether you use a QuickBooks pro or enterprise, you can seek assistance from our experts for all QuickBooks editions and versions. Common QuickBooks editions include:
QuickBooks Pro
QuickBooks Premier
QuickBooks Accountant
QuickBooks Enterprise
QuickBooks MAC
QuickBooks online
And many more…
Major services provided by QuickBooks support team
As we mentioned earlier, there are a bunch of services that you can expect from our customer support team. However, here is a detailed list of the services that our certified ProAdvisors excel in:
Fixing technical issues – In case you are facing technical issues with the software like the H series error, 6000 series error, installation issues, performance problems, software crash errors, banking errors, update errors, payroll errors, etc., then you can surely seek assistance from our professionals and our experts will help you in getting rid of these errors successfully.
Assistance with installation and setup – In case you are new to QuickBooks or have just got and planning to set it up, then you can reach out to our tech team for guidance throughout the process. Our team will help you with the steps and procedures to install, setup and use the QuickBooks software without much hassle.
Retrieving and troubleshooting – Certain errors in QuickBooks might land you into data losses, corrupt files, etc., but our QuickBooks support professionals can surely help you in dealing with the error successfully.
Customization – At times you might need to scale up your software and get access to additional functionalities, and our experts can surely help you with that. You can ask our certified tech-geeks to help you with the customization and upgradation of the software.
There are a bunch of support providers out there, but what makes us unique in this industry is the fact that we have years of knowledge and expertise in tackling all sorts of QuickBooks related issues. Our team professionals are certified by Intuit and are well-versed with the current technical advancements. The QuickBooks professionals are available round the clock to make sure that all your queries are answered on time and properly. Our team include a bunch of industry experts, who understand the accounting industry and the QuickBooks accounting software properly and make sure that the customer queries are answered properly.
Need some help with QuickBooks? ProAdvisors are just a call away!
You can avail of our services by simply dialling our QuickBooks customer service number. Our support number is available round the clock to provide any sort of assistance related to QuickBooks accounting software. Our dedicated team of professionals and certified ProAdvisors are ready to help you and clear all your clouds of confusion.
For any queries or for any inquiries, all you need is to give us a call at +1-888-510-9198 and our team will provide you with customized solutions. You can speak to our live representatives and experts on call and share your queries related to QuickBooks accounting software with them.
Running a small business requires a lot of efforts and managing business finances can be a tough nut to crack. This is where QuickBooks for small business comes into play. The QuickBooks accounting software for small business helps in managing the tedious errands and prepare precisely and accurately prepare tax statements, in order to minimize the liability and safeguard the financial interests. A proper accounting software like QuickBooks can keep your business in top financial shape and help in making better decisions. Even if you are a small business, a lot needs to be done to maintain proper accounts. From budget, tracking expenses, paying suppliers, categorizing transactions, to keeping accurate books, everything needs to be done properly. And all this hassle can be eliminated by simply incorporating QuickBooks accounting software.
Well, simply using spreadsheets and ledgers might work well for businesses you have just entered, but eventually when a business starts growing, the number of customers and vendors they deal with grows along with that, and even easiest of the tasks like keeping track of the money moving in and out of the accounts can be a tedious task to deal with. And at this point in time, combing through a million spreadsheets or piles of paperwork will no longer suffice. This is when a business should switch to an accounting software. And when we talk about accounting software, QuickBooks tops the list.
QuickBooks accounting software makes life easier for small business owners. Instead of doing things manually, a major chunk of accounting tasks can be put on autopilot with this software. According to some stats, around 75% of the accounting activities can be automated with an accounting software.
Not just that, QuickBooks accounting software has an easy-to-use interface. This makes it easy to carry out different tasks like bookkeeping, etc. even if you do not have detailed accounting knowledge. The software further helps in in planning, spotting potential issues, identifying the strengths, and prove business viability. There are a bunch of features that roll in with QuickBooks accounting software, especially the ones that are useful for small businesses.
As we already mentioned earlier, QuickBooks accounting software is loaded with features and functionalities. And when it comes to a small business, the following features make it easy to handle all the accounting and bookkeeping activities. Let us have a look:
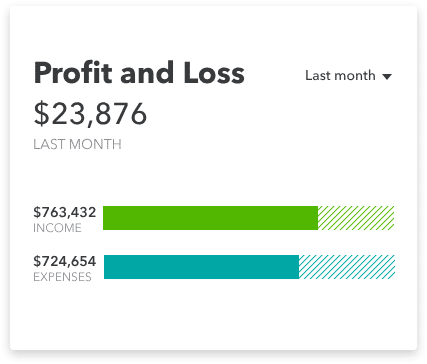
Smarter than a spreadsheet- Well, the spreadsheets are no more the only solution to manage your expenses. QuickBooks accounting software is way smarter than a spreadsheet. From simple income and expense tracking to powerful cash flow management and reporting, QuickBooks allows the businesses to manage and organize the finances in a better way.
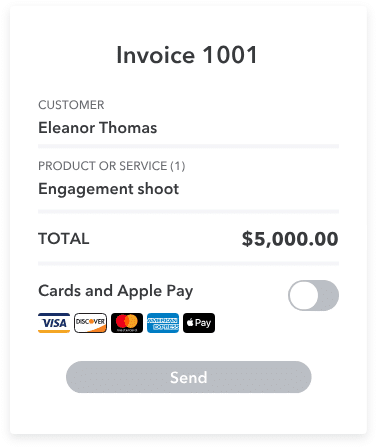
Keep cash flowing- The small businesses can accept credit card and bank transfers anywhere and anytime with a free QuickBooks GoPayment card reader. You can pay as you go with no upfront cost or hidden fees.
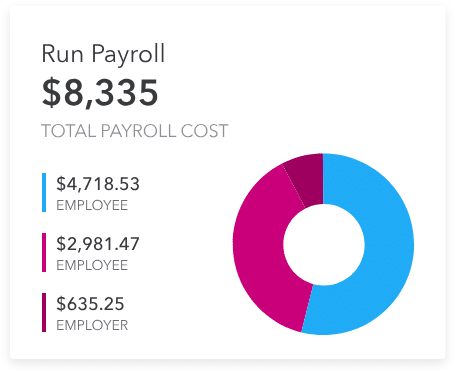
Run payroll in minutes- The QuickBooks self-service payroll gives a do-it-yourself option along with a full-service payroll, which makes handling payroll much easier for businesses.
Tracking employees and billable hours with ease – Manually entering the details can take hours and might lead to some errors and omissions. Thus, QuickBooks allows proactively managing overtime. Also tracking time from anywhere or from any device resulting in effortless payroll and invoicing.
Other than the above-mentioned features and functionalities, what makes QuickBooks an ideal choice for the small business is the fact that it is easy to use, easily accessible, not harsh on pockets, and doesn’t require any professional to operate.
Conclusion
In a nutshell, QuickBooks accounting software can eliminate the extra efforts, hassle, and time that goes behind managing the accounting and bookkeeping activities manually, especially when we talk about the small business sector. QuickBooks is an ideal accounting software for small businesses. A small business can get organized and save a lot of time with QuickBooks. So, if you are interested in getting QuickBooks software for your business, make sure to check out the official Intuit website today. Or in case of any queries or if you require any sort of professional guidance related to QuickBooks, then in that scenario consult our QuickBooks tech support professionals at +1-888-510-9198 and they will get back to you with instant support solutions.
In QuickBooks, you can convert QuickBooks reports and forms into Adobe portable document format files easily using QuickBooks PDF converter. This makes it easier for the users to share the financial reports with personnel who do not have QuickBooks installed on the system. Getting a QuickBooks PDF converter is easy, as it involves a handful of steps only. To help you understand and use QuickBooks PDF converter better, here we are with this segment sharing the complete information related to PDF converter in QuickBooks. Just in case you need any professional assistance, give us a call at +1-888-510-9198, and all your queries will be answered immediately by our professionals. Having said that, let us understand what QuickBooks PDF converter is all about and what all information you need to know about it.
What is QuickBooks PDF converter?
QuickBooks PDF converter is one of the basic features of the QuickBooks software that helps you to convert all your financial reports or files into PDF format so that you can access them easily. This conversion process is done with the help of the QuickBooks print component which has so many features and advantages that will help you in multiple ways. One of the best parts of this feature is that it is built into QuickBooks software.
Advantages of using QuickBooks PDF Converter
QuickBooks PDF Converter offers numerous advantages to its users. So, let’s discuss some of them in brief. They are as follows:
This PDF converter tool is capable enough of sharing your data easily with your business associates and clients who don’t have the QuickBooks application installed on their system.
This also helps you to convert your company’s financial report into PDF format. Moreover, this report can be saved conveniently as a record and can be shareable too.
Also, this PDF Format can be uploaded to a web browser, the internet, or in the server for others to see.
Other kinds of QuickBooks reports such as reconciliation statements, company invoices, balance sheets, payroll info, etc can also be converted easily by this tool.
Just in case while printing, saving, or e-mailing the converted PDF Format from QuickBooks Desktop you encountered some errors then you can update the file with the help of software.
You can easily download the QuickBooks PDF and Print Repair tool from the official website.
After exploring everything about this QuickBooks PDF Converter tool and advantages of using this PDF Converter tool. It is also important to know the installation process of this tool. Let us take a deep dive into the steps of installing the QuickBooks PDF Converter tool.
Start the process by right-clicking on the QuickBooks Desktop icon and then choosing the Properties option.
After that go ahead, by hitting the option Find Target in order to open the location of the File.
In the Next step, double-click on the Install.exe or Install App for installing the QBs PDF Converter.
Then, after the completion of installation hit on the OK tab.
Now click the Start button to open the Run box after typing the run in the search area.
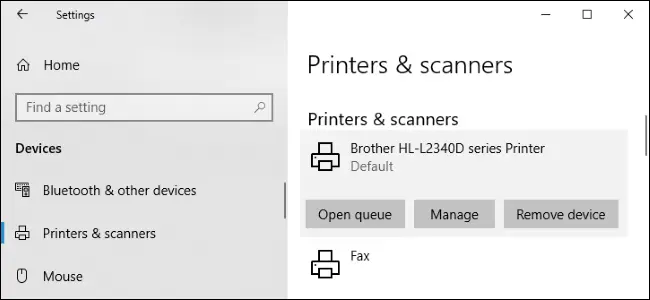
Furthermore, type control printers in the search area & click on the OK tab. It will open Printers & Faxes window.
After that, clicks on your Document Converter with the right mouse click & select the option Rename.
Lastly, enter the QuickBooks PDF Converter & press Enter. Ensure that you have typed the name of your PDF converter correctly.
Steps to delete QuickBooks PDF Converter Tool
While working with QBs PDF Converter tool, you may face many problems then you can delete this converter tool.
Here we have mentioned the steps that can be implemented as it is in order to delete the QBs Converter tool in Windows. They are as follows:
Initially, logging in to the windows as an admin by using the credentials.
After that, you must open the option Printers &Faxes window, if in case you are using the latest version of Windows of MICROSOFT including WINDOWS 10
Click on the start button, type Run in the search area & hit the enter button.
Now, type control printer in the search box of the Run command & again press the Enter button.
After that, you are required to right-click on the icon of QBs PDF converter.
Last but not least, choose the option delete & click the OK tab in the confirmation window to finish the task.
Important Tips: After deleting the QuickBooks PDF converter, you have to reinstall QuickBooks PDF converter, then again you have to follow the installation process of the PDF converter in order to install the QBs PDF converter.
Steps to re-install the QuickBooks PDF Converter Tool
Suppose you want to re-install the QuickBooks PDF Converter tool.
Start the process by clicking right mouse button on the QuickBooks icon.
After that right-click on the properties option from the list that appears on the screen.
Then from the properties window click on the find target option or open file location.
Now you will be taken to a Windows Explorer window. Here, you have to double-click the install.exe file or install application. This will install the QBs PDF converter.
Hit the OK tab
Next, move ahead to the windows start tab and also go for the run tab.
Then, Type in control printers in the open field.
And hit the ok tab in order to open the printers and faxes.
Furthermore, right-click on the Amyuni Document converter and select the rename tab.
Now enter the correct name as per to the QuickBooks version being installed in the system and press the enter tab.
QuickBooks 2006-2009 R8: QuickBooks PDF converter
QuickBooks 2009 R9 and later: PDF converter 3.0
QuickBooks 2010 R1 and R2: PDF converter 2.0 QuickBooks
In the next step choose NO for the default printer and click on the Next tab.
Now go for Do not share this printer option and then click on Next opt.
At the end a prompt to print a test page appears on the screen and you need to choose the option NO and lastly click on the Next tab.
How to implement this QuickBooks PDF Converter Tool
After that you’ve learnt how to install this QBs PDF converter, now the only thing you need to learn is how to implement this tool in converting your files or report into PDF format.
For its implementation carry out the steps as mentioned below.
Initially openQuickBooks & look for the invoice or reports that you wanted to save in PDF format
Then, click the File option under the menu tab. And select the option save as PDF.
Meanwhile, choose the file in which you want to save your invoice in PDF format.
Lastly, enter the File Name & hit the Save button.
When the QuickBooks PDF Converter Tool not working
When you are trying to convert the file into PDF Format but sometimes this tool stops working and you might get certain errors. This can be irritating sometimes and also affects many users.
However, this trouble can be fixed easily by following some troubleshooting methods. Let us explore the methods that are mentioned below:
Troubleshooting methods to fix if the QuickBooks PDF Converter tool is Not Working
Here are some methods that are mentioned below to get fixed this non-working PDF Converter tool quickly.
Method 1: Utilization of QuickBooks Print and PDF tool
No doubt, this print and PDF repair tool is an extremely powerful tool that will surely help you in fixing your problems. Let us learn how to make use of it.
Firstly, start the process by shutting down the QuickBooks application.
In the next step, download the QuickBooks tool hub from the official Intuit’s website. It is suggested to download the newest version of this tool. And if it is already installed in the system you can know about the version by choosing about to view the version or you can click on to the home button.
Once you are done with downloading the software, now follow the instructions and agree to terms and conditions displayed on the window to install the software.
After the installation is complete, launch the software by double-clicking the icon.
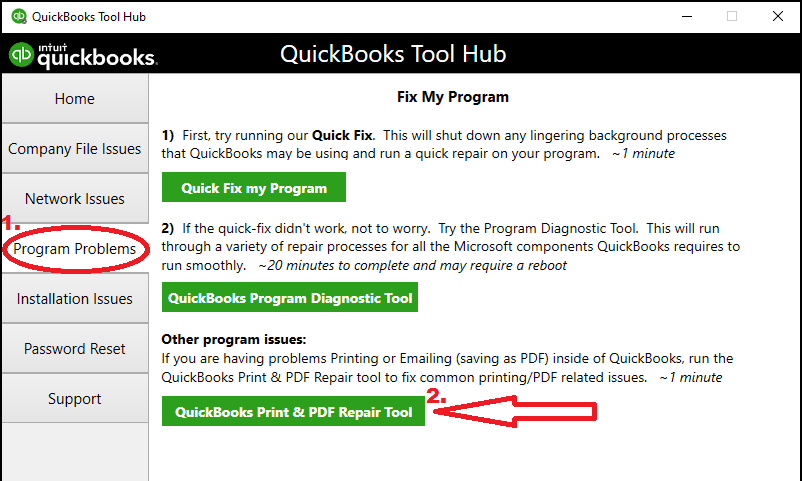
Once the QuickBooks tool hub is opened, a tab named Program Problems appears on the screen just simply click on it.
Now, click on the QuickBooks print & PDF repair tool button.
Finally, this tool will automatically detect the issue and fix it. You can also try to print, email or save in the PDF form from the QuickBooks Desktop.
When the process gets finished, restart your computer.
Do try this method if the above-mentioned method is not applicable. This method is performed in two steps:
STEP 1: Check and reset the temp folder permissions
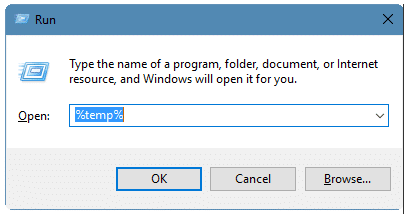
Open the Run window by thumb press the Windows+ R key.
Move ahead by typing in %TEMP% and tap the enter key.
In the empty area of the temp folder right click and opt for the properties tab.
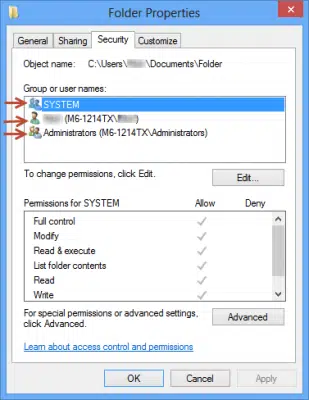
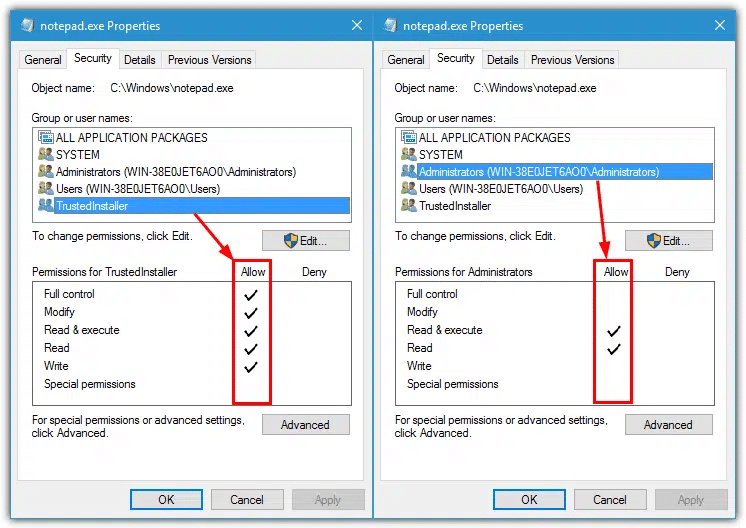
Also select security tab as well.
Ensure that all the users’ names and groups that are shown on the security tab have full control.
Once the permissions are set to full control, make sure to save as a PDF again within QuickBooks.
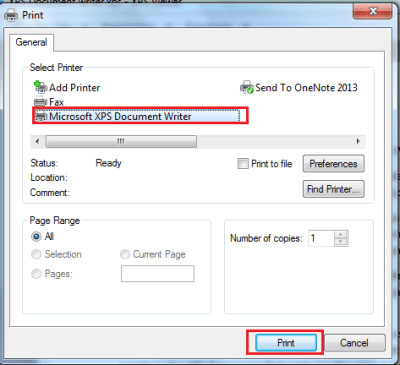
STEP 2: Verification of printing the XPS document
Initially you have to verify that whether XPS document is performing well or not so that he/she can print to the XPS document writer, as QuickBooks only makes use of the XPS document writer for saving as a PDF.
Here, first opens the notepad window, followed by typing in test. And then press the file and print options respectively.
Now, go for the XPS document writer and click on the print tab.
Furthermore, enter a filename and also save it to the desktop.
Go ahead towards the desktop and look for the document printed from notepad.
Key points to remember
There are some important factors that are to be remembered, before moving ahead:
For checking the print issues, you are required to print to the printer and check if he/she can print successfully outside QuickBooks.
And somehow if you are unable to print to the XPS printer outside of QuickBooks, then it is suggested to consult an IT professional.
If some error persists, reinstall the Microsoft XPS Document Writer.
Method 3: Testing, reinstalling, and adjusting permissions for XPS document writer
If you are tired of the above solutions that did not work for you, then you can still try to fix the issue successfully by following some basic steps.
But for that, it is important to keep some facts in mind:
Remember that Intuit doesn’t support Microsoft apps and it is also not responsible for the tools as well.
Further, if it doesn’t suit you, reach out to IT professional is recommended.
Steps to be followed here are:
Initially, it is important to test the XPS document writer and print outside the QuickBooks.
Then check for the XPS services whether they are enabled or not.
Now reinstall the Microsoft XPS document writer.
Then rearrange the Windows user permissions for XPS document writer and alter the security software settings.
Further, install or repair MSXML 6.0.
Then create a new template for the form and bypass the print spooler.
Method 4: Installed Antivirus
Sometimes the Anti-virus installed on your system interrupts the functioning of this tool. To overcome this, you need to either make changes in the settings of your anti-virus or delete this anti-virus. By doing this, you can easily fix the issue that you are facing.
Method 5: Reinstalling the QuickBooks PDF Converter
This is the most suitable method of all. Even the people who were not facing any kind of trouble with the QuickBooks PDF converter wanted to have PDF converter to be download in their system. Therefore, let’s move ahead without delaying any more, here is how to do it.
Start the process by deleting the PDF converter if it is installed already.
Then, log into Windows as an admin.
Open Printers and faxes option & then look for a QB PDF converter.
In the Next step, right-click on it and opt for delete.
At Last, download and install this tool again. And for that, we have already mentioned the steps above of installing the converter.
Concluding here!
In this piece of writing, we have tried our best to provide you with detailed info about this QuickBooks PDF Converter tool. And we are very hopeful that this blog will help you in the best possible way in resolving any kind of issue related to this QuickBooks PDF Converter tool. If somehow still you find anything tricky related to this or got stuck in any particular situation and at any stage, without any hesitation kindly contact our QuickBooks support team of experts by ringing the call at the toll-free number +1-888-510-9198.They are readily available 24*7 to provide you with quick and precise solutions of your queries.
FAQs Related to Quickbooks PDF converter tool
Can you convert QuickBooks to PDF?
You need to choose print or preview. In case you want to print the statement, choose print icon and print as you normally do. Or to save as a PDF, you need to choose download icon, and select where you want to save it on the system and choose save tab.
How do I fix a QuickBooks PDF converter?
In order to fix QuickBooks PDF converter, you can download QuickBooks tool hub and go for Program problems and further select PDF and print repair tool. This tool might take a couple of minutes to run. Furthermore, you will have to print, email, or save as a PDF from QuickBooks desktop again.
Can QuickBooks send PDF invoices?
Yes, QuickBooks lets you create and send invoices in PDF format without impacting the layout. This feature makes sharing super easy in QuickBooks.
![QuickBooks Error 1911: Couldn’t Register Library File [Fixed]](https://www.hostdocket.com/wp-content/uploads/2023/07/QuickBooks-error-code-1911.png)