Being an entrepreneur, “What’s best for your business: Bookkeeping services or Bookkeeping employees” question might have troubled you at least once in the entire working process. QuickBooks users at least once look for the answer to this question. Understanding the need of the hour, we have come up with this article, where you will get all the answer to your questions.
Difference b/w Bookkeeping Services and Bookkeeping Employees
Bookkeeping is basically a part of the accounting process that involves recording of the financial transactions. The transaction is all about purchase, sales, receipts and payments to be made by organizations or individuals. With the advancement in technology, today bookkeeping services are offered by software. However, it is always a debatable topic that whether Bookkeeping services are better for business or bookkeeping employees.
Entrepreneurs have to ensure that proper processing and assessing is being done, and also the finances are handled in the right way and more. But all these tasks are pretty cumbersome and time consuming. And this is why businesses look for ways to handle all these tasks.
If you want to know the answer to this question, then stick to the article till the end. However, for more details, you can get in touch with our accounting help team via our toll-free number i.e. +1-888-510-9198.
In order to decide from the two options, it is important to first get familiar with the perks of each of the options. Thus, following are the benefits of bookkeeping services:
Cover diverse aspects of financial management
One of the major benefits of availing bookkeeping services is that the professionals who offer these services conduct verification of data, analyse the accounts, perform audits, and accordingly caters a financial report. Not only this, but they also make the income statements, tax return records as well as maintain the balance sheets. The best part is that all the analysis that they offer give an insight of the business trends, growth opportunities as well as cash flow management strategies, which makes Bookkeeping Services beneficial for the businesses.
Reduced risk of errors and omissions
Coming to the next perk of bookkeeping services, it reduces the risk of errors and omissions. The bookkeeping service providers are known to handle the rebates, the gross amount of sale, net sale amount as well as other financial transactions. In simple words they are the ones who decide how to handle transactions and bookkeeping activities without any kind of errors, which makes it a good option for the businesses.
Cost-effective
The issue of overhead costs is one of the major concerns of majority of businesses. Apart from this, it is offering the base salary and there are many additional costs incurred by the employers on hiring employee which consists of payroll taxes, medical benefits, sick days, retirement plans, screening interviews and more. All these extra costs can be avoided by availing bookkeeping services as they aren’t very expensive as they seem to be. Thus, the entrepreneurs consider Bookkeeping services beneficial in terms of cost effectiveness.
Now that we have explored the benefits of Bookkeeping services, we will now check out the benefits of bookkeeping employees.
Daily Transaction Records
One of the most compelling benefits of having bookkeeping employee is that he/she keeps record of the day to day transactions. The Bookkeeping employee maintains purchases, payments, sales and receipts through a general ledger. They also use certain software to keep track of credits as well as debits. Moreover, they also make a trial balance which makes tracking of cash flow much easier. All this adds to the pointers to opt for Bookkeeping employees.
Easy Data generation of organization’s financial activities
Bookkeeping employees generate data of the company’s financial activities on a daily basis and in the long term this data turns into information that helps in handling the financial issues of the company. The data also assists the entrepreneurs in avoiding unnecessary expenditure and ultimately this leads to lesser chances of missing on bills or payments.
Easy Follow-up
Another benefits that adds to the list is that opting for bookkeeping employees makes it very easy for the entrepreneurs to keep a check on the performance of the bookkeeping employees and also follow-up with them. This actually induces more productivity as you can get the work done as per your requirement.
Here is a table to compare the differences between bookkeeping services and bookkeeping employees:
Factor
Bookkeeping Services
Bookkeeping Employees
Definition
Outsourced services provided by professional bookkeepers.
In-house bookkeepers who are employed by a company.
Cost
Typically, more expensive than hiring an employee, but can save money in the long run.
Generally, less expensive than outsourcing, but can be more expensive in the long run due to benefits, taxes, and training costs.
Experience and Expertise
Bookkeeping services are typically provided by experienced professionals who have expertise in various accounting software and techniques.
Bookkeeping employees may have less experience and may need training to keep up with changes in accounting practices and software.
Flexibility
Bookkeeping services offer a high degree of flexibility, as they can be scaled up or down to meet changing business needs.
Bookkeeping employees may not be as flexible, as their workload and responsibilities are tied to the company.
Availability
Bookkeeping services are generally available 24/7 and can be accessed from anywhere with an internet connection.
Bookkeeping employees may have limited availability, as they may only be available during regular business hours.
Data Security
Bookkeeping services typically have robust data security measures in place to protect client information.
Bookkeeping employees may not have the same level of security measures, as they may not have access to the same resources as professional bookkeeping services.
This table provides a general comparison between bookkeeping services and bookkeeping employees. The best choice for a company depends on a number of factors, including cost, experience, flexibility, availability, and data security.
Disadvantages of Bookkeeping Services
Now that we have explored a lot about the perks of both the options, it is better to get familiar with the negatives as well. The negatives of Bookkeeping Services also include the following:
Inaccurate/late financial report
When the users avail bookkeeping services, at times there are chances of meaningless or incorrect accounting or bookkeeping reports. This can affect the functioning of the business and that’s why many businesses prefer in-house bookkeepers as they work with dedication.
Follow-up regularly
Even the idea of hiring bookkeeping services seem to be an easy solution, at times it becomes quite difficult as you do not get them in-person. This makes the task of tracking their work and follow-ups pretty difficult.
Disadvantages of Bookkeeping Employees
Limitations Ahead:
Even though the in-house bookkeepers may be very efficient in maintaining the finances and transactions but they often lack expertise in various other aspects. However, the bookkeeping service providers have a big team where each professionals have expertise in different niche and this makes the work a lot easier.
Distraction from Core duty:
It has been often noticed that in many businesses the bookkeeping employees are provided with additional responsibilities like human resource and this distracts them from the main work. This eventually affects the task of bookkeeping and for which organizations have to face many hassles.
As we have given a proper insight about the pros and cons of both bookkeeping services and bookkeeping employees, now making the right decision for your business falls on your part. The decision largely depends on the type and need of the business. Thus, before you jump on to any conclusion, first analyze the requirements of your business. The in-house bookkeeper is a great option for small business, but if you are a bigger organization and in a tight budget then bookkeeping service is the perfect option for you. Choose wisely so that your financial transactions are sorted.
For any doubts and queries or if you are still unable to decide which option to opt for, then connect with us and our experts will be ever ready to help you. Dial toll-free number i.e. +1-888-510-9198 to communicate with our accounting experts and Certified ProAdvisors. And we will be there to assist you in a single call.
Learn the updated QuickBooks ProAdvisor program, membership, training and certification
What is QuickBooks ProAdvisors? What actually they do? And why the users need it? Well, these questions commonly arise in the minds of QuickBooks users. If you have similar questions, then you have landed in the right place. Today, we will be discussing each and every aspect associated with QuickBooks ProAdvisors, just like the ProAdvisor program, membership, training, certification, and many other things.
Thus, stay tuned with the article and explore further. Or you can also get in touch with our QuickBooks consulting team at our toll-free number .i.e. +1-888-510-9198, and they will clear all your clouds of confusion.
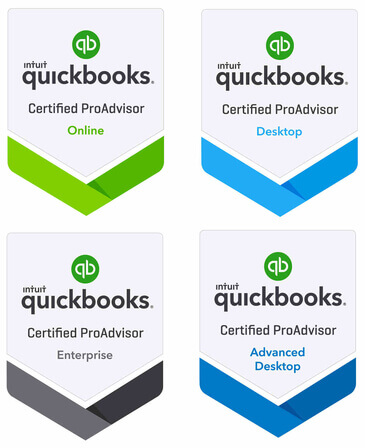
What do you mean by QuickBooks ProAdvisors?
Basically, QuickBooks ProAdvisors are an accountant, a bookkeeper, or a CPA, who generally have a certification and along with that offers a large variety of services which includes, accounting, tax and financial planning, computer consulting, bookkeeping, etc. After exploring and analyzing the exact position of the business and also what is required for reaching on top, the QuickBooks ProAdvisors provide the strategic tools. In simple words, it can be said that QuickBooks ProAdvisors are there to assist the businesses in improving the accounting and bookkeeping management of the business, with the ultimate goal to increase the growth of the business.
Coming to the QuickBooks ProAdvisor Program, it can be said that it is a program that enables the experts in accounting and bookkeeping to provide expert advice and suggestions with the best tools and strategic methods. This program comprises of software, tools, and resources for all the accountants and the bookkeeper. It has almost everything that the user required for supporting the QuickBooks clients and improve their practice.
This program allows the accounting professionals to augment their skills, as well as improve the growth of their firm, and also to become an expert by providing certain benefits, such as strategic marketing tools, customer care, training, and also the product discounts. Many QuickBooks users wish to take the membership of this ProAdvisor Program, as it offers amazing benefits. Let us have a look at the benefits of this program:
Benefits of QuickBooks ProAdvisor program membership
Checkout the benefits of ProAdvisor program membership of QuickBooks:
1. QuickBooks Online Accountant
This is a platform provided for all the accountants and QuickBooks users, where they can manage as well as practice their accounting skills under one roof. This is especially designed to enhance the accounting skills and the business. It is an all-in-one portal, that keeps the Desktop, as well as the Online benefits with each other under a single roof.
The features of QuickBooks Online Accountant include:
Regardless of the location, QuickBooks users can get Certification Courses from QuickBooks ProAdvisors. It should be noted that all the memberships come up with certification courses, where one can make the best of use of one’s knowledge and also earn CPE credits. Free memberships provide QuickBooks Online certifications, whereas the deluxe and the Premium memberships add certifications for Desktop Software.
The user can also access the certification page in QuickBooks Online simply by selecting ProAdvisor in the left-hand navigation menu, followed by clicking on certification.
3. Find a ProAdvisor listing
Each and every version of this program includes a listing on the Find a ProAdvisor site, which is a directory of accounting professionals used by countless businesses to find and connect with the ProAdvisors. If the user completes at least one current certification, the user will be eligible to publish their own profile so that the prospective clients is able to discover the QuickBooks user.
Every ProAdvisor membership comprises of infinite access to chat and also phone support. While the support is convenient to all the ProAdvisors, completing the certification courses makes you eligible for much better support from some of the experts.
5. Rise according to the Rank
In the process of becoming a ProAdvisor, the user can avail numerous benefits. This generally depends on the points, which means the number of points that they have earned. These points will help the user to become a ProAdvisor.
Marketing Tools
Silver
0-199
points
Gold
200-799
points
Platinum
800-1,599
points
Elite
1,600+points
In Find-a-ProAdvisor Directory list
✔️
✔️
✔️
✔️
Constant contact Email marketing tool
✔️
✔️
✔️
✔️
Squarespace website builder
15%
20%
25%
30%
Intuit Marketing Hub
✔️
✔️
✔️
✔️
QuickBooks ProAdvisor merchandise store
✔️
✔️
✔️
Product
Support
Chat and phone support
✔️
✔️
✔️
✔️
Priority Chat and phone support
✔️
✔️
Training
Online certification and training
✔️
✔️
✔️
✔️
In-the-know webinars
✔️
✔️
✔️
Professional QuickBooks online training for your clients
Complete advanced certification is there for
QuickBooks online.
Intuit has launched Redesigned QuickBooks ProAdvisor
As the recent press release by Intuit, it has launched a redesigned QuickBooks ProAdvisor that provides further support to the accountants and bookkeepers. This program not only offers customer support, training, and software discounts, but also it offers plentiful other benefits such as:
In order to display their expertise, QuickBooks users can access gold, silver, or Elite membership.
There are guides obtainable, along with templates and other marketing resources of the new Intuit Marketing Hub, that can be accessed only by a ProAdvisor.
Also, in this program, there are a few grow your practice workshops and masterclasses that might assist in improving the business.
Special discounts are also available for the ProAdvisors who want a deeper connection with the clients.
QuickBooks Advanced Certification and its importance
It should be noted that all the QuickBooks Advanced Certified ProAdvisors are required to complete 9 CPE credits of Advanced Continuing Education (ACE) approved training. The above mentioned thing is to be completed within 3 years of getting the certification. Thus, after every 3 years, the QuickBooks users will have to again earn 9 CPE credits. The reasons why anyone should attend QuickBooks Advanced Certification include:
By attending this, the user becomes a professional by acquiring in-depth knowledge of QuickBooks online.
The user also obtains the Advanced Certified ProAdvisor status and be awarded by a certificate and a logo.
Below we have shared a list of membership type with their benefits and description.
Membership Type
Price
Benefits
Description
Free
Free
QuickBooks Online Accountant (QBOA) with a free set of books for your company, Client file management tools, Practice management tools, Technical support, Free online payroll subscription, QuickBooks online certification courses
Adds Desktop accountant and everything you need to support Pro and Premier desktop clients.
Deluxe
$349
per year
It includes everything from the free membership. Also comes with:
QuickBooks accountant desktop, Technical support, Certification courses for QuickBooks desktop, Discounts for Pro and Premier software
Adds Desktop accountant and everything you need to support Pro and Premier desktop
Premium
$549
Per Year
This plan includes everything from the free membership deluxe membership, also it comes with:
QuickBooks point of sale, QuickBooks enterprise solutions, QuickBooks for Mac, Free technical support, Certificate courses for enterprise and point of sale, You will get discounts for variety of QuickBooks products.
Adds Desktop accountant and everything you need to support Pro and Premier desktop
Add-ons (Deluxe and Premium)
Price
Benefits
Description
Enhanced Payroll for Accountants with ProAdvisor discounts
$249
Per Year
You can run your payroll in QuickBooks desktop for up-to 50EIN’s, You can also access all variants federal and state forms
Run Payroll for your desktop clients at a sharp discount
Steps to download the software?
Downloading the QuickBooks ProAdvisor software doesn’t involve any rocket science. It is simple procedure, all you need to do is follow some simple steps:
With this we come to the end of this article. Continuing the QuickBooks ProAdvisor practice is a sign of smart entrepreneurs, as this improves business growth at large. I end this post here, with the hope that it might work in your favor. If you want further discussion on this topic, or if you have any query, you can dial our toll-free number .i.e. +1-888-510-9198, and talk to our certified QuickBooks online support executives and QuickBooks professionals.
FAQs Related to QuickBooks ProAdvisor Program
Can Anyone Become a QuickBooks ProAdvisor?
Yes, anyone can become a ProAdvisor, as long as he/she is willing to prepare for and pass the exam. In case you are an accountant or bookkeeper, then becoming a ProAdvisor is something suggested, as it would further help in advancing the career and obtain QuickBooks benefits.
How to become a QuickBooks ProAdvisor?
In order to become a ProAdvisor, you must first sign up for QuickBooks online accountant and further study for and pass the certification exam. You need to score 80 percent or higher in order to pass the exam.
Is there a fee to obtain a QuickBooks ProAdvisor Certification?
No, obtaining QuickBooks online ProAdvisor certification is free. All you need is to sign up for a free QuickBooks online accountant subscription, and study the training materials to pass the exam.
Will my QuickBooks certification expire?
Yes, it will, the expiration of the certificate depends upon the type of certification you hold. QuickBooks online ProAdvisors need to recertify by June 30 each year, in order to maintain their certifications.
QuickBooks is the world’s leading accounting & bookkeeping application for your business because it offers wide range of product as well as services. The QuickBooks Online Accountant is seamless for every category of industry and each & every sort of task. This accounting software can almost do whatsoever associated with financial management and make your tax season easier. As tax season is coming up, it is time to bring all the financial documents together. Being an entrepreneur or a business owner, this period is very hectic and tedious, if you don’t have QuickBooks financial application. Once you will purchase this accounting application for whole year, this will simply mean that you will no longer need to rush through gathering financial documents and end up with missed assets & deductions.
Having clean books and easy to understand financial statements, will lower your tax preparation costs and will give you much clearer understanding of the tax situation, not to mention the ability to plan and avoid surprises down the line. Through this post we have presented you benefits of QuickBooks accounting software which make your tax season easier.
Your Choices of Accounting Software Which is Suitable for your Business
QuickBooks Pro:
QB Desktop Pro also has fantastic attributes in it. It is the very best small business accounting software. QuickBooks Pro reveals you exactly where your organisation stands financially and far more. With the help of QuickBooks Pro software, you can manage your day-to-day tasks swiftly and efficiently.
QuickBooks Enterprise:
QuickBooks accounting software has actually included several versions, however a couple of are incredibly popular than other versions. For example, QuickBooks Enterprise solutions provides you 3 options:
Silver
Gold
And platinum edition.
QuickBooks Enterprise is a more powerful version as it can track all your accounting details, inventory items, vendors and much more.
QuickBooks silver edition has several powerful attributes.
The QuickBooks gold edition has everything consisted of in silver, plus improved payroll.
QuickBooks platinum version includes everything that the silver and also gold include, with a few bonus. As an example, it additionally comes with advanced inventory and also pricing.
QuickBooks Accounting Solutions – That Collects all Your Data
This software aids you arrange everything in one location. You do not need to fret to collect all your budget reports, financial records, and invoices. Consequently, the software is easier for you to access and even more user-friendly. You can deal with all your costs by tracking and paying expenses via the software.
It additionally offers you the option to sync with your online banking right to QuickBooks. The attribute called “Income Tracker” will aid you to produce a transaction record for your whole year or details duration. You will get automatic reports that you can select to personalize and also schedule. Obtaining reports and also solutions have never ever been simpler.
Eliminate Ghost Assets
A ghost asset is a fixed asset in general ledger which cannot be accounted because it is physically missing or rendered unusable. Not properly recording these collapses could lead to negative results in your taxes. QuickBooks accounting and inventory management software helps in avoiding these ghost assets.
This accounting software comes with tools which help in tracking your inventory along with advanced inventory tracking and inventory reporting. This report shows your company’s assets and helps calculate your COGs for the year, which you need to know for certain tax forms. Also you can customize these reports to include assembly summary, valuation summary and inventory reporting.
Don’t Forget Deductions
You may know a few deductions but less you remember you
could forget some which may have an impact on your taxes. Government uses these
deductions as a solution to encourage spending in places that they want you to.
Example of possible tax deductions includes the use of the contract labor,
vehicle expenses and then rental of business property, utilities, supplies and
more. It’s sad but many business owners forget about certain deductions,
resulting in less tax breaks than they deserve.
QuickBooks software can help you track your business with a click of a button. Reports containing information will now be easy to use and organized by category. The income-related transactions. By managing deductions you can ensure minimum mistakes and help maximize either many back or less money to pay.
QuickBooks accounting software offers many great choices but
some are more popular than others. For example, Enterprise version offers you
three options: silver, gold and platinum. It is the top-notch solution to track
all your customers, vendors, inventory items and much more.
Platinum edition includes every feature of silver and gold
including enhanced payroll, advanced inventory and pricing.
For small businesses, Desktop Pro is considered the best accounting software. It is true software showing exactly showing where your business stands financially and much more. It also helps in daily tasks efficiently and quickly. Desktop Pro Plus has the entire feature which Desktop Pro has plus some added specific features to complete daily business chores.
Organize all your data with the help of QuickBooks software
This software helps you in collect everything in one place. With QuickBooks you don’t have to worry to collect all your expense reports, receipts and financial records. This software is very to access and user-friendly. You can handle everything through the software like all your expenses by paying and tracking bills. It gives you an option to sync with your online baking straight to QuickBooks.
The tracker of income feature will help you create a transaction report for your entire year or for a specific year (based on your choice). You can choose customize and schedule feature to receive your automated reports. Easy way to get reports and answer is QuickBooks.
One of the most important aspects of using QuickBooks accounting software is that data loss can never happen, it automatically saves a backup of your company file in the main server, in case the software crashes. Just think of it that your company file is in wrong hands by accident, it can jeopardize all your business efforts. The abundance of confidential data, such as financial balance, account numbers, social security and employer identification numbers will be at huge risks.
Business owners must consider such accounting software which can describe security features in detail such as malware technology, anti-spyware and firewall protection.
Conclusion
I hope you found this information helpful for make your tax season easier. If you have any questions regarding make your tax season easier or need further information, you can simply dial our QuickBooks technical help service number .i.e ++1-888-510-9198. Our Intuit Certified ProAdvisors will look forward to your concerns and provide you a feasible solution for your queries.
FAQs
Can I use QuickBooks for tax return?
In case you use QuickBooks Self-Employed to track expenses, sort them, and record your income, filling out your tax return becomes easy. All you need to do is download your Tax Summary and use it to complete your Self Assessment
What functions does QuickBooks have for tax?
QuickBooks can automatically perform the sales tax calculations on invoices and receipts for easy and accurate filings. Then, it lets you know when your tax payment is due, so you can file on time and avoid extra fees.
How to use QuickBooks desktop for taxes?
To use the QuickBooks desktop for taxes, the user can use the steps below and add sales tax item and rate. 1. At first, head to the list menu and then choose the item list 2. After that, select new and open the new item window 3. The user is then required to select the sales tax item 4. Now, enter a sales tax name 5. After that enter a description 6. Also, enter the sales tax rate or dollar amount
How to run a tax report in QuickBooks online?
For this, you simply need to perform the steps below: 1. The first step is to head to the business overview and then choose reports 2. Now, in the find report by name field, look for sales tax liability report 3. The user needs to choose the report period dropdown 4. After that choose the tax agency dropdown 5. Now, select run report 6. And then, look at the tax amount column
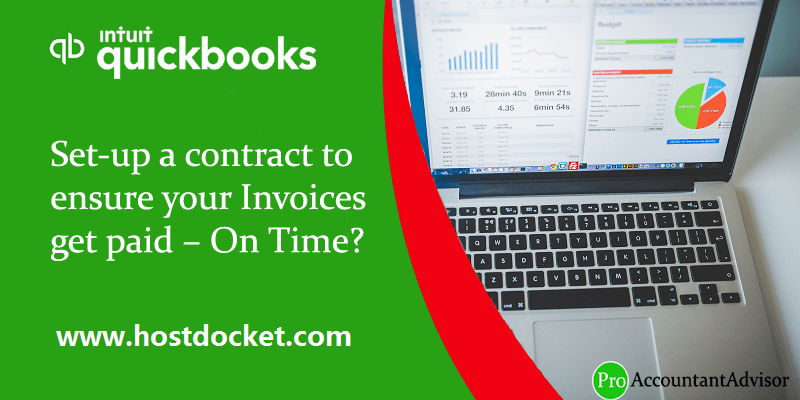
QuickBooks is one of the best bookkeeping and accounting software available in the market. Shrewd businessmen know that when we set-up a contract is important to maximize the chances of getting paid in a timely manner. In this post we will discuss about set up a contract to ensure your invoices. A well-structured contract will get over a large range of set expectations, variables, and keep you encrypted in the event of the disagreement in your business relationships. When a contract is in and of itself, it does not guarantee that your invoice will be paid or breach of contract happens. It can help you in better legal protection if in case your client does not pay an invoice.
In this post, we are going to discuss the complete procedure to set up a contract to ensure your invoices get paid on time. Thus, make sure to stick around this piece of writing till the end. Or you can also reach out to our Certified ProAdvisor for any queries related to QuickBooks. Ring up to us at +1-888-510-9198, and our technical team will clear all your clouds of confusion.
If something is important to your success in business then include it as a provision in your contracts. Below we have discussed 8 things every contract should have:
The exact work to be delivered
Important deadlines
Rules for revisions
Contact information
Termination Clauses
Intellectual rights & release information
Payment terms
Shipping terms
We know that every business is unique and it’s better to ask for assistance from your contract lawyer to lock down the specifics of your contract to ensure that it will hold up in court in the worst scenario.
If you also provide digital services then specify the wanted length of an eBook or article, the total number of Web-pages have to be designed or the number of a tease for a logo.
As a landscape designer, keep in detail how many plans you will finish and whether the gets client gets to keep them.
Interior designer may indicate which rooms will be taken out and how many furniture options will be provided for each.
2. Important Deadlines
Make a deadline for the completed work product but also include milestones on the way to keep the team under the thumb.
Do not overlook adding in dates for deliverable which client will provide like background documents, brand guides and samples.
3. Rules for Revision and Edits
Sometimes, even with your best efforts, you cannot hit the mark on some products. If you are a
service provider who wants to ask
changes, this part of the contract will detail how many revisions will be
included in the genuine scope of the task and how will you manage additional
requirements, should they arise.
4. Contact Information
Confirm your chosen method of contract and ensure that you
have a day-to-day contact on the client side and the information on other team
members who will be approving/reviewing your work.
Describe how much attention which party needs to give if one of you decides to suspend the task.
This protects both sides: It neglects to leave the client in the lurch and then provides them more than enough time to find another provider if you do not want to continue work with them and safeguards your income so that they do not disappear without prior notice.
6. Intellectual Right & Release Information
Mention copyrights, details on who owns any intellectual property which is created.
An indemnity clause is dependent on whether you may quote completed work in your personal portfolio plus other relevant issues related to legal rights.
7. Payment Terms
Answer the questions mentioned below when you are preparing
payments terms for your contracts:
How swiftly do you need to get paid to make sure
plenty cash flow or working funds?
Does getting salaried early justify offering an
early pay concession?
What will happen if you don’t get paid on time?
Will you be charge interest?
Will you withhold the past due balance from
future orders?
Will you take the product back?
Will you decline future shipment until payment
is made?
Payment terms can be both simple and complex. Prepare
payment terms in such a manner that you will get paid on the terms which can
best protect your business and be crystal clear about what steps should be
taken in the situation when you are not going to get paid.
8. Shipping Terms
If in case your services indulge logistics which is the
situation with a large range of
businesses from retailers to builders, it’s mandatory to address such shipping
terms in your contract:
When is the product going to be delivering?
Who is accountable for paying for shipping
costs?
Who is responsible for any damage that occurs when
the products are in shipment?
When does the being paid party take title to the
goods?
Should the receiving party have a chance to examine
the goods for conformance upon receipt? How long should that examination phase
be?
Now, let’s discuss what these contracts are, their benefits and things to take care of when using each variety of contract.
3 Types of Contracts to Robust Your Business Goals
When it comes to set up a contract to ensure your invoices then one size does not fit all. That is why you will want to set up your contract which works best for your business and fulfills the needs of your client.
The 3 most common contract constructs are:
Retailer Contracts
Hourly Contracts
Project Based Contracts
Before performing the process to set up a contract to ensure your invoices, let us understand what are the types of contracts mentioned above, their benefits and the things to be taken care of in each type of contract?
1. Retainer Contract:
What it is: A retainer is a large sum paid to a provider which basically serves “rent” for your services for a specific amount of time each month. Your client will pay a fee upfront, assume $3,000, and you’ll bill against that amount for your services, depending on an hourly rate. This agreement works well if you regularly do a variety of work for a client that requires a different skill set.
Benefits: This type of agreement allows both the service provider and client to budget without surprises and without having to devote time every month to make a scope of work. Plus, it means that you as a service provider will know that you need to be left to that single client for some period of time every month so there’s no need to fill up your calendar just when they need you.
Things to be taken care of: You will want to line out what happens when you’re deadline goes over and under, with a retainer agreement. Let’s take an example, your client is on vacation and ignores 2 calls and 1 release. Should you apply that amount to the coming month or make additional work to make up the difference? Ensure that your contract includes clear expectations for how to handle this situation and a plan for when you will alert the client which you are nearing the limit of the retainer.
You will want to watch for “scope creep”, which mainly happens when projects expand. Lets us understand with an example, sometimes a client may come to a builder with a variety of change orders once they see their home materializing, or decide that they don’t like the cabinets after all, which can lead to costly delays. Or, a customer may ask an interior designer to “just take a quick look” at another room while you are presenting concepts for a kitchen or change their mind and request color of blue when they had specific shades of yellow. Now, how you will handle scope creep, like whether you will maximize the retainer or project fee or bill hourly.
You will be billing for your services on as decided hourly rate. Some freelancers prefer to bill different services at different rates, for the example, client meetings are billed at less than writing work or strategy bills maximum than research. Ensure that your contract is specified on the rate, including a cap if needed.
Also make sure to track your time carefully, so that you can provide a complete project summary on the bill of how much time was spent on what tasks.
Benefits: Scope creep is specially eliminated in an hourly-based agreement as the client is literally getting what they are paying for.
Things to be taken care of: Hourly work can immediately escalate without the client realizing it, creating a surprise bill. Discuss the limits of agreed-upon for hourly work with your client, and ensure to keep them in the loop as you reach the cap. Then they have the choice of prioritizing the work to stay below the ceiling or allowing you to continue to bill.
3. Project-Based Contracts
This type of contract depends to a specific scope of work; for the example, building a deck or installing new features.
Benefits: Project-based contracts clearly denote the scope of work and allow you to remain focused on one agreed-upon goal. It also gives a perfect reason for trying out a client and vice-versa, to ensure that your work styles and expectations are comfortable. As the project is over, you can agree to part ways or decide to work on a new project.
Things to be taken care of: Parameters and work products must be clearly and completely described so that there could be no confusion on what exactly the deliverable are. In other words, check how many design meetings you will hold and exactly what materials will be included. Will you clean up a work-space every day or at the end of the job?
4 Important things to consider when dealing with the set up a contract to ensure your invoicesget paid timely
As a business owner, your #1 goal is to get paid. In case if you have experienced that client is not paying on time before then you may be shocked to learn that making “Payments” section of your contract is clear as water and can help you ensure that you get paid in a regular period of time.
Here is what payment information you must include in your contract:
1. Payment Methods:
Your customer may have told you how they typically pay their
partners, or you can let them know if you have a preference. Note that the
easier you make it pay you, the quicker your client is likely to pay.
That is why it’s important to accept large types of payment methods on your invoice, from checks to credit card. Another popular choice is an automatic bank transfer, known as Automated Clearing House (ACH), where money moves directly from the customer’s bank to your bank. QuickBooks also has a feature as “Pay Now” button on your invoice which can actually make payment process up to two times faster.
2. Payment Terms:
This tells your client to understand when the bill is pending. The most common term is “Net 30” and it means that the customer must pay within 30 days. But you can also specify other terms. Always add a deadline to your invoice hence the clients get busy too and they want to know when they have to pay to you.
3. Late Fees:
Most of the clients are bound to pay on time, but if a payment is unpaid then this can lead to a disaster on your budget. That’s the reason it is considered smart to allow the customer to know up front that you will be applying for a late charge if their account goes 30 days past.
You can select to add a surcharge or make it a percentage of payment. Let them know if you have planned to pause work if they do not want to pay in a certain period of time. Even though many contractors do not want to stop work and you may find it to be an exceptional method for “reminding“ clients which need to pay.
4. Installment Invoicing:
Do not wait until the end of the project for payment? It is great to build in payment milestones all along the way. QuickBooks Invoicing feature gives freedom to invoice in installments, as specified in your contract with your customers or clients. That is helpful generally for a project-based task where you might want to bill a percentage up front and then in some increments along the way as you hit projected milestones. QuickBooks will automatically track payments to show what you have collected and what is still outstanding to ease your accounting.
I hope with the help of this post you have set up a contract to ensure your Invoices to get paid on time. For any kind of queries you can get in touch with our QuickBooks help team anytime at +1-888-510-9198. Our certified ProAdvisor are always ready there to assist you.
FAQs Related to Set-up a contract to ensure your Invoices get paid – On Time
Can you create a contract on QuickBooks?
QuickBooks contract management is a cloud based software designed by Intuit to help businesses in managing their contracts and records. Using this, you can set up a contract to ensure your invoices get paid on time.
How do I track time and invoice in QuickBooks?
In order to turn on time tracking, you can perform the below steps: 1. At first, go to get paid and pay, and further choose time. 2. The next step is to select why you want to track hours. 3. You now have to choose if you want basic time tracking in QuickBooks online or if you want to try a QuickBooks time account with more time tracking features.
Does QuickBooks automatically apply payments to invoices?
You can choose automatically apply payments, in case you want QuickBooks to automatically apply a customer’s payment to the outstanding invoices. In case the amount received is less than the customer’s outstanding balance, then QuickBooks applies the payment to the oldest invoices first.
Can you make a receive payment transaction recurring in QuickBooks?
For this, you need to perform the steps below: 1. At first, open an existing transaction. 2. Now, choose make recurring in the footer of the form, to create a template. 3. In case you opened an invoice, you can choose automation and then go for recurring invoice.
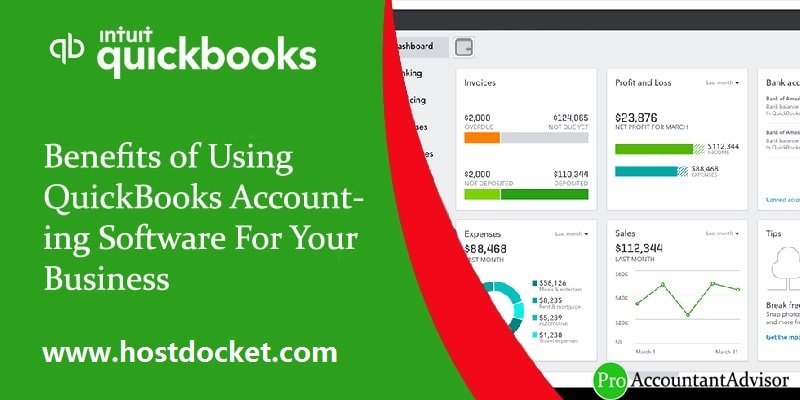
QuickBooks is one of the finest accounting software. The features and functionalities it offers, is what makes it unique and most productive for majority of businesses. If you are planning to get your hands on QuickBooks, then this article is surely something that you can look into. In this segment, we are going to tell you how you can get benefits of using QuickBooks accounting software.
However, if you are looking for professionals guidance, then speak with certified QuickBooks technical support ProAdvisors you can dial our toll-free number i.e. +1-888-510-9198. We will be more happy to help you out in this matter.
Understand these facts before you choose an online accounting software for your business
The various versions and features of QuickBooks have proved to be instrumental in the success of millions of business personnel all across the globe. If you are starting a business, it’s necessary for you to know what an accounting software do for you. Learning how a software can help you run your business can be helpful for you in multiple ways.
There is no denying that the internet is loaded with hundreds of accounting software and other gizmos, and choosing one that suits your requirements can be challenging. And that’s why to extricate you from a situation like that we have created this blog post. After you read this, you will be familiar with some of QuickBooks most useful features and advantages, and you will be able to reach the conclusion if it’s going to be instrumental for you not.
Useful tips to choose the right accounting software for your business
The reviews of different websites, as well as innovative advertisement, may lure you into buying them. But not all reviews and advertisements are based on true experiences. By being a little cautious you can save yourself from any sort of tricks.
If you listen to business owners and accounting experts, QuickBooks accounting software is totally worth your money. The software is particularly accommodating for small and mid-sized businesses. It can multitask for you, help you save money and time that you can use in further expanding your business and achieving new business goals.
Some of the major issues that an organization may face are bookkeeping, accounting, and preparing taxes. QuickBooks does that all for you. The software is available online and is easy to install and use (See – how to setup and install QuickBooks desktop).
Since the makers of QuickBooks keep introducing new features and tools in the software, it’s necessary to purchase the most updated version. If you still not sure if you should embrace QuickBooks or you need to know about the robust software, you can read on and you will have your reasons.
Further in this article, we are going to discuss various QuickBooks desktop editions and their major features.
QuickBooks Basic and Pro
QuickBooks Basic, also called QuickBooks Simple Start, is designed and recommended for beginners who own small business. This edition of QuickBooks supports one user at a time. For multi-license, small business owners can upgrade to QuickBooks Pro. You can speak to our QuickBooks Pro support if you wish to upgrade or require any assistance.
QuickBooks Online
This edition enables up to 3 users to use QuickBooks at the same time. The advantages of QuickBooks Online include automatic invoicing, entering invoices, and protecting crucial data. This is an appropriate version of the accounting software for small companies who want to be more productive and keep their data safe at the same time. For any query or assistance, you can contact our QuickBooks Online Support team anytime.
QuickBooks Retail: Point of Sale
QuickBooks Point of Sale is an advanced edition that can be installed on a PC and can be functioned as a cash register. For query or assistance in regards to this advanced edition, you can speak to our QuickBooks Point of Sale Support team.
QuickBooks Premier
QuickBooks Premier is an advanced edition of the accounting software that can be used by a maximum of five users at a time. It enables you to create Inventories, bills of material, industry-specific reports, business plan, and email orders. In case you have any query or you need any assistance, you can contact our QuickBooks premier technical support team.
Points to consider while choosing QuickBooks Accounting Software
Before learning about the major benefits of QuickBooks accounting software, it is imperative to acquire some knowledge required to choose the right QuickBooks edition.
Firstly, what you require to comprehend is the long-term and short-term requirements of your organization. Once you know what your business may require, you can pick the right and appropriate QuickBooks edition. The software is available on the internet. You may also receive, along with the details of the QuickBooks version you wish to buy, many other contemporary things but make sure you only purchase the necessary products.
You must also ensure the vendor as well as employment stability. This step will provide you with some clarifications for the right accounting software.
It’s necessary for you to know what your business may require and what can be useful for you. You must not be dependable on your vendors to take decisions for you.
Some good to know features of QuickBooks
There might be significant differences between versions of QuickBooks accounting software. Additional features and advanced tools may add up to the price of the software.
A great way to know the worth of this product is calculating the time it may take to complete a particular task. Next, find out the cost and time of labor that may be required to perform the same task. Check yourself how useful QuickBooks can be for you.
SAAS vs. Desktop
SAAS, or software as a service, is for businesses who wish to do experiments with new brands and products. While Desktop products are for business owners who want to make a one-time investment and use the software forever.
Future Aspects
QuickBooks is a robust software and picking the right version can do wonders for your organization. This online software can assist you to multitask if you are starting your business or just started your business. Once you start achieving growth, you can also invest in better QB products with advanced features and tools. These products may be a little pricier but will prove to be a deal in long term.
QuickBooks strengthens businesses of different sizes and sorts. Whether you require multiple employees to operate your business or you have your business at more than one location, QuickBooks accounting software can provide you with various bookkeeping and accounting solutions.
Advantages of QuickBooks Over Other Accounting Softwares:
Feature / Advantage
QuickBooks
Competing Accounting Software
User Experience
Intuitive interface, easy to learn and navigate, well-designed layout, and user-friendly dashboard.
May vary by software, with some having more complex or less user-friendly interfaces.
Integration
Seamless integration with a wide range of third-party apps and services, such as payroll, e-commerce, and CRM.
Varies by software; may have fewer integrations or less seamless connectivity.
Customer Support
Extensive customer support, including phone, email, live chat, and an extensive online help center.
Customer support options and quality may vary.
Customization
Highly customizable reports, invoices, and templates that can be tailored to fit the needs of various industries.
Customization options may be limited or less robust.
Scalability
Offers various plans and pricing options, catering to businesses of all sizes, from self-employed to enterprises.
May have fewer pricing tiers or less scalability for growing businesses.
Cloud-based Solutions
Access to cloud-based versions (QuickBooks Online) for real-time data access and collaboration from any device.
Some competitors may not offer cloud-based solutions, or their offerings may be limited.
Inventory Management
Comprehensive inventory tracking and management features, including multiple locations and low stock alerts.
Inventory management capabilities may be limited or not as comprehensive.
Payroll Processing
Integrated payroll processing options that can streamline payroll and taxes for both employees and contractors.
May require third-party integration or may not offer as seamless a payroll experience.
Mobile App
Offers a robust mobile app for iOS and Android, allowing access to key features on the go.
Mobile app functionality may be limited or nonexistent for some competing software.
Bank Reconciliation
Easy and efficient bank reconciliation process with automated transaction matching and categorization.
Bank reconciliation may be more manual or less efficient in competing software.
Tax Preparation
Built-in tax preparation and filing tools, making it easier to file taxes and stay compliant.
Tax tools may not be as comprehensive or may require additional integrations.
Multi-currency Support
Supports multiple currencies for international transactions and accounting, with automatic exchange rate updates.
Multi-currency support may be limited or less user-friendly in competing software.
Reporting & Analytics
Offers a wide range of built-in, customizable reports for financial insights and analysis.
Reporting options may be more limited or less customizable in competing software.
Ecosystem
Large and active community of users, developers, and third-party apps, ensuring continuous improvement.
Competing software may have smaller ecosystems or less active communities.
*Please note that the comparison may vary depending on the specific accounting software being compared. It’s important to research and compare different software options to choose the one that best fits your business needs.
What you should know before buying QuickBooks
You might not possess significant knowledge of various online accounting software available in the market if you just have started a business. There are a few things you must keep into consideration before making any purchase.
Check the features of the software you are considering to purchase. The internet is loaded with accounting software with a plethora of features. But beware, not any seller selling them can be trusted. Always check if the website selling them is authentic before you give out your card details.
Have a look at the features of the software and make a note of them. Also, make sure that they are easy to use. The process of using the software must not be complicated. That should be user-friendly so that you can use even without proper training.
Ensure that the software is compatible with the system you use.
The software must be budget friendly and offer you all those features that are you require.
Why to choose QuickBooks accounting software?
QuickBooks is trusted by millions of business owners all around the world. It comes with an abundance of useful features and tools and is also very user-friendly.
QuickBooks can significantly contribute to the growth and finical profit of your organization.
Business owners using QuickBooks accounting software have reported major growths in the profit of their organization.
QuickBooks fixes one of the major causes of clashes between employees and employers which is the payroll issue this software can help you deal with the event most of the complicated payroll problems with ease.
Along with its user-friendliness, QuickBooks is also known for its flexibility. It helps people to take care of the production of the firm.
Another reason you can pick QuickBooks about others is its accessibility. A user can access his account from anywhere QuickBooks hosting. Also, this software and its features are compatible with all sorts of devices.
If just are running a company, chances are that you would have some loans. QuickBooks can help you with loan formalities as well as it can assist you with tax preparations.
Features and advantages of QuickBooks desktop 2019
Below are the features and advantages of QuickBooks desktop 2019 that can help you manage and run your business with ease:
Invoice Customers:
You can send bills to your clients or customers using the useful tool. It’s a list of products and services and the costs that your customers receive from you. It makes the process of billing your customers simple and increases your cash flow.
Control Cash Flow:
This tool enables you to track and manage cash flow. This accounting software can replace online banking. I mean, why spend time login to your bank account when you can do that while you are using QuickBooks? Make sure that you keep your QuickBooks file updated. Next, by shaping the break-even point, you can handle your cash flow. And use cash flow worksheet and other methods to control your cash flow.
Manage Bills and Account Payables:
QuickBooks helps you keep your vendors, suppliers and other affiliates pleased through its “enter bills and pay bills” functions. These functions are simple and take almost no time. You can pay your dues and print checks to eradicate redundant data entry and enhance your productivity.
These are transaction templates used to speed up data entry. This can be used to fill transactions on the regular or predictable basis. It consists of invoice bills, bookkeeping, and payments. This is used for boosting efficiency and saving time.
Journal entries:
Journal entry is a record to keep accounting transactions in order. It is required to fix issues or to create year-end entries as per your CPA to match with your tax return. It is more significant in “accounting” and it’s advisable to be familiar with it.
Online Banking:
Online baking through setting up QuickBooks account can reduce unnecessary loads of data entry. Data with almost all the major banks can be downloaded in QuickBooks.
With this feature, you can keep up with updated cash flow and enhance your efficiency. A check would never clear until the approval of the concerned person is obtained and it makes it necessary for you to concede cash flow analysis. This feature also removes redundant data entry.
The Payroll Management:
This feature is vital. It assists you to make payments to your employees in a systematic manner and reduces the chances of errors. You can also outsource your payroll. Make sure that the outsourced payroll is recorded appropriately. Also, many organizations provide files that can be easily imported to your payroll data in QuickBooks accounting software. Since you will have one less liability to worry about, you can focus your energy on other responsibilities and e more productive.
Financial Reporting:
This is an important part of the bookkeeping process. If financial reports aren’t properly analyzed, your bookkeeping can’t perform to the fullest.
Custom Importing:
If you are a QuickBooks user, you enjoy import capabilities just as your financial institution. You can make use of ‘CS V’ converter to QuickBooks in order to make your data importable. However, you may be required to seek developer data in order to create IIF files.
The startup scene is booming worldwide. More new startups are making profits using advanced tools and technologies. If you too have started a new business you can turn that into something big. However, you must be prepared to face and handle some issues and technicalities that your business may face. It’s understood that no one can be an expert in every field of business. But employing right sources and investing in right software and tools can help you manage your business. QuickBooks is one such accounting software that can help you make the most of your opportunities.
Enjoy an excellent accounting experience with QuickBooks
Bookkeeping and accounting are considered among the most complicated tasks a business owner has to handle. QuickBooks takes care of these as well as other features with ease. Let’s say you started a business but you already have years of experience working in the same industry and you know people who own different organizations.
It’s expected that you will have enough knowledge of how a business works. You know how business owners face their financial situations and how they collect funds to sustain their organization. It’s an uphill talk to manage different things in the initial stage of your business.
Handle your financial situations with QuickBooks
As per the reports, one-third of new setups and small businesses face financial problems within their first couple of years? Now, you may be wondering how you could manage your business.
Also, handling finance isn’t the only task you are required to run your business smoothly. Knowing where, how and when to make investments before you start your business can be useful.
Managing financial activity is another trait to grow a business. Manage your finances right to achieve business growth.
Not many first-time business owners have enough knowledge of managing finances. It’s not about the amount of money on owns but to understand how to manage that.
Start your new business using the right version of QuickBooks
Making partnership with financial experts is necessary for the growth of your business. You can also pick the finest accounting tool for the growth of your business and updated that as your business grows. As per the data of makers of QuickBooks –Intuit, almost seventy percent of new business buy accounting payroll or HR services in the earliest years of businesses.
QuickBooks is design to provide required assistance that ranges from managing accounts to preparing taxes for small businesses.
Along with QuickBooks, Intuit has also developed several other amazing software to help small businesses grow. Just the previous year intuit launched OWN IT Network, an online community of small business owners who help each other achieve business excellence and growth. Also, the company has created a free tool to educate business owners on how to start successful businesses.
Software excels
This software is examining your company methods and also allowing you promptly determine how much money streams through your operation. When an application manages all the transactions, it has huge data at its disposal to produce numerous reports.
You can promptly see exactly how your income is isolated amongst numerous functioning expenses.You can easily determine your bottom line extra effectively and also track which part of the nation generate the most rate of interest from customers. These reporting alternatives are practically unlimited depending, on the types of software you make use of to provide information.
Winding Up
QuickBooks has been proving itself as useful accounting software for years. Among the various software available online this certainly has emerged as one of the most favorable. You can certainly invest n QuickBooks. If you need assistance in choosing the right QuickBooks edition, want to know how you can make the most of it, or face any sort of issue while using it, you can contact us at out toll-free ++1-888-510-9198. Our Intuit certified ProAdvisors are readily available to re-sort your problems in no time.
Thanks for visiting Pro Accountant Advisor, we welcome you to visit here anytime if you have any questions related to accounting or bookkeeping. We request you to consult with our certified ProAdvisors if any accounting related concern troubling you.