Experiencing QuickBooks error code 12002 and can’t find the right way to rectify it? Well, to help you out in tackling such an error in QuickBooks, here we are with a comprehensive guide sharing the complete details. Talking about QuickBooks error code 12002, it is an error that usually occurs due to network timeout, slow internet connection, or any other internet connectivity issue preventing QuickBooks from connecting to the internet. To learn what fixes this error in QuickBooks, make sure to stick around this piece of writing till the end. Or you can further dial our technical support number i.e., +1-888-510-9198, and our certified QuickBooks ProAdvisors will answer your queries immediately.
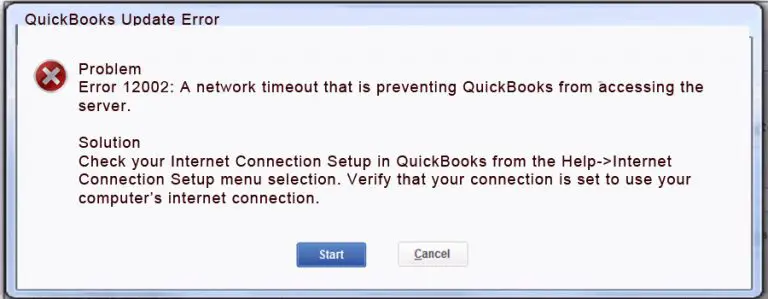
QuickBooks error code 12002 occurs when the QuickBooks software is unable to access the internet connection. At times due to some basic reasons, QuickBooks is unable to connect to the internet, which can further cause issues while updating the software. This can be due to incorrect browser and security settings, or an application like an antivirus or firewall program interfering with the update. There are a few other reasons behind the occurrence of such errors, we have tried to elaborate on them later. Here is what error message you see when error 12002 in QuickBooks occurs.
“A network timeout that is preventing QuickBooks from accessing the server”
What triggers the QuickBooks error code 12002?
Certain factors might trigger such an error, of which the common ones are stated below:
In case the QuickBooks software is unable to access the server as there is a network timeout
Moreover, if the internet connection is poor
The user can also experience a similar issue if the SSL setting is incorrect
Or if the internet security or firewall is leading to some or the other issue
Moreover, if the internet explorer isn’t set as default, then experiencing such an error is probable
Important steps before troubleshooting 12002
Before you proceed with the steps to eliminate the QuickBooks error code 12002, it is essential to perform the steps listed below:
Step 1: Create a Company File Backup
It is important to back up the company file before performing any necessary set of steps to get rid of the issue.
The very first step is to open QuickBooks on the system.
After that, head to the file menu and select the backup company file option.
The user will then have to make a local backup of the data.
Here are a few quick methods that can be performed to eliminate QuickBooks error code 12002 successfully.
Method 1: Verify the Internet Explorer Settings
The user needs to first close QuickBooks and open Internet Explorer.
And then choose the Tools and then select the Internet Option.
After that, select the Security Setting and ensure that the security setting is set to Medium High.
The next step is to click on the Globe icon and then choose the Content tab.
After that ensure that the content advisor tab is enabled
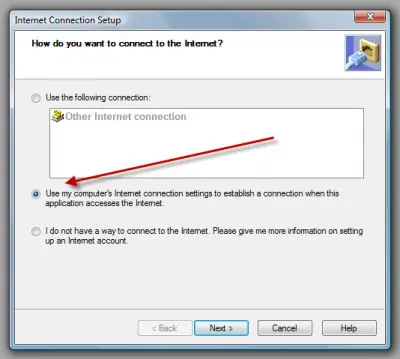
Moreover, click on the connection tab and perform the steps ahead:
The user needs to choose Never a Dial connection.
Also, ascertain that you choose the right ISP and hit ok tab
Select the LAN setting tab
Also, verify if the automatically detected settings checkbox is enabled
Now, check if the use of a proxy server is disabled
In case, you come across port 80 uncheck the box.
Now, hit ok tab
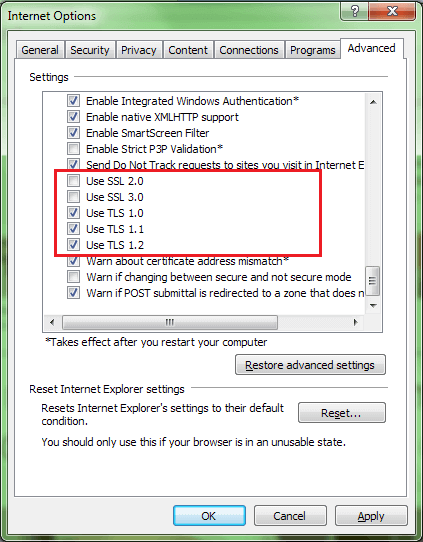
Go for the Advanced Tab:
Click on the Restore Advanced Setting option.
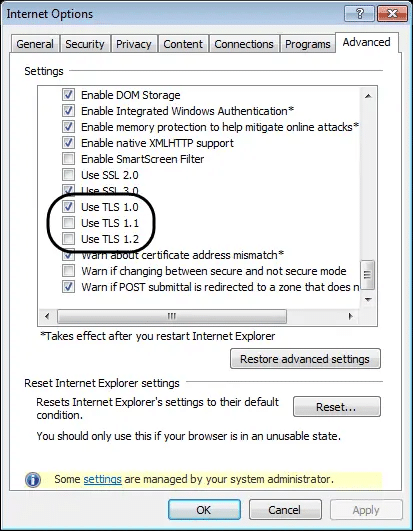
Look for Use TLS 1.0, Use TLS 1.1, and Use TLS 1.2 options.
Ensure that the Use TLS 1.0 is checked and the other two are unchecked.
Close the Internet Option and then click on OK button.
Shut down the Internet Explorer and restart the system.
The next step is to open QuickBooks and update it again.
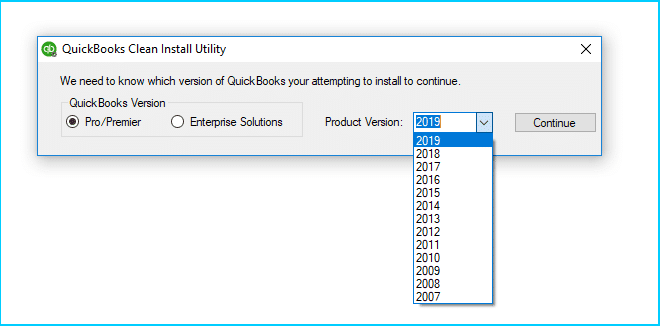
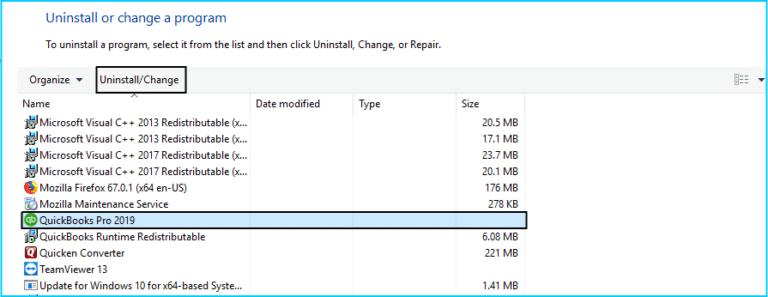
Method 2: Install/Uninstall QuickBooks in Selective Startup Mode
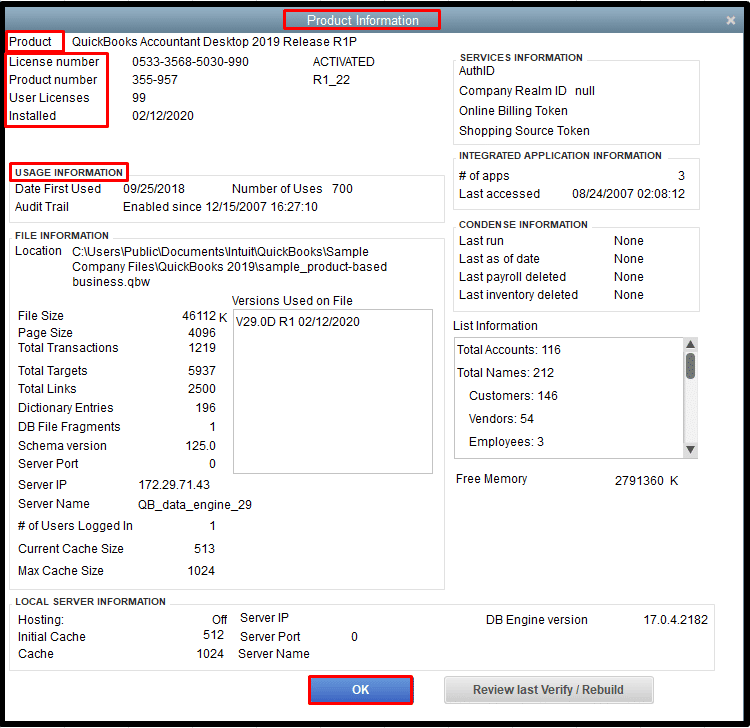
Hopefully have already created a backup of the data. Keep your QuickBooks desktop license and product details before you continue with the steps below:
Step 1: Start the System in Selective startup mode
You can stop all the applications from restricting your repair process. It is suggested to switch to selective startup mode.
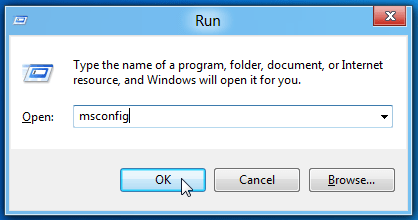
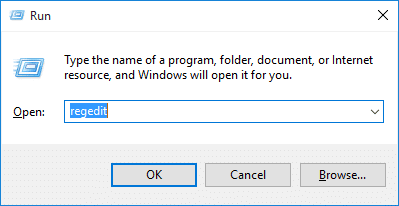
The user needs to first press the Windows and R tab to open the run command box on the bottom left of the system screen
Then type msconfig and choose the ok tab
Once done with that hit Windows + R and open the run command
Enter in msconfig and hit the ok tab
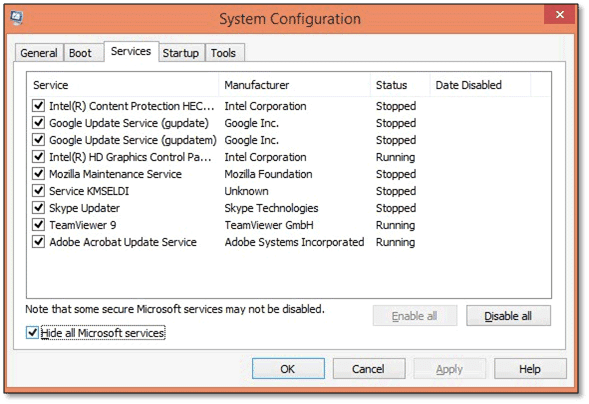
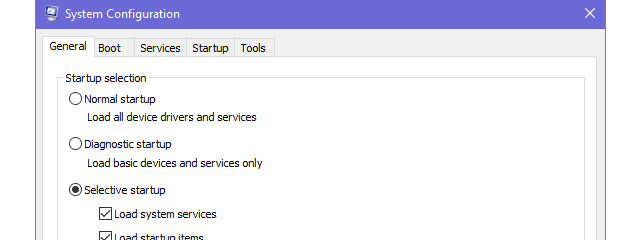
Also, head to the general tab and choose selective startup and load system services
Click on the services tab and choose Hide all Microsoft services
Choose disable all option
Uncheck the checkbox for Hide all Microsoft services.
The user should check and ensure that the Windows Installer checkbox is selected from the list of services
Hit ok tab
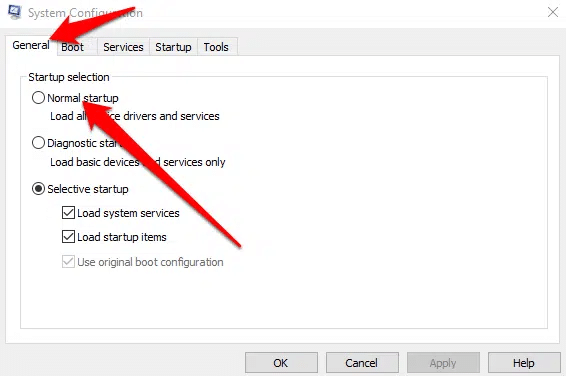
And then choose the reboot option on the system configuration window
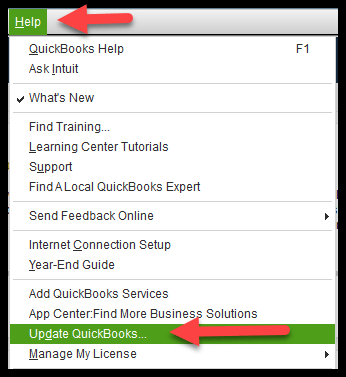
Method 6: Reset Update settings in Internet options
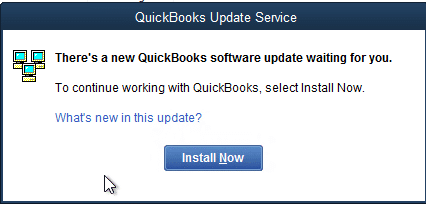
The user should first click on the Update Now tab.
The next step is to select the Reset Update Checkbox.
Now, hit the get updates tab and if the updates fail, then the user can continue with the steps below:
At first, one has to click on the advanced settings tab.
After that look for the Use TLS 1.0, USE TLS 1.1, and Use TLS 1.2 options.
Also, ascertain that the Use TLS 1.0 is checked and the other two are unchecked.
This would reset the update settings in the internet options fixing the issue up to a certain extent
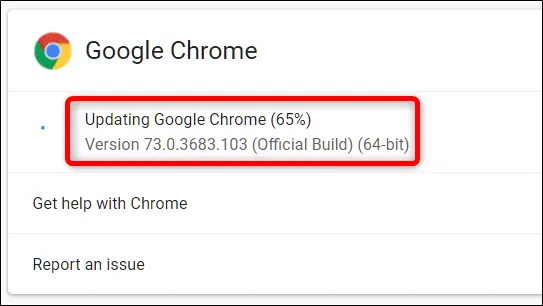
Method 7: Update your Chrome browser
Installing the latest version of Chrome can help in fixing the issue up to a certain extent, as often an outdated Chrome browser can trigger issues in QuickBooks. The steps involved in fixing such errors are as follows:
The very first step is to open the Chrome browser on the system.
After that, click on the More tab.
The user is required to select the updated Google Chrome.
Once done with that wait for a while to update the browser.
After the process is over, click on relaunch. If the user is unable to find the update option, then it indicates that he/she is using the latest version of Chrome.
Now that you know what it takes to get rid of the QuickBooks error code 12002, it is time to implement these steps carefully and check if the error gets resolved or not. However, if for some reason the user continues to end up in a similar issue again and again, then in that scenario, talking to our QuickBooks Support professional at +1-888-510-9198 is suggested. We are a team of technically sound experts who work round the clock to provide you with immediate tech assistance.
FAQs
How many 12000 Series Error Codes are There?
Here is the list of 12000 series error codes that users experience: · QuickBooks Error 12007 · QuickBooks Error 12031 · QuickBooks Error 12152 · Error 12002 · Error Code 12009 · Error 12029 · Error Code 12057 · Error 12157
How to repair the corrupted company file in QuickBooks?
To repair the company file using the rebuild data tool, the below set of steps will help: 1. The first step is to open the file menu. 2. Click on the utilities and choose the rebuilt data. 3. Go for the OK tab on the QuickBooks information window. 4. Search for the tool to repair your file. 5. Choose the OK tab. 6. Head to the file menu from the top of the screen. 7. Go for the tool in order to check your file for data issues.
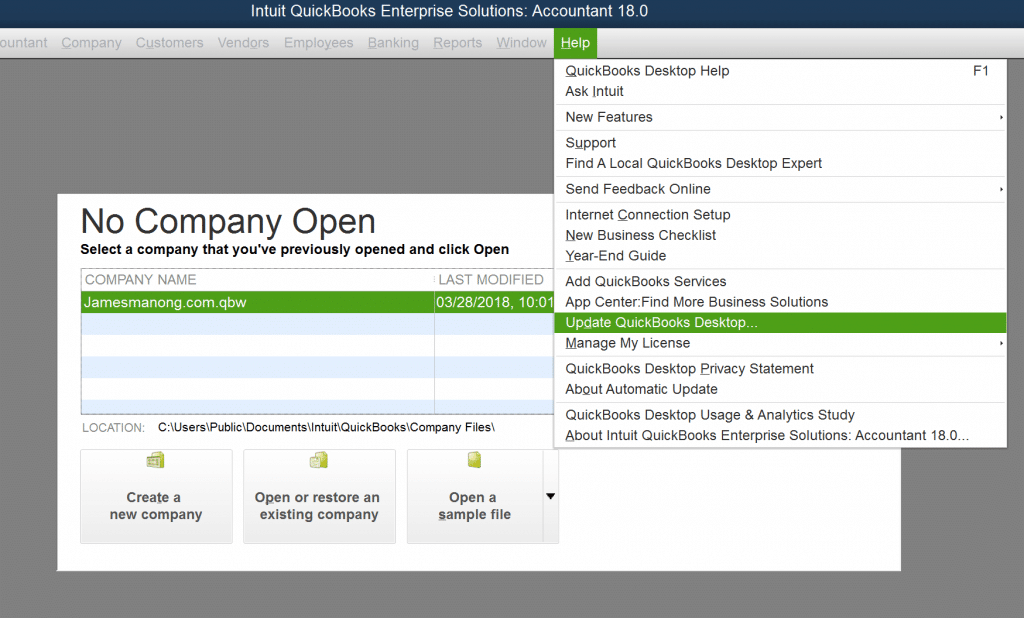
How to Reset the QuickBooks?
Carry out the below steps to reset QuickBooks. · The very first step is to head to the help menu in QuickBooks. · After that, select the search tab and click on contact us option. · Sign in to your QuickBooks online account with your admin log in ID and Password. · Now, confirm the action by clicking on the yes button. · Choose the wipe data option from the next page.
Mapped drives in QuickBooks help the user in accessing the QuickBooks files on another server, system, or drive over the network. It further makes it easy for the user to access the company file from the shared storage. However, sometimes, the QuickBooks user might come across certain issues with the mapped drive. These issues can be pretty much annoying for the user, and thus should be fixed instantly. In this article, we are going to talk about all possible fixes to this issue. Thus, if you are interested, make sure that you read the article carefully till the end. Or you also have an option to get in touch with our QuickBooks support team at our toll free +1-888-510-9198 for any sort of further tech assistance.
Points you can’t afford to miss
There are certain pointers that need your attention. Note that the user can guide a particular shared folder. If the client on PC 2 has shared the C: drive with the PC, then the user can easily guide that particular C: drive, but not the subfolders. The user will further have to right-click the company file folder and if the user is unable to discover the mapped network drive alternative, then the user should scroll upwards and find more significant level folders. In case the user is making use of QuickBooks hosting, then he/she is recommended to check with the cloud admin of the mapped drive.
In case the company file is available on a similar PC where QuickBooks is being used, then it is suggested to open the record from the information document’s drive.
Effective measures that can be taken to get fix QuickBooks not showing mapped drives
The user can try performing the below set of steps to successfully fix the mapped network drive error in QuickBooks.
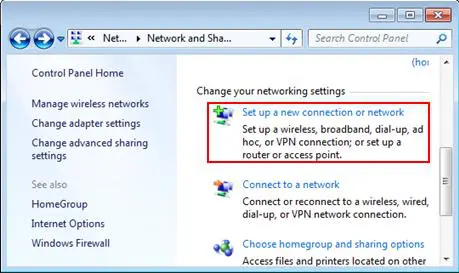
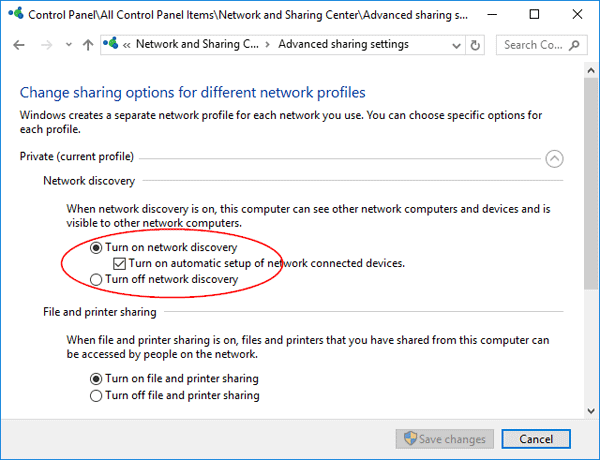
Method 1: Check the mapping drives and turn on network discovery
The very first step is to move to the search bar and enter in settings tab
Now, select the sharing tab
The user should then click on private network.
Once done with that, the user is suggested to make sure that the choices that he/she has made from turn on network discovery are correct and then turn on automatic set up.
The last step in the process is to click on save changes and hit next tab
Method 2: Fix the issue by obtaining IP and DNS address
It should be noted that at times, the user might try to obtain the IP address and DNS manually, due to which the outcomes in the QuickBooks do not show mapped drives. The steps involved in here are:
The user is recommended to first open the settings tab and then choose change adapter option.
After that open the network connection window.
The next step is to enter the next tab and right click the ethernet and choose properties form the available list.
After that click on the networking tab.
And then click on the internet protocol version 4. If the user finds it tick marked, then uncheck and recheck the box.
The next step is to click on properties tab.
After that from the IPV 4 properties window, go for the options Obtain an IP address automatically and obtain DNS server address automatically.
This brings us to the end of the article, where we hope that the information, we shared in above might have helped you in dealing with the mapped network drive issues in QuickBooks. However, if the error continues to trouble you even after performing the right set of steps, then feel free to contact us at +1-888-510-9198, and let our experts handle the complete situation for you.
FAQs related to QuickBooks Mapped Drives
What is QuickBooks not showing mapped drives problem?
QuickBooks does not show mapped drives error occur when the QuickBooks program is unable to recognize the mapped drives. This further prevents users from getting access to the company files.
What causes QuickBooks not showing mapped drives issue?
A few of the common factors causing such an error are as follows: 1. The firewall or antivirus is blocking the network 2. QuickBooks installation files is corrupt 3. Misconfigured network settings
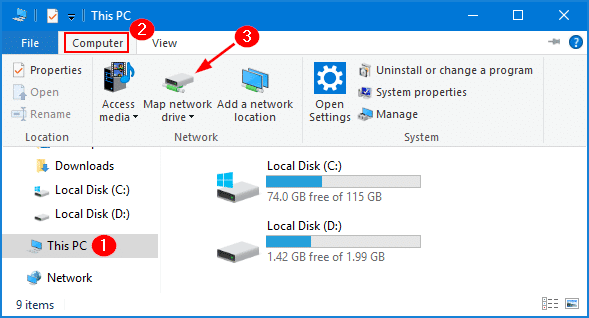
How to map a network drive in Windows
You can map a network drive in windows using the steps below: 1. Press windows icon 2. Type this PC in the search bar 3. After that, select a map a network drive 4. Choose any unused drive letter then choose browse 5. Head to the network location where the company file is available 6. Click on ok tab and then hit finish tab as well.
Why is my mapped drive not showing up?
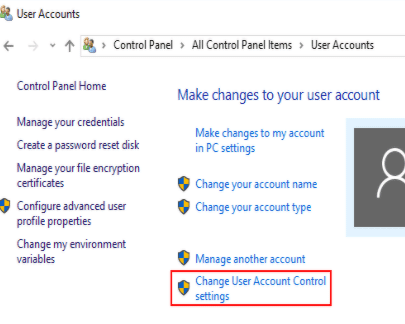
It can be possible if you use UAC (User Account Control). Whenever you login onto any window as an admin, there’re two options available on the screen. One admin is provided with the rights, and the other one is without any rights.
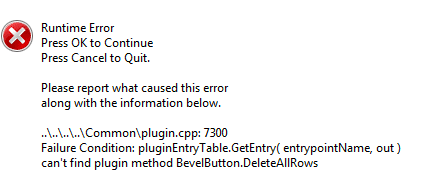
QuickBooks accounting software is a robust solution that has marked its presence in the past couple of years. However, the only pitfall of this software is the errors that the users come across when working on it. In today’s article, we are going to discuss one such error i.e. QuickBooks error code 7300. The user can come across such an error when the program is set up or during Windows startup or shutdown or even during the installation of the Windows operating system. Or such an error can also be experienced when opening the company files.
There can be multiple factors leading to such an error, which we will be discussing later in this article. If you are interested in finding the solutions to such an error, all you need to do is to go through this article till the end. The user can also get in touch with our QuickBooks support team for any sort of further tech assistance. Give us a call at +1-888-510-9198, and we will provide you with immediate support services.
Procedure 2: Back up the QuickBooks related registry entry
If the first method didn’t help much in eliminating the issue, then try backing up QuickBooks related registry entry. The steps involved in this procedure are as follows:
The user needs to first click on the Start tab.
Once done with that, in the search bar the user should enter in command and avoid hitting enter tab
The next step is to press Ctrl + Shift keys and then click on Enter tab.
The user will see a permission dialog box, where he/she will have to select Yes.
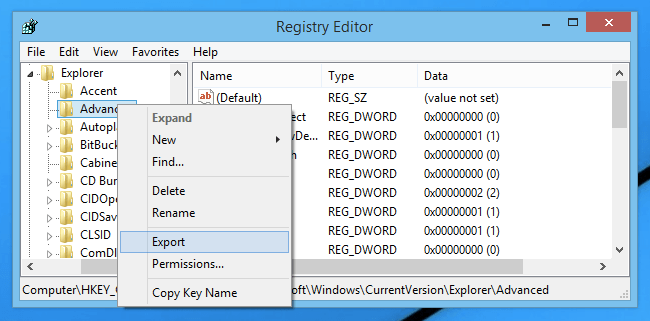
Now, a black box appears with a blinking cursor will appear, where the user should enter regedit and press Enter key.
The next step is to click on the QuickBooks error 7300 related key you want to backup.
And from the File menu choose Export.
After that choose the folder to save in the list
Now, in the Export Range box, make sure that the selected branch is selected.
Once done with that, the user should choose to Save with a .reg file extension.
And the final step is to back up the QuickBooks-related registry entry.
Towards the end of the article, it is believed that the reader might be able to understand what all solutions can be implemented, so as to deal with such an error. However, if there are any queries remaining, then contacting our technical Support for QuickBooks Enterprise at +1-888-510-9198 is recommended. We are a team of technically sound professionals who work round the clock to provide the finest possible assistance.
FAQs related to QuickBooks Error 7300
What is error code 7300 in QuickBooks?
The error 7300 in QuickBooks is often seen when the Intuit sync manager stops working. You can expect to face similar issues when trying to open the company files in QuickBooks.
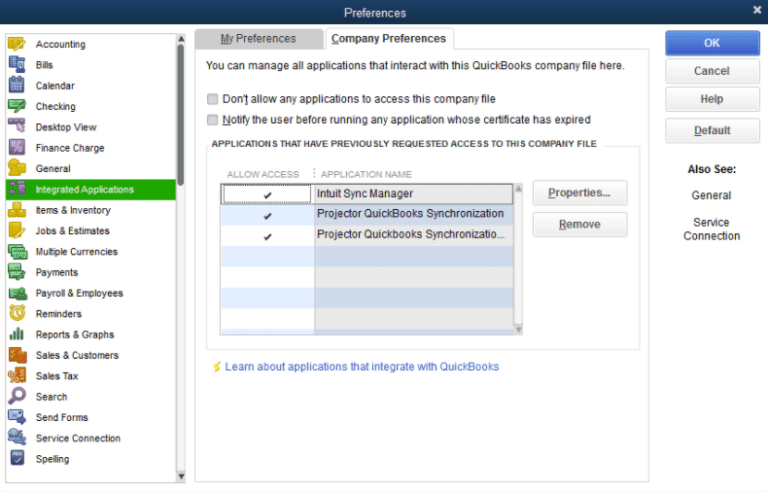
What is Intuit Sync Manager?
Intuit sync manager basically syncs QuickBooks company file data with Intuit online services and third-party developed applications that the user might subscribe to.
How do I turn off Intuit Sync Manager?
You can try to turn off the Intuit sync manager using the steps below: 1. Right click the Intuit sync manager from the system tray. 2. Further, select the company 3. Click on sync enabled menu. 4. After that select disable from the drop-down menu.
Experiencing QuickBooks POS error 140014 can be extremely devastating. It is a Point-of-Sale error that is not pretty much commonly encountered. The error series 14XXXX indicates that the issue is related to the connection between the QuickBooks desktop and QuickBooks POS. You can bump into such an error when you try to run the reports in QuickBooks point of sale. There can be a bunch of factors instigating this particular error in QuickBooks, which we will be elaborating later in this segment. You can find a warning message highlighting on your screen stating:
QuickBooks POS cannot access your QuickBooks Financial Software company File.
You can face this issue if UAC settings are misconfigured, or the version of QuickBooks being used is outdated. There are a few factors causing this issue in QuickBooks, which we will be discussing later. Thus, to learn further about QuickBooks POS error 140014, stick around this piece of writing. On the other hand, if you need any sort of professional assistance, then feel free to connect with our QuickBooks support professionals at +1-888-510-9198, and get answers to all your queries immediately. Having said that, let us further unleash the causes and fixes of QuickBooks POS error 140014.
Towards the end of this article, we expect that the information stated above might help in dealing with the QuickBooks POS error code 140014. However, if for some reason the error persists or the user needs any sort of technical assistance, then we suggest you to get in touch with our QuickBooks support team. Give us a call at +1-888-510-9198 and we will provide immediate technical assistance.
FAQs related to POS error 140014
How do I fix invalid product number in QuickBooks POS?
To fix the invalid product number in QuickBooks POS, use the steps below: 1. Delete the contents of the entitlement client folder 2. Rename the WSActivity file 3. Clean reinstall QuickBooks Desktop point of sale
Is QuickBooks POS no longer supported?
Note that QuickBooks point of sale payments will no longer work with QuickBooks point of sale software after October 3rd, 2023.
What is QuickBooks error 140014?
You might come across QuickBooks point of sale error 140014, when running the financial reports in QuickBooks POS.
How do I fix POS error 140014 in QuickBooks?
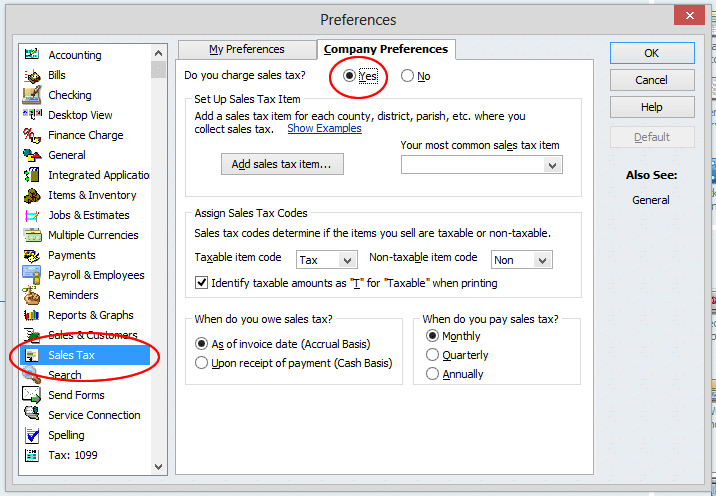
The steps to fix the issue are as follows: 1. Update QuickBooks 2. Disable UAC preferences 3. Enable sales tax 4. Create of New windows user 5. Ensure QuickBooks POS is enabled in QuickBooks desktop
QuickBooks error code 179 is an error that can be seen when the user tries to log in to the bank’s website on the system. Error 179 in QuickBooks means that your bank’s website has rejected a login attempt as you might already be signed in somewhere else. This error restricts the user from logging in and forbids the user from accessing the data. The banking errors are often critical and should be taken care of immediately. The same error can also be experienced after incorporating the Accountant’s copy into the company file. You can come across this issue if you have forgotten to close the bank’s app correctly or you logged out, but the bank hasn’t acknowledged the request. At times, it can take around 15 minutes or more for bank servers to recognize a logout request.
There can be a couple of factors causing such an error, which we will be discussing later in this article along with the effective solutions for the same. To learn more about such an error, make sure to read the article carefully till the end. However, the user can also contact our QuickBooks Error support team for any sort of further assistance. Give us a call at +1-888-510-9198, and we will ensure to provide immediate support services.
Experiencing QuickBooks error code 179 is possible due to the following reasons:
The user can face such an error if there are some issues in the reports
Or if the user forgets to log out of the last session
Another reason can be that there are some issues with the company file
Or the balance sheet reports are not showing all accounts
The user can also face a similar issue if the transactions are missing in QuickBooks
Also, if the QuickBooks company file is facing issues
Incorrect login credentials can also cause a similar issue
Signs of QuickBooks error 179
The user can experience such an error with the following signs:
One of the basic signs can be if the company file is damage or missing
Or if QuickBooks is not responding to the commands or is freezing automatically
The software is missing some important information
Or when the software starts inputting null values whenever you are in operation
Quick Steps to fix QuickBooks error 179
In order to fix the bank error 179, you can perform these quick steps. A quick tip is that, if an account is being connected for the very first time and then shows error 179, then you need to wait for 15-30 minutes before trying to update again. Also, note that there are times when the account will update overnight with a fresh banking aggregation.
You need to ensure that you have logged out of the bank website or app for more than 15 minutes.
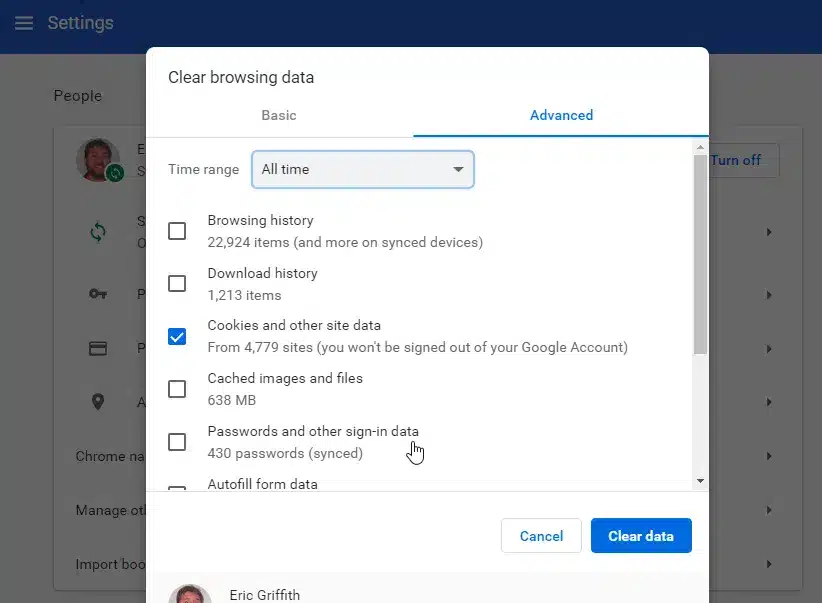
Furthermore, clear your browser’s cache and cookies, or try other browser troubleshooting options.
Also, ascertain that the bank app on the phone is completely closed. Simply minimizing the app doesn’t send a sign-out request to the bank.
In case you are using a joint account, then ascertain that no one else is connected to the bank account’s website or app.
The last step is to confirm if you have only connected the bank account to one QuickBooks online account.
Note that if you still get error 179 after connecting the bank, try to change the bank password. This will sign you out of any other sessions. Moreover, you can change your password once you have connected.
Once the above-stated steps are performed, the user will be able to successfully get rid of the issue from its root cause. However, if in case the user isn’t able to, then contacting our QuickBooks support team at +1-888-510-9198 is recommended. We are a team of technically experienced QuickBooks Enterprise Support professionals, who work round the clock to resolve all sorts of QuickBooks issues.
FAQs
What is QuickBooks XML error and how do you fix it?
You can fix the XML error using the steps below: 1. The very first step is to unhide the hidden files and folders 2. After that update QuickBooks point of sale 3. And then, repair QuickBooks point of sale application 4. Now, change the name of entitlement client folder 5. Change the name of session data file 6. Delete the files from the entitlement folder
What is QuickBooks error 6177 0?
Error Code -6177, 0: “QuickBooks is attempting to open this Company file” indicates that QuickBooks accounting software is unable to use the path to the company file. This kind of error generally occurs while a user uses QuickBooks in multi-user mode.
How do I fix a QuickBooks error?
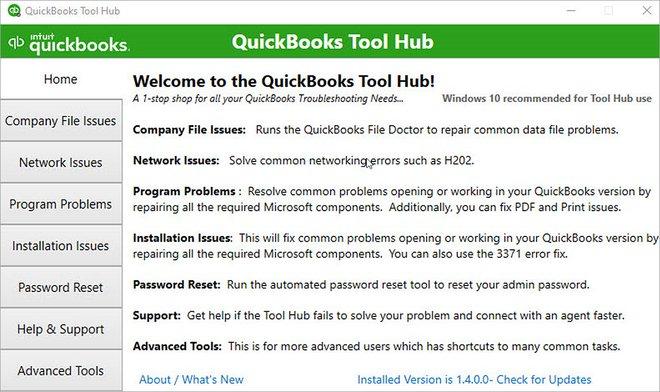
The user can try to fix the QuickBooks errors by running the QuickBooks Install Diagnostic Tool. This would resolve common install issues. For this, one needs to open the QuickBooks Tool Hub, then select Installation Issues. Select QuickBooks Install Diagnostic Tool.