If you’ve ever tried opening, restoring, or backing up your QuickBooks company file and got stopped in your tracks by Error 6000, 83, you’re definitely not alone. This is one of the most frequently reported issues among QuickBooks Desktop users, and it almost always points to a problem with how QuickBooks is trying to access your company file whether that’s over a network, due to permission issues, or because the file itself has run into trouble. Don’t want to deal with the technical back-and-forth yourself? Call our QuickBooks technical support team at QuickBooks technical support i.e +1-888-510-9198 and we’ll get this sorted for you right away.
This error belongs to the broader 6000 series of QuickBooks errors, all of which are tied to company file access in one way or another. What makes Error 6000, 83 a bit tricky is that it can show up in several different situations, while opening a file stored on a server, restoring from a backup, or even while creating a new backup. Because the triggers vary so much, the fix usually depends on exactly when and how the error appears for you. In this guide, we’ll walk through what causes QuickBooks Error 6000, 83, how to identify which scenario applies to you, and the complete set of solutions covering Windows servers, Linux servers, backups, and restores so you can get back to your company file without losing any data.
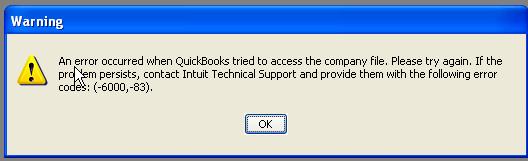
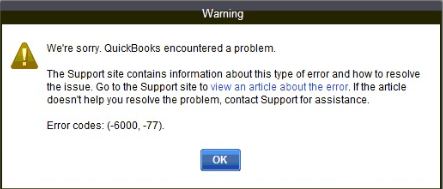
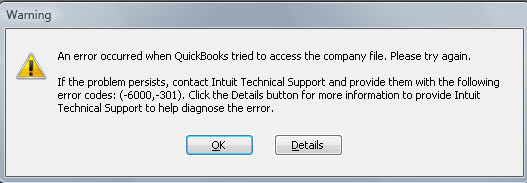
QuickBooks error code 6000 83 is a 6000 series error related to the company file. It appears on the screen with a warning message: An error occurred when QuickBooks tried to access the company file. Please try again. If the problem persists, contact Intuit Technical Support and provide them with the following error codes: (-6000, -83).
Or
You do not have sufficient permissions to the specified folder. To use QuickBooks in a multi-user environment, you must have read/write access and create/delete rights to the folder where the company file is stored.
quickbooks error message 6000-83 screenshot
What May Cause QuickBooks Error 6000, 83?
Check out the possible reasons due to QuickBooks Error -6000, -83 appears: –
This error can also appear if you are using a non-U.S. or non-Canadian version of Windows. Or if you are having a ‘Regional Language Settings’ option in Windows which is set to some other language apart from English.
The troubleshooting steps depend on the action performed when the error occurs. Please select from the under given situation & pursue the suggested troubleshooting steps.
Condition 1: Open the QuickBooks company file stored on a Windows Server
You may find that copying QB company file to the computer during error fixation is more efficient than resolving it on the network. Once the trouble fixed, copy the QB file back to its original network location.
Solution 1: Use the QuickBooks File Doctor to fix the error
Use the QuickBooks File Doctor to resolve the QB company file or network related issues.
Firstly download the QuickBooks file doctor tool from here
Install and run this file doctor tool on your system.
This toll will automatically scan the server errors and resolve them automatically.
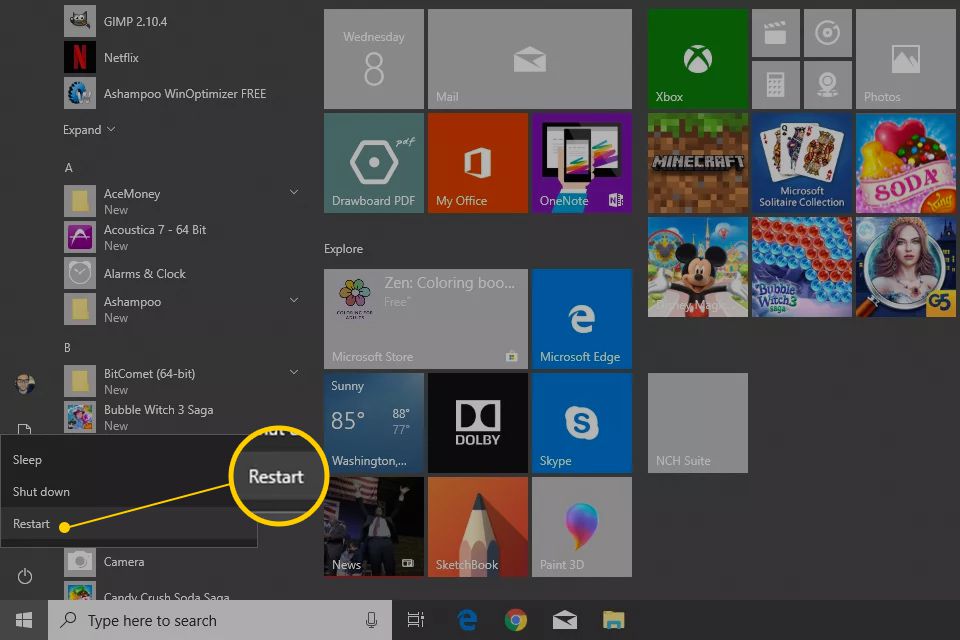
Finally restart your computer system once.
Solution 2: Turn off hosting on all Workstations that Access the file Over the Network
If you’re using the QuickBooks desktop on more than one system, configure only one of them to host the QB company file.
Follow these steps to turn off hosting on all workstations.
Open the QuickBooks Desktop. Choose the “File” icon, & then select the “Utilities” tab.
From the list, if you see:
Host Multi-User Access – The computer is not hosting the QB company file & you can go to the next system.
Stop Hosting Multi-User Access – Select that option, then:
In the ‘Stop hosting multi-user Access’ window, click on the “Yes” icon.
In the ‘Company file must be closed’ window, click on the “Yes” icon to continue & go to the next computer.
You can see the manual troubleshooting steps that QuickBooks File Doctor automatically performs in Solution 1. You are supposed to utilize the following solution steps if the QuickBooks File Doctor is unable to run successfully on the system.
Configure QuickBooks files for the firewall or anti-virus
Note: Intuit does not endow support service for firewall associated issues.
See the Configure of Firewall & Internet security settings for QuickBooks Desktop updates and also network access to view the exceptions needed.
Pursue the instructions from the firewall maker’s website to configure the firewall to allow Internet access to the QuickBooks files on the entire system.
Verify the permissions to access the QB company file
To confirm that permissions arrange correctly, see the Setup folder(s) and file(s) permissions to share the QuickBooks company files.
If you want to place permissions, go to the ‘Set Windows’ access permissions to share QB company files.
Scan the QuickBooks company files
You want to scan the complete folder where the QuickBooks company file(s) are situated or stored to create the ‘Network Descriptor’ file(s) with .nd extension. The *.nd extension file(s) stores the details/information’s about the system where the file(s) are hosted.
Go to the ‘QuickBooks Database Server Manager’ screen, hit onto the “Add Folder” icon and search the folders that contain QB company file(s).
Once all QB folders are added, hit onto the “Scan” icon.
Under the ‘QuickBooks Company Files’ option, you will see the data files.
Browse to each & every folder that contains QB company files. Then, ensure that the .qbw,.nd file was created or build for each of the QB company data file(s).
Check the hosting on the computers
If you are using the QuickBooks Database Server Manager (QBDSM) on the server in the network environment, then the server computer supposes to be the only computer with the hosting feature turned on.
Turn on the hosting on the server computer and scan the QB company files.
Open/access the QuickBooks application, then go to the “File” option and choose the “Utilities” tab.
From the list, if you notice:
Host Multi-User Access: It simply means that the system is not hosting the QB company file. Thus, you suppose to use the next system.
Stop Hosting Multi-User Access: Choose this preference, then:
Go to the ‘Stop hosting multi-user Access’ screen, and then hit onto the “Yes” tab.
Close the company file window, and then hit onto the “Yes” to continue & later, go to the next computer.
Server
Press onto the “Taskbar” window & choose the “Task Manager” tab.
Go to the ‘Image Name’ column, search for the QBDBMgrN.exe. (Go to the column heading to alphabetize the list.)
In case, you don’t see the QBDBMgrN.exe on the list, ensure that the QuickBooksXX service is on the system:
Log in the system as a Full Administrator. (Contact the system administrator to log in as full admin.)
Hit onto the “Start” or “Windows” tab & choose the “Run” tab. Go to the “Open” section, and type in the services.msc, and then tap on the “OK” tab.
Locate the service given below for the corresponding QuickBooks Desktop version:
QB version 2020: QuickBooksDB30
QuickBooks 2019: QuickBooksDB29
QB version 2018: QuickBooksDB28
QuickBooks 2017: QuickBooksDB27
QB version 2016: QuickBooksDB26
Ensure that you choose the Automatic startup type & also the service started currently
If the service is not yet started, then perform right-click on it & choose the “Start” tab.
In case the startup type isn’t Automatic and then performs double-click on the service. In the Startup type drop-down, choose the “Automatic” option.
Go to the QBDBMgrN.exe file in a row; confirm that the “User Name” column entry is correct
If the QuickBooks 2018, the entry should be QBDataServiceUser28
In the QuickBooks 2017, the entry should be QBDataServiceUser27
If the QuickBooks 2016, the entry should be QBDataServiceUser26
Open/access the QB company file from a different location
Use host computer to open/access the QB file.
Navigate to the systemwhere the QB company file is saved /stored.
In case, the only system that stored or installed the Server is hosting computer, then move to the ‘Copy file’ option to some other location.
Open the QuickBooks Desktop application and also the QB Company file that receiving the error warning message.
If you are capable of opening the QB company file from this system, then check the QB company file.
If you are unable to do so, then proceed with step B.
In case, you are getting instructions from QuickBooks to rebuild the QB company file, then go ahead and do it.
Note: In case, QuickBooks Desktop application identifies no issues/problems with the QB company file, and the error or issue persists, then you should proceed with Step B.
Copy the QB file to other location.
Open/access the folder that stores/contain the QB company file.
Perform right-click on the ‘filename’ & then choose the “Copy” tab.
Perform right-click on the empty area on the desktop screen & choose the “Paste” option.
Turn-on the QuickBooks Desktop application & then, open the QB company file on the desktop.
Note: If you experience the QB error warning message, it means that the QB company file might be distorted /damaged. In such a case, you have 3 options:
Restore the QB company file backup.
Recover the lost QB data with the help of ‘QuickBooks Auto Data Recovery’.
Send the QuickBooks company file to the QuickBooks Data Recovery Team. To request the QB data recovery service from the official Intuit Data Services, you must get in touch with the technical support. (Fees may apply.)
If the QuickBooks company file opens successfully, copy the QB file(s) back to its original location.
Note: Ensure the original QB Company file name renamed before copying the file that freshly opened from the computer. Make sure that you do not paste new QB company file over the existing QuickBooks company file.
Open/access the folder(s) that contains the original (damaged) QB company file, and then rename the file by adding OLD or DAMAGED at the beginning of the file name.
For Instance: If the original QB company file name was ‘CompanyFile’, rename this file as OLD_CompanyFile or DAMAGED_CompanyFile.
Close the QuickBooks application.
Copy/replicate the QB company file(s) from the computer and then paste the same file(s) to the folder where it initially saved/ stored.
Open the QuickBooks application & open the QB company file from its initial location.
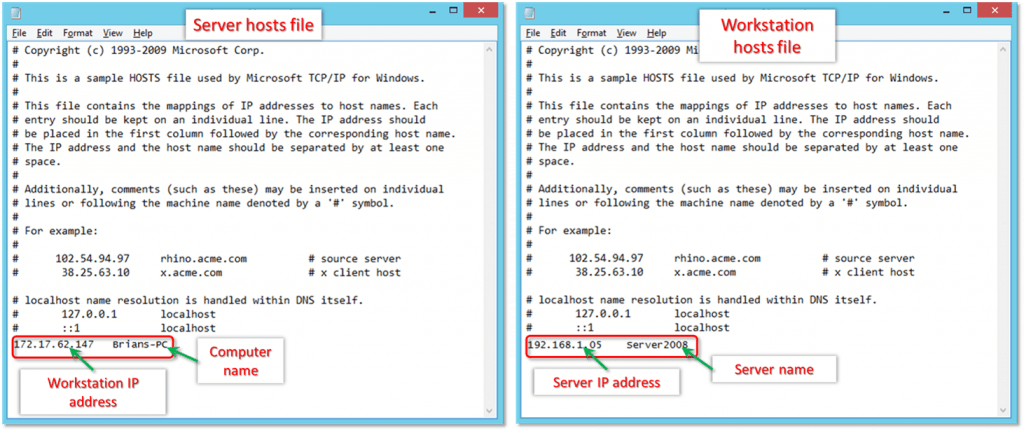
Edit the Windows hosts file(s) on the desktop with the correct IP address & Windows Server name.
Note: Hosts files generally deal with Static IP addresses. If the network is utilizing the Dynamic addressing, this might create problems if the server is rebooted and acquires a different IP address than configured in the Hosts file.
The Windows server should be configured to maintain the same address for the network at all the times.
Firstly Close your QuickBooks desktop.
Now select the Start menu and Computer, on the server
Then go to:
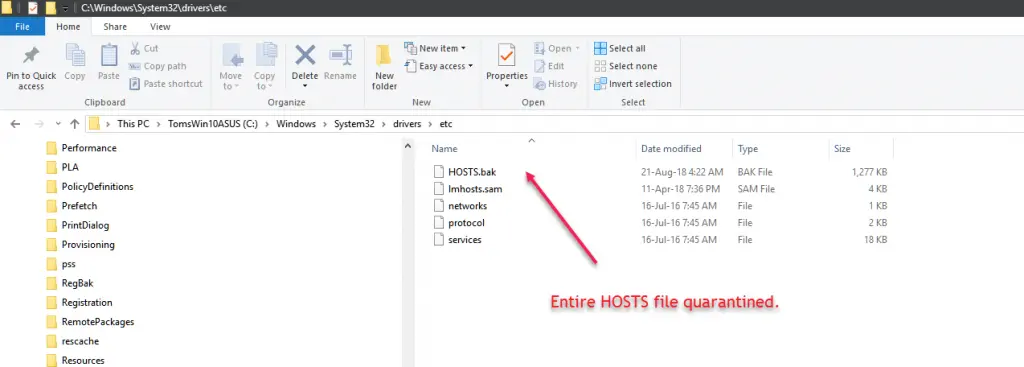
C: \ Windows \ System32 \ Drivers \ Etc
C: \ Windows \ Syswow64 \ Drivers \ Etc
After that double-click the hosts file option.
Choose Notepad to select a program to open up with.
You need to Enter the IP address followed by Computer name server will have workstation IP and computer name while workstation will certainly have Web server IP and also computer name.
When entering these details, just use the Tab key instead of the space bar to different IP address and computer system name.
Condition 2: Open the QuickBooks Company file stored on a Linux server
Tips to Remember: The solution mentioned below for (QuickBooks Error 6000 83) must be performed by the system administrator with good knowledge of operating the Linux operating system. Also, he/she supposed to have complete insight of network operations and permission to install properly while configuring the QuickBooks Enterprise Solution Linux Database Server Manager.
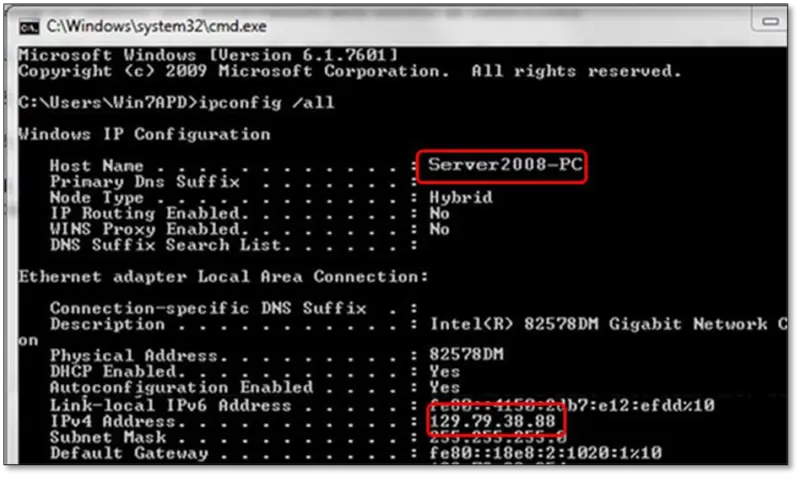
On the keyboard, hold the “Windows + R” key simultaneously to open/ access the ‘Run’ window.
Type-in the ‘CMD’ and later, hit onto the “OK” tab.
Go to the command prompt, type-in the Ping (Name of Linux Server) & hit the “Enter” tab.
Solution 2: Edit the hosts file
Use the IP address & Linux server name to ‘Edit’ the hosts file from the workstation.
Case Sensitive Linux File System
Ensure that you are using the right case while specifying the QB Company file name that you desire to open/access via Windows client. For instance, if you state the company B instead of company b, Windows can open/access the Linux server but the database will unable to access/open the QB file.
Shut-down the QuickBooks Desktop application.
On the keyboard, hold the “Windows + E” key simultaneously to open/access the ‘Computer’ window.
In the Local Disc, navigate to (‘C ’ => ‘Windows folder’ icon => ‘System32 folder’ tab => ‘drivers folder’ tab => etc. folder.
Use ‘Notepad’ to open/access the hosts file.
Once the last IP address listed, edit or add the IP address of the server.
Hit onto the “Tab” key, and then type in the server name.
Save the file, and then open/access the QuickBooks & QB company file.
In case you see such an error when creating a backup, then here is what can be done to rectify it. It should be noted that, if you store the company file on a server, then move it to the local hard drive. After you are done with the fixation of the error, you need to move the company file back to the server. In case you use Intuit data protect, you can reach out to our professionals for assistance.
Initially, you need to close QuickBooks on the server system, the one that hosts the company file.
After that, move to the file menu and choose Quit QuickBooks desktop.
Once done with that, open the Windows start menu.
You now have to type File Explorer into the search bar and further open File Explorer.
The next step is to choose my computer from the navigation bar.
Choose C drive
And further, right-click on the screen and choose the new tab and also the folder to create a new file folder.
Assign it a name as QB Test Folder.
You now have to carry out the steps to create a backup company file. When QuickBooks asks the location to save the file, save it in the folder created in the steps above.
Now, perform the steps to restore the company file using a new backup.
In case you do not see error 6000 83, then start using your backup as the main company file. Do not use old company files anymore. Rename it, to avoid accidental use.
Solution 1: Change/Alter the QuickBooks file extension
Whenever you try to restore a QB company file, it will create a QB company file with a .qbw extension as a suffix. If the backup procedure creates a QB file with either a .qbm or a .adr extension, then you must rename the QuickBooks file extension to .qbw & try to open/access the renamed QB file. For instance, rename the ‘My Company Name.qbm’ to ‘My Company Name.qbw’.
Note: If required, alter the system Windows settings, this will enable you to see QB file extensions.
Go to the QuickBooks Company file, and then hit onto the “F2” key to open/access the Product Information screen.
Under the “File Information” field in the “Location” section, highlight & copy the file location and then paste it on the system notepad.
In case, you are using the QB multi-user environment then shut-down the QuickBooks application on all the computers utilizing the QB Company file(s).
Perform right-click on the “Windows” or “Start” icon and then click on the “Explore” tab. Go to the QB company file location as you noted in step 2.
Perform right-click the “File Name” tab & then choose the “Rename” option.
Enter the new QB company file name & then hit onto the “Enter” tab.
Note: If prompted to verify that you rename the QB file, confirm that you had type-in and saved the new QuickBooks filename correctly. Finally, click on the “Yes” tab.
Not acceptable: Business\Fred\Fred’s Documents\My Business $.Business – The quotation mark (‘) and the dollar sign ($) are special characters. The Fred’s Documents folder and the My Business $.qbw file should both rename.
Note: If you need to restore your backup to a network location, restore it to your computer first. Once the backup restored, copy the restored file to the network location.
In the “File” menu, select the “Open or Restore Company” tab.
Choose the “Restore a backup copy” option and then click on the “Next” tab.
Choose the “Local backup” option & hit onto the “Next” tab.
Browse to the backup QuickBooks file [Companyname].qbb, and then choose the “Open” tab.
Go to the ‘Open and Restore a Company’ screen, then hit onto the “Next” tab.
Go to the “Save Company File” screen; eliminate any special characters or spaces mentioned in the “File Name” section, then choose the “Save” tab.
Note: If QuickBooks file is on a mapped network Drive, then try to open/access it by using the UNC path (or reverse, switch from allocated to UNC path).
QuickBooks Error 6000, 83 can feel intimidating at first, especially with all the different scenarios it can show up in networked servers, Linux setups, backups, and restores. But once you identify exactly which situation matches yours, the fix is usually a matter of following the right sequence of steps, whether that’s adjusting hosting settings, editing the hosts file, or simply renaming a file extension.
If you’ve worked through the steps above and you’re still stuck, or if any part of this felt too technical to handle confidently, our certified QuickBooks customer support team is just a call away at +1-888-510-9198. We help resolve this exact error for QuickBooks users every day, and we’re happy to walk you through it step by step or simply take care of it for you.
Some Common Questions Regarding QuickBooks Error 6000 83:
What is QuickBooks Error 6000 83, and why does it occur?
QuickBooks Error 6000 83 is a common error code that appears when users try to open, restore, or backup a QuickBooks company file. It usually indicates a file access issue, which can be caused by a variety of factors, such as network connectivity problems, incorrect folder permissions, damaged company files, or interference from antivirus software.
How can I fix QuickBooks Error 6000 83?
The solutions for QuickBooks Error 6000 83 can vary depending on the underlying cause of the error. Some common troubleshooting steps include running the QuickBooks File Doctor tool, verifying file permissions and network connectivity, disabling antivirus software temporarily, restoring a backup of the company file, or seeking assistance from a QuickBooks expert. However, it’s important to note that some causes of the error may be more complex and require advanced technical knowledge.
Can QuickBooks Error 6000 83 be prevented in the future?
While there is no foolproof way to prevent QuickBooks Error 6000 83 from occurring, there are some best practices that can minimize the risk of encountering the error. These include regularly backing up QuickBooks company files, ensuring that all network connections are stable and secure, setting appropriate folder permissions, avoiding using special characters in file names, and keeping QuickBooks and antivirus software up to date. Additionally, it’s important to maintain good communication with your IT team or QuickBooks support provider to promptly address any issues that may arise.
Does QuickBooks Error 6000, 83 cause permanent data loss?
In most cases, no. This error is usually related to file access like permissions, network settings, or file extensions rather than the file’s actual content. However, if the company file itself is damaged, there’s a small risk of data issues, which is why it’s important to always work from a recent backup before attempting fixes.
Can switching from a wireless to a wired network connection help fix this error?
Yes, in many cases it can. QuickBooks performs significantly better on a stable, wired network connection. Wireless connections are more prone to dropouts and latency, which can interfere with QuickBooks’ ability to consistently access the company file, especially in multi-user setups.
Why does this error happen specifically when restoring a backup, but not when just opening the file?
This usually comes down to file extensions and file paths. When restoring, QuickBooks creates a new file with a .qbw extension, if your backup somehow generates a .qbm or .adr file instead, or if the restore path contains special characters or is too long, QuickBooks will throw Error 6000, 83 specifically during that restore process.
Did you see QuickBooks Error Code -6000, 77? Well, you can land into such an error when opening “company file”. This error is basically a 6000 series error that is often associated with the company file. You can experience this error when you do not have enough permissions to gain access to any QuickBooks file. Often this issue is seen when the multi-user mode is enabled. To help you in tackling this issue in QuickBooks, we have designed this piece of writing to share the complete information related to QuickBooks error 6000 77, from its root causes to the fixes that can be performed to rectify the issue.
Dealing with financial data is stressful enough, and encountering an unexpected error when opening your company file can instantly put your business operations on hold. If you want to fix this issue quickly on your own, this comprehensive guide will walk you through the process step-by-step. Need an instant solution? We understand that you can’t afford downtime. If you are hesitant about manual troubleshooting or fear losing your crucial accounting data, let our certified experts handle it safely for you. Call our QuickBooks Technical Support Team right now at+1-888-510-9198, for immediate, risk-free assistance. Let’s dive into the details of QuickBooks Error Code 6000, 77 and how to resolve it.
Whenever the file is stored in the incorrect folder, QuickBooks Error -6000 -77 occurs. Now-a-days the accounting standards and accounting software have transformed the way people manage their businesses. Now as both cloud and basis are available, the growth of the businesses has been triggered and helps them take their functions to the next level. When it is hit with errors, it shows up pop-up messages and stops users from working.
What Causes QuickBooks Error 6000, 77?
One or more of the following reasons may cause QB Error -6000, -77:
Company file needs to be present on the local drive which is located on an external storage device.
Number of files opened with reference to the mapped drive on QuickBooks.
QuickBooks is running in multi-user mode while communicating the problem.
The company file is present on external storage instead of being in the local drive or a network.
A folder having the company file shows “Incorrect folder permission”.
A mapped drive is opening the company file.
Reaction: All this results in QuickBooks file becoming corrupt or damage.
Note: Restarting the system can fix the issue.
Instant Fixes for the error
Before you move ahead to perform the steps discussed in this segment, here are a few steps you can perform:
You can firstly reboot the QuickBooks software with more permissions. In many cases, the issue is removed after the software restarts and further work is required
You can also run the QuickBooks file doctor tool. The tool has the ability to repair the damaged or corrupted QuickBooks files. The utility fails in QuickBooks file recovery and fix the error. This is for its weak and basic underlying technology.
Move the company file to a local or network drive, if it was previously on an external storage device. You need to try and open the QBW file in QuickBooks.
If the company file references the mapped drive, then change the settings and opt for the right server. You can do this by clicking on the open or restore in the file menu and select the open a company file and click on network place. Hit on the entire network and select the server in which the company file is stored.
Rewrite the extensions of .ND and .TLG which help to configure files allowing QuickBooks Desktop to access company files in multi-user mode. Errors are seen while opening QuickBooks Desktop if harm .ND and .TLG files are there. If you rename these files, then there will be no data loss while opening or scanning the company file using QuickBooks database server manager. They occur automatically.
Open the folder that has the company file stored.
Locate files with the same name of a company file with these two extensions as “.ND” and “.TLG”
Find the files with the same file name as your company file, but they should be with the extension .ND and .TLG. Ex: company_file.qbw.ND, company_file.qbw.TLG
Select “.ND/.TLG” file, do a right click and click “Rename” option
Add the word “.old” after adding an extension and press “Enter” key. (Example: company_file.qbw.nd.OLD, company_file.qbw.tlg.old)
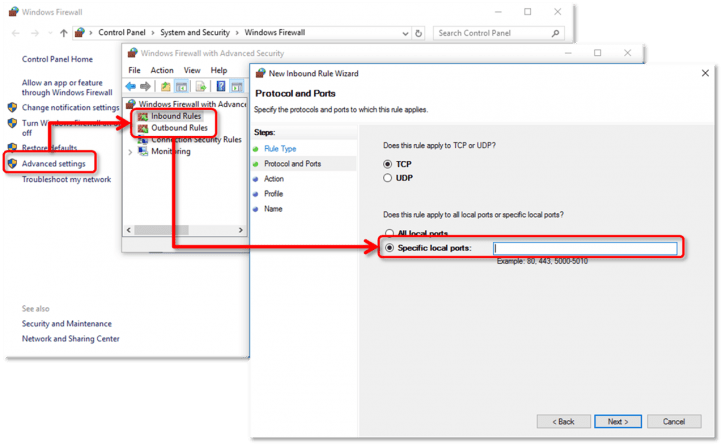
Solution 4: Configure firewall and security software settings
Configure the “Firewall port settings” to automatic.
Manually configure exceptions for all firewall ports.
Either install an “Anti-virus” defender or appropriately configure it.
Solution 5: Try UNC Path Instead of the Mapped Drive
Right-click on the QuickBooks icon, press and hold the “Ctrl key” on your keyboard, and select “Run as Administrator” option.
Hold down the “Ctrl key” till the “No Company Open” window appears.
Note: When you will hold down the “Ctrl key“, it will prevent QuickBooks Desktop from auto-opening a company files.
From the File menu, select “Open or Restore Company” > Open a company file > “Next“.
In the left pane, click “Network” settings, and navigate to the location of your company file.
Note: If you can’t find the folder having the company file, you may need to set folder permissions.
Select the company file and click Open.
Solution 6: Removing any blank spaces in the filename
Any blank spaces or characters in the company file name, can cause issues in QuickBooks. Thus, get rid of any blank spaces or characters from the file name using the steps below:
At first, the user needs to log out of the QuickBooks desktop software application on the systems where QuickBooks is open.
Next step is to move to the QuickBooks company file and open it.
Right-click on company file and choose the Rename option.
Opt for the name of the company file and enter it. Also, check that there is no space in it, and then remove any spaces between the file extension and also the company name.
Other than the above steps, we recommend you perform the steps discussed below to get rid of such an error in QuickBooks. Let us have a look:
The user needs to first reboot QuickBooks with more permissions
At, times, a mere reboot can fix the issue
Another alternative is to move the company file to a local folder or network drive, only when it was stored on an external storage device previously. The user will then have to open the QBW file in QuickBooks and check if the issue exists
If the company file references the mapped drive, then the user will have to change the settings and choose the right server
Tap on to open or restore option in the File menu.
Select Open a company file and click on Network place.
After that, click on the Entire network
Go for the Server having the company file.
Lastly, check if the solution worked or not, and then reboot the software
Some Other Helpful tips to solve this error:
Get more permission and reboot the QuickBooks software. Most of the times, error removes as one restarts the system and thus, and fixes the issue.
Resolving QuickBooks -6000 Series Errors can be a bit tricky, but following the structured steps mentioned above will help you regain access to your company file safely. In most cases, adjusting folder permissions or utilizing the diagnostic tools will get your accounting software back on track without any data loss.
However, we know that your time is valuable, and dealing with technical multi-user errors can be overwhelming. If the error still persists after trying these steps, or if you prefer a professional to take care of it securely, we are here to help. Get in touch with our QuickBooks Enterprise Support Experts at QuickBooks enterprise support team anytime at +1-888-510-9198. From handling complicated 6000-series errors to providing complete QuickBooks training and setup, our certified ProAdvisors are available 24/7 to ensure your business never stops running smoothly.
What is QuickBooks Error 6000-77 and how does it affect my business?
QuickBooks Error 6000-77 is a common error that occurs when attempting to open a company file. This error may disrupt normal business operations by preventing access to critical financial data. It occurs in case there are issues with file permissions, corrupt or damage company files, or problems with the network connection.
How can I resolve QuickBooks Error 6000-77 on my own?
To resolve QuickBooks Error 6000-77, you can try the following steps: 1. Ensure QuickBooks is up to date. 2. Run the File Doctor tool to diagnose and repair any potential company file issues. 3. Check file permissions and configure the required settings. 4. Verify your network connection and ensure your firewall or antivirus isn’t blocking QuickBooks.
Are there any other errors related to QuickBooks Error 6000-77 that I should be aware of?
QuickBooks Error 6000-77 is part of the 6000 error series, which includes other errors such as 6000-80, 6000-82, 6000-83, and 6000-301. These errors are generally related to issues with company files, network connections, or file permissions.
What are file extensions in QuickBooks?
File extensions in QuickBooks are usually used to identify the file and the information inside. There are a handful of file extensions that are available in QuickBooks, that help the users to identify different files.
Can I contact QuickBooks support for assistance with Error 6000-77?
Yes, if you’re unable to resolve QuickBooks Error 6000-77 using the suggested steps, you can reach out to QuickBooks support for professional assistance. Contact our toll-free number +1-888-510-9198, and our skilled technicians will guide you through the troubleshooting process.
QuickBooks Error 6000, 301 is one of the more well-known errors in the 6000 series a group of errors that all relate to issues with accessing your company file. Since the company file holds all your critical business data, any error connected to it deserves quick attention, and this one is no exception. When this error strikes, QuickBooks displays a warning message saying it encountered a problem trying to access the company file, and recommends contacting Intuit Technical Support with the error code if it continues. The disruption can range from a minor inconvenience to a complete halt in your workflow, depending on how often you need to access that particular file. This guide breaks down exactly why this error happens and walks you through 7 solutions to fix it. If you’d rather have it sorted by a professional right away, our QuickBooks Error Support team is available at +1-888-510-9198 just give us a call.
Warning: An error occurred when QuickBooks Desktop tried to access the company file. Please try again. If the issue pertains, contact the Intuit Technical Support & endow them with the following QB error codes: (-6000,-301).
In most cases, Error 6000, 301 occurs when you’re trying to open a QuickBooks company file with (.qbw), and your system doesn’t have enough available disk space to process it. This shortage of space prevents QuickBooks from reading the file correctly, which is what triggers the warning message and makes the software difficult to manage until it’s resolved.
If you’d like a professional to fix this for you instantly, our QuickBooks Error Support team is available at +1-888-510-9198.
Causes of QuickBooks Error 6000, 301
The Error can cause due to the following ways. One or more of the QuickBooks desktop files gets damaged. These file(s) are given below:
Transaction Log (.TLG) file
Network descriptor (ND ) file
Data Source name ( DSN) file
If the data company file is not working
Encryption Software installed.
This error can be experienced when the .QBW file is damaged or corrupted
The database name file available on your desktop gets damaged
Another reason can be if you try to install encrypted software. The process of operaing QuickBooks will be hindered.
If you are trying to open the QuickBooks desktop company file and the same file is located on the hard disk offer desktop, which is accessing the QuickBooks database server manager.
The software used is outdated and needs an update with the latest QuickBooks software launched by intuit
Symptoms of QuickBooks error
Wondering whether you’re actually dealing with this specific error? Watch for these telltale signs:
In case you are unable to open or access the corrupted company file
Or if the QuickBooks application is responding slowly than usual
Another sign can be if the QuickBooks software is asking to recreate the company file to access it freely
You need QuickBooks support files, or you might not be able to use QuickBooks
Check out the possible systematic solution for QuickBooks error 6000 301. Follow the steps in sequence to get the best result.
Solution 1: Repair your QuickBooks desktop
Since the QuickBooks is all about giving enough of the application to be stored over the computer and the related excel file(s) it is necessary to delete the files which are of no use or have got corrupt.
Here is the easy step to remove QuickBooks error:
Go to the “Start” or “Windows” menu => open the “Control Panel” tab => click on the “Programs” tab => click on the “Programs and Features” tab.
Select the QuickBooks & click on the “Uninstall” icon.
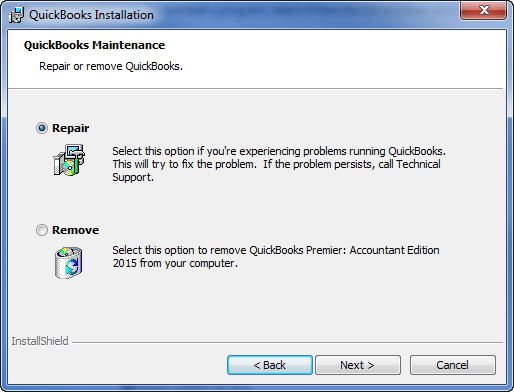
Click on the “Next” tab once the QuickBooks installation window appears.
Select the “radio” button next to “Repair” icon. Click on the “Next” tab & then the “Repair” tab.
One can try to perform the below set of steps to update the QuickBooks software. The steps differ for manual and automatic methods. Let us have a look:
Manual update
The user needs to close company/logoff, from the File menu.
After that click on the File tab and also go for the Exit option.
The next step is to right-click the QuickBooks desktop icon.
And then, click on Run as admin
Ensure that you are on No company open screen.
After that, go for the Update QuickBooks option from the Help menu.
Once done with that, click on Options tab
And then, hit a click on Mark all tab
Go for Save tab.
Now, click on Update now.
And then, click on Reset update and click on the Get updates tab.
Close QuickBooks desktop, when update complete message appears on the screen.
Open QuickBooks desktop and click on Yes tab.
Reboot the system and you are done with the process
Automatic Update
The user is suggested to click on Update QuickBooks from the QuickBooks help menu.
After that, head to the Update now tab in the Update QuickBooks window.
Now, Checkmark the box.
And remove the previous update downloads by Resetting update.
This might increase the amount of time required for the update.
The user is now required to click on Get updates and the current release will download.
Also, reboot the system and Accept the option to install the new release, when rebooting QuickBooks
Solution 3: Rename the QuickBooks .ND files
Opening the folder which contains the company file.
Just have the file(s) with the same name as the QuickBooks file but with the extension .tlg along with .nd and/ or .dsu.
Right-click with each file along with selecting Rename. Adding the word .OLD to each of them.
This rebuilds your company data files and keeps away from a default database.
This tool will automatically detect the problem and try to fix them automatically.
Solution 6: Disable the encryption software (if find any)
Now get to communicate to the software merchant for your encryption software for specific guidance on disabling the software.
Note: We do not suggest encrypting the QB Company file using any third-party encryption software. You can contact the encryption software’s vendor for detailed instructions about how to disable it.
Solution 7: Copy the Company file to the Desktop
The user can also copy the company file to the desktop to check if there is any issue with the company file.
At first, right-click on the desktop and then head to new and folder options respectively
Now, head to the original location of your company files.
After that, right-click the Company file and hit on Ctrl + C keys to Copy the file.
The user is then rneeds to head to the newly created folder on the Desktop and hit on the Ctrl + V keys to paste the file.
Now, press and hold the Ctrl key until the No Company Open Window pops up on the screen.
After that, go for the Open or Restore an Existing Company option.
And pick the company file that you copied to the desktop folder, then hit on Open.
Winding Up
Out of the 7 solutions covered above, repairing your QuickBooks installation or renaming the .ND and .TLG files tends to resolve Error 6000, 301 for most users, so it’s worth starting there if you haven’t already. The remaining solutions are there as backup in case the underlying cause turns out to be something less common, like encryption software interference. If the error keeps showing up no matter what you try, it’s probably time to bring in a professional rather than risk further damage to your company file. Reach out to our 24/7 QuickBooks support helpline number i.e. +1-888-510-9198 we’re always ready to help, day or night.
Some FAQs Relating to QuickBooks Error 6000 301:
What is a QuickBooks company file?
QuickBooks company file is one of the core components of QuickBooks that stores essential and sensitive company information. As the file has the sensitive data, it is essential to keep a timely backup of the file, to avoid missing essential company data.
What is QuickBooks tool hub?
Intuit the developer of QuickBooks offers various tools to eliminate errors that come across when working on QuickBooks. One such tool is the QuickBooks tool hub. This is a one-stop destination for all QuickBooks tool requirements. It gives access to a plethora of tools like file doctor, install diagnostic, connection diagnostic, etc.
How to fix QuickBooks error code 6000?
QuickBooks error code 6000 can be easily tackled by performing the steps to rename the .nd and .tlg files. You can check out the detailed article to fix this issue permanently in QuickBooks.
How to download QuickBooks desktop?
One can easily download QuickBooks desktop software from the official Intuit website. The software is subscription based, which means one has to have license and product key to access the software.
What is QuickBooks Error 6000, 301?
QuickBooks Error 6000, 301 is a common error that occurs when a user tries to open a company file stored on a different computer. This error message suggests that the company file is damaged or inaccessible.
What are the causes of QuickBooks Error 6000, 301?
The main causes of QuickBooks Error 6000, 301 are: Corrupted or damaged company file Incorrect folder permissions Damaged network data Improper installation of QuickBooks
What should I do if QuickBooks File Doctor doesn’t resolve the error?
If QuickBooks File Doctor doesn’t resolve the error, you can try the following steps: Ensure that the hosting is turned on for the computer where the company file is stored Try to open the company file in the single-user mode If the issue still persists, you can call QuickBooks support at +1-888-510-9198 for further assistance.
Can low disk space on the server also cause Error 6000, 301, not just the local computer?
Yes, this is an important detail many users overlook. If your company file is hosted on a server and accessed over a network, the disk space on the server matters just as much as the space on your local workstation. Even if your computer has plenty of free space, a server running low on storage can still trigger Error 6000, 301 when QuickBooks tries to read or write to the company file. Checking available space on both ends is a good first step before working through the other solutions.
Will repairing my QuickBooks installation delete any of my data?
No, repairing your QuickBooks installation (Solution 1) only fixes the software’s program files it does not touch your company file or any financial data stored within it. Your company file is stored separately from the application itself, so even a full repair or reinstall of QuickBooks leaves your transactions, customer records, and reports completely untouched.
Is QuickBooks Error 6000, 301 different from other 6000-series errors like 6000, 77 or 6000, 80?
Yes, while all 6000-series errors are connected to company file access issues, each one has a slightly different root cause. Error 6000, 301 is most commonly tied to insufficient disk space or damaged network/transaction log files, whereas Error 6000, 77 typically relates to incorrect file storage locations, and Error 6000, 80 is often caused by multiple computers being set as the host. That said, several troubleshooting steps like renaming .ND files and running the QuickBooks File Doctor tend to overlap across all of these errors.
Have you ever heard of SUI rate for basic, enhanced, or standard payroll? Well, SUI tax rates stand for State unemployment insurance. It provides employees who lost their data for different reasons with a short-term benefit. Moreover, when you mistakenly put-up state taxes or payroll items. QuickBooks incorrectly deducts unemployment from an employee’s paycheck. You state sets your SUI rate. And this rate is unique to every business. In case you are a new employer, your state will assign you a new employer rate until you file unemployment taxes for a certain period of time. Often when SUI rate changes, you will have to update it in payroll. This surely keeps your SUI tax liability accurate. It should be noted that the state unemployment insurance is only paid by the employer, unless the state requires employees to contribute.
In addition to that QuickBooks 2013 for windows requires a valid Intuit payroll subscription with recent upgrades being installed. You can further configure QuickBooks to accurately compute unemployment as long as the employee hasn’t used up all of the state unemployment insurance benefits. To learn further about SUI and to explore the process to change SUI, make sure to stick around this piece of writing carefully. Or you can further connect with our tech support team in case of any queries. Feel free to reach out to us at +1-888-510-9198, and we will answer all your queries immediately.
Facts Related to SUI Tax
These SUI rates are important for your large business and that is issues by a state.
SUI tax rate is not a part of payable tax & it is critical that a user enter their tax rate in their QB desktop software.
This tax is paid by the employer until and unless your state and employees contribute with each other.
SUI wage limit will be rationalized through the tax table as per rules according to which state you belong to. Remember one thing, this will not be modified by a manual.
In the beginning of a financial year, many states will already update SUI tax rate. In fact, others such as New Jersey, Vermont and Tennessee will update their SUI tax rate in the first quarter of a financial year.
QuickBooks Payroll software is used to manage your accounting in a well-planned way. With the help of this payroll, this brings our work less stress and reduces the workload by consuming less time. If you have any queries, then ask expert advice directly from our QuickBooks Consulting Service team.
Method that Describes SUI basic, Enhanced or Standard Payroll
Know what the facts about SUI tax rate are
All rates are exclusively unique for every new business & this can be issued by any state.
The rate is also not a part of an updated tax table. It’s critical that you enter the current rate in your QuickBooks Desktop.
If it is paid by an employer, it is unless that you’re in a state or want to contribute by the employees.
Steps to Change the SUI tax rates in Enhanced or Standard Payroll
Now we need to understand that points to change SUI tax rate in Enhanced Payroll & Standard payroll
First of all, choose an option of Lists. Then click to the Payroll item list.
After that, double-click on the SUI tax item, which is typically named: [state abbreviation] – unemployment company.
Then click on the next key button. Click on the company tax rates as yearly.
An account is also required to type correct rates as per quarterly.
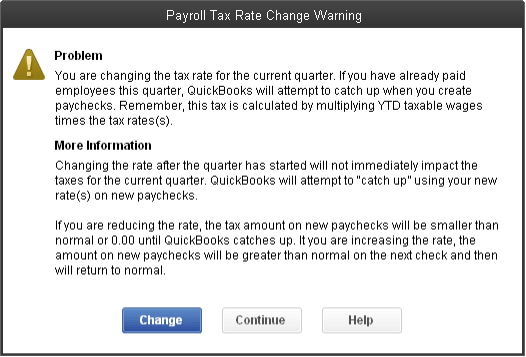
Note: Remember one thing that if your device date is 7/1 & 1/1 that a user will now able to include the rate for a first quarter as for annually.
While to do so if you mention all correct rates or a user get an error message as Payroll Tax Rate Change Warning on your desktop screen. Now click the continue option. Thus, the user SUI rates will now be updated.
Now click on the next option and then give a one clicks to clear of all unnecessary items which are having no matter related to SUI tax.
After this, give a click to the next option and then click on the finish button, if troubling somewhere then asks expert guidance provided by QuickBooks Payroll Support team.
If you want to change or require you to make some modifications in Sui wage bases or sums that are reports to our workers. Set up a payroll report and standardized these numbers.
Here are some tips describing as that boost to change SUI tax rates and enhanced or standard payrolls as explained here: –
Firstly, select or click as reports & then click to an employees and payroll option.
After that, set the date to keep track as quarterly.
Now click to customize the accounting report and select the following details.
Date required for proper information.
Want the Source Name for that report.
Which Payroll Item you’re using.
Wage Bases of a payroll.
Total amount mentioned in the given payroll.
While to do so, click the filters option, in the above list, select the payroll items.
Now give one single click to the payroll item. Select the State unemployment item.
Now let us look at the total wages that are based upon the column and can increase the present rate.
At the end, users need to match all sums that you have calculated.
Hopefully, this article helped you to understand about SUI Tax Rates & how to change in basic, enhanced or standard payroll, if troubling somewhere or have any query then feel free to contact us at our QuickBooks support number through given toll-free number +1-888-510-9198. Thanks for visiting our page, if you want any additional services our Certified ProAdvisors team is available to help you with all accounting and bookkeeping solutions.
If you are facing errors while operating or accessing your payroll account? Then you’re at the right place where end users will get instant solutions provided by our Intuit certified Pro Advisors. No more wait, give us a call on our toll-free number +1-888-510-9198, and share your problems with our experienced professionals who have years of experience sorting out all accounting and quick booking solutions. Thus, our accessibility is round the clock. It’s too easy to connect our experts that are more qualified and highly knowledgeable in resolving all sorts of hindrances in real-time.
FAQs Related to SUI Rate in QuickBooks
What is the process to alter tax rates in QuickBooks?
To alter tax rates in QuickBooks, you can perform the below steps: 1. Open QuickBooks company page and choose reports from the menu 2. Choose item list 3. Every item that is stored in QuickBooks will be visible 4. Locate customize report in the top menu bar and click on the same 5. Press filter tab 6. Choose account after that, and select all liabilities from the drop-down box. 7. The sales tax list should be printer 8. Click on print and choose report from the list 9. When a new window appears, select your printer and press print tab
How do I change payroll settings in QuickBooks?
You can change the payroll settings in QuickBooks using the steps below: 1. Open QuickBooks desktop company file and sign in as QuickBooks admin 2. Choose edit, and go for preferences. 3. From menu choose payroll and employees 4. Go for preferences tab 5. Ensure that QuickBooks payroll features is set to full payroll
What is Sui Basic?
State unemployment insurance is a tax funded program by employers to give short term benefits to workers who have lost their job. This tax is needed by state and federal law. Unemployed workers receive these benefits on the condition that they are looking for new job.
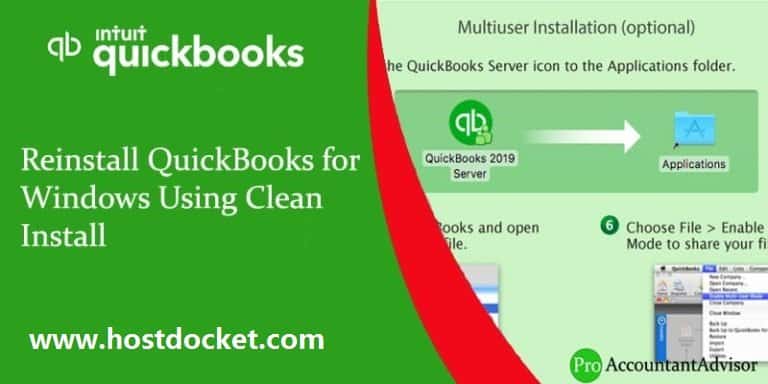
After a long time, some of the older versions get damaged or when a simple reinstall is incorrect, it becomes an issue, and then a user required to uninstall the older QuickBooks Desktop version for Windows. There is a rename installation files that is left behind this software, and then make a reinstalled the program. Thus, this process is known as clean installation or you can say Clean Uninstall. QuickBooks Software needs to reinstall at once to perform well and error free.
Get Consulting & Troubleshooting: As we all know QuickBooks is accounting software designed to help you and manage financial information. Our Certified QuickBooks ProAdvisors® can assist you with QuickBooks installation, implementation, Integration and troubleshooting. We also can provide you training and consulting to help you get the most out of your software and increase productivity and efficiency.
Steps to Re-install the QuickBooks Desktop Version
Note: Before uninstalling your QuickBooks, be sure to have your QuickBooks Desktop download file or your installation CD and license numbers are available.
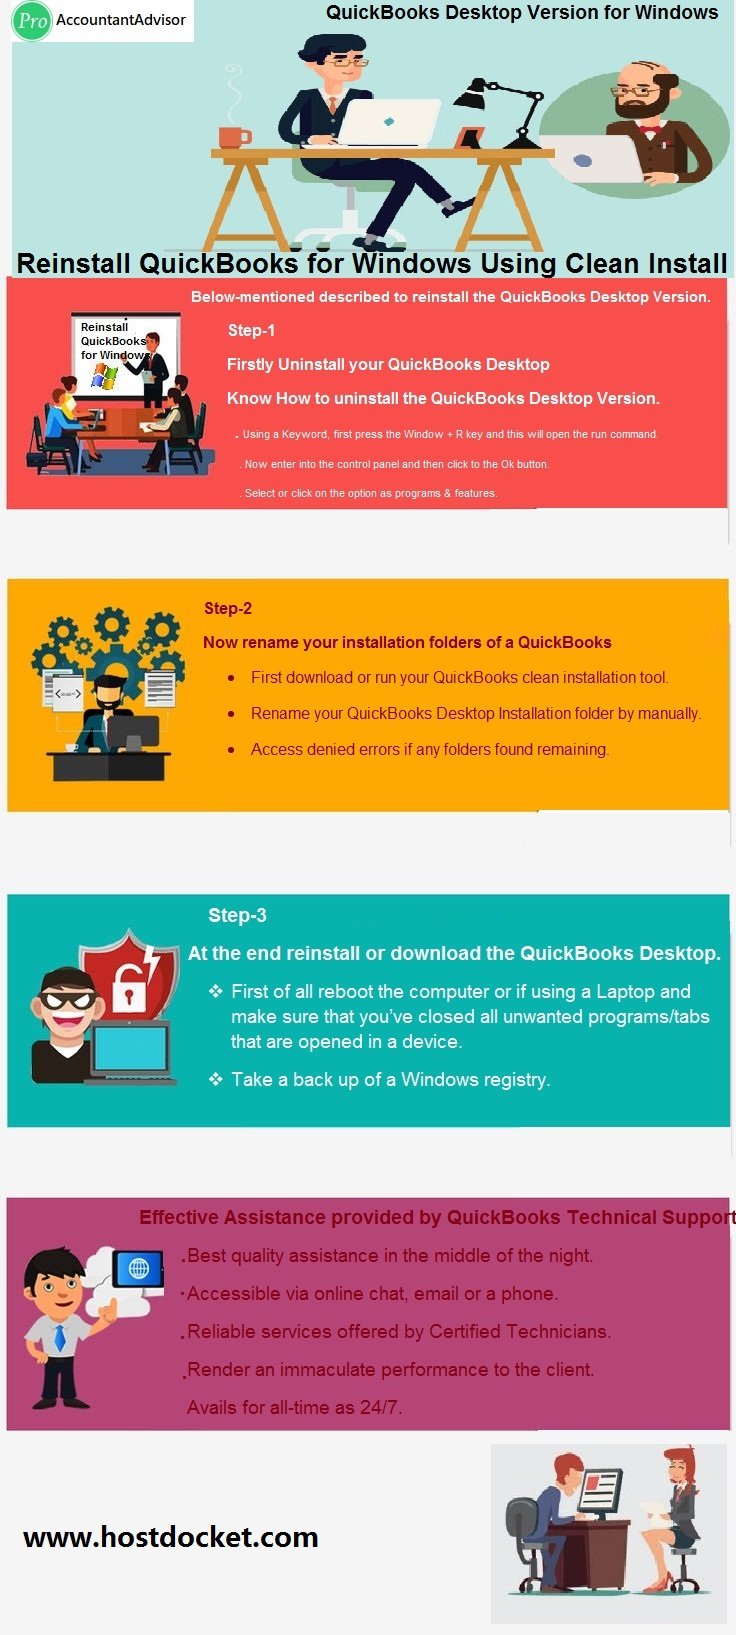
Step 1: Firstly, Uninstall your QuickBooks Desktop
Using a Keyboard, first press the Window + R key and this will open the run command.
Into the Run command, type control panel and hit Enter.
Select or click on the option as programs & features.
In the below given main list of all programs choose QuickBooks and then click to uninstall option or to change.
Now follow the instruction that completes the process.
Step 2: Now rename your installation folders of a QuickBooks
A user will have an option & can use QuickBooks clean install tool that you can rename all your folders that you can make into your device. Thus, if a user did not want to run this tool, also you can rename your QuickBooks installation folders through a manual.
First download or run your QuickBooks clean installation tool.
Rename your QuickBooks Desktop Installation folder by manually.
Access denied errors if any folders found remaining.
Step 3: At the end reinstall or download the QuickBooks Desktop.
Performing a clean Installation process as explained below: –
First of all, reboot the computer or if using a laptop and make sure that you’ve closed all unwanted programs/tabs that are opened in a device.
Take a backup of a Windows registry.
After this make un-install for all versions of your QB software.
Now open a task manager tab and then end all QuickBooks processes including as QBCFMonitorService, QBDBMgr, QBDBMgrN, QBPESEVNT08R, QBW32, or QBWebConnector.
Now rename of your Intuit folders into Intuit.old.
C:\ProgramData\Intuit
C:\ProgramData\COMMON FILES\INTUIT
C:\Users\QBDataServiceUser28
C:\Users\QBDataServiceUser27
C:\Users\QBDataServiceUser26
C:\Users\QBDataServiceUser25
C:\Program Files\Intuit or C:\Program Files (x86)\Intuit (64-bit)
C:\Program Files\Common Files\Intuit or C:\Program Files (x86)\Common Files\Intuit (64-bit)
Now repeat your step as discussed that helps to keep control included KEY_LOCAL_MACHINE\SYSTEM\ControlSet001\Services\.
Few Important Points
While to do, reboot your system device to make assure that no QuickBooks Db services is running while installation process is running on a computer device. If you face any problem while performing these steps then you can take help from our QuickBooks Error Support team.
Finally install a new version of QB software. Let’s start with an oldest version via the newest version.
When the installation process is completed. Be sure that you a user have opened the database server manager (Note: if you’re at the server).
When installing program is done, also be sure that you’ve opened the company file. If your first installation step works then go through & installed all further versions that you required. After completion of each installation, check it by doing a self-test.
Hopefully, above given steps will help you and troubleshoot your issues in a right way. If find any troubles, then ask expert guidance offered by our experienced technicians that have a versatile accounting knowledge & are capable to resolves all unknown QuickBooks Error Codes that user faces while installing QuickBooks software.
Effective Assistance Provided by QuickBooks Technical Support
Looking for an incredible help? Ask your doubts directly to our technicians who have work knowledge in resolving countable issues at a specific time. Get this opportunity and fix all your errors either on chat, email support, or on a telephonic consultation. Seek effective assistance that is provided by our QuickBooks Support at +1-888-510-9198. Our team is available for 24 hours a day.
Services Offered by our Experts are as:
Always ready to handle your QuickBooks software error codes
Best quality assistance in the middle of the night.
Accessible via online chat, email or a phone.
Remarkable QBs services
Focus on client’s problem
Reliable services offered by Certified Technicians.
We are always available for 24 hrs. a day to serve the best assistance to the user. I hope you have successfully troubleshooted this error. However, if you are still troubling with these errors then we recommend you to connect with our live expert through our toll-free number +1-888-510-9198. Our QuickBooks support team is available round the clock.
Some FAQs Related to Reinstall QuickBooks Desktop for Windows
How can I reinstall QuickBooks Desktop for Windows?
To reinstall QuickBooks Desktop for Windows, first, make sure to have your product and license information handy. Then, download the installation file from the Intuit website or use your original installation CD. Follow the prompts to uninstall the current version of QuickBooks and then install the new version.
I’m having trouble reinstalling QuickBooks Desktop for Windows. What should I do?
If you’re having trouble reinstalling QuickBooks Desktop for Windows, you can contact our support team for assistance. Our toll-free number is +1-888-510-9198, and our experts can help you troubleshoot any issues you may be experiencing.
Do I need to back up my company file before reinstalling QuickBooks Desktop for Windows?
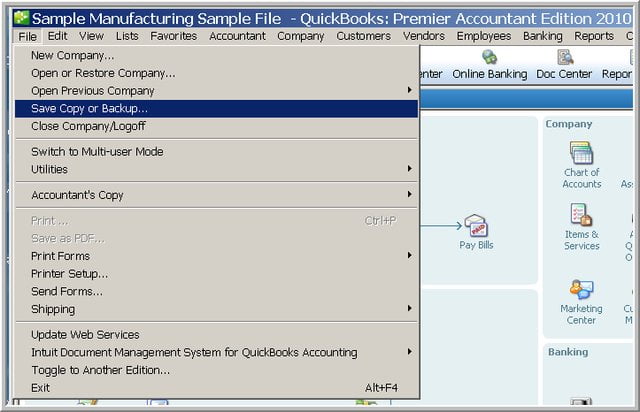
Yes, it’s recommended to back up your company file before reinstalling QuickBooks Desktop for Windows. This ensures that you don’t lose any important data during the reinstallation process. You can back up your company file by going to the “File” menu in QuickBooks and selecting “Backup Company.
Can I reinstall an older version of QuickBooks Desktop for Windows?
It’s not recommended to reinstall an older version of QuickBooks Desktop for Windows unless it’s necessary for compatibility reasons. If you’re unsure which version to reinstall, you can contact our support team at +1-888-510-9198 for guidance.
Will reinstalling QuickBooks Desktop for Windows delete my data?
Reinstalling QuickBooks Desktop for Windows will not delete your company data, as long as you backup your company file before starting the reinstallation process. However, any customizations or preferences you’ve made within QuickBooks will need to be set up again after the reinstallation is complete.