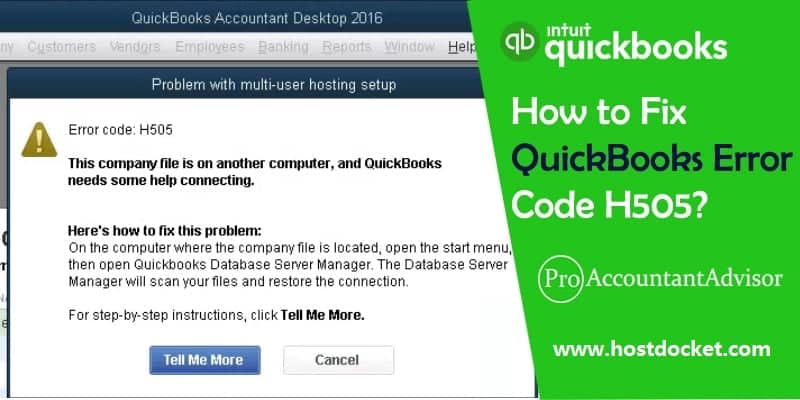
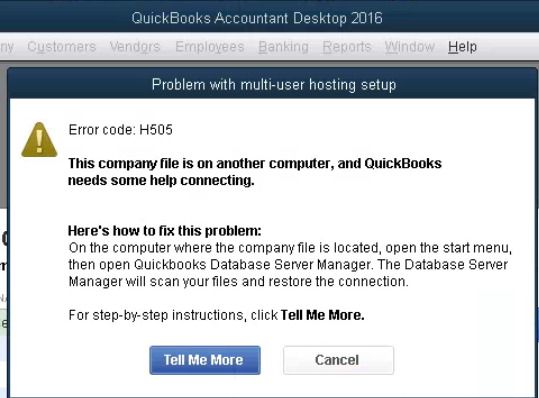
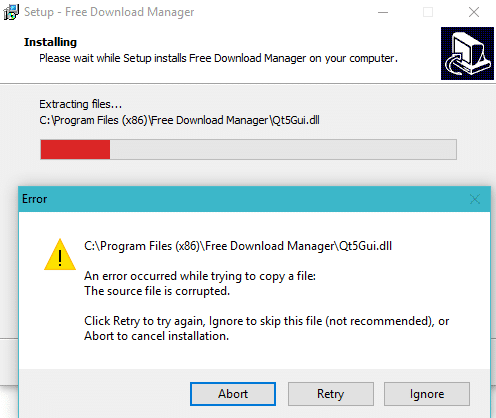
Often when you try to switch to multi-user mode, you might come across an error message i.e., QuickBooks error code H505. This error basically indicates that something is blocking the multi-user connection to the server. QuickBooks error H505 basically belongs to the H series error and is a network issue. It shows up on the screen with a warning message stating:
Error Code: H505 Error Description: This company file is on another computer, and QuickBooks needs some help connecting.
If you are also facing this error then this post can be of great help to you. However, if you are seeking expert assistance or professional guidance, then in that case you can make a call at our toll-free number i.e. +1-888-510-9198. Our QuickBooks desktop support team will help you in fixing the issue in the best possible way.
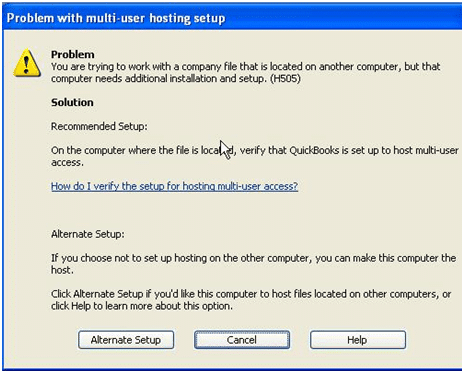
QuickBooks Error code H505 appears when the user tries to get the company files or data on another computer & that computer does not have proper establishment setup or the computer requires additional installation or setup. The H series errors are related to the hosting settings problems. This error code appears on the screen, due to one or more of the user’s computers being set to be the QuickBooks server. It should be noted that the user’s computers can function in multi-user mode, but only the server is compatible with Word in that way, i.e. system that hosts the company files, should be the only machine configured to act as the host.
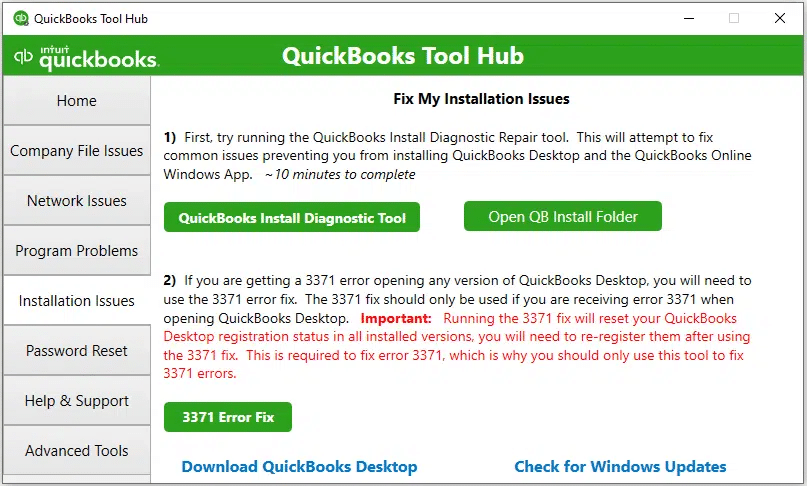
Start the procedure of downloading the QuickBooks tool hub program from the official Intuit website
Later on, save the downloaded file on the computer and perform on-screen instructions to install it
After downloading, make sure to open the tool hub by double-clicking the newly created icon to launch the tool.
The user is then required to check that the QuickBooks desktop is installed on the server system and the network is accessible
After the tools hub is open, you need to click on the company file issues tab
And also choose run QuickBooks file doctor from the onscreen available options
Select the company file that you want to diagnose and repair
Note that you can also directly download the QuickBooks file doctor tool and run the program on the server. The file doctor tool can fix the multi user error and this will free up the H series errors completely.
Solution 2: Verify services & hosting
Step 1: Firstly, You need to Verify the services
Here’s how
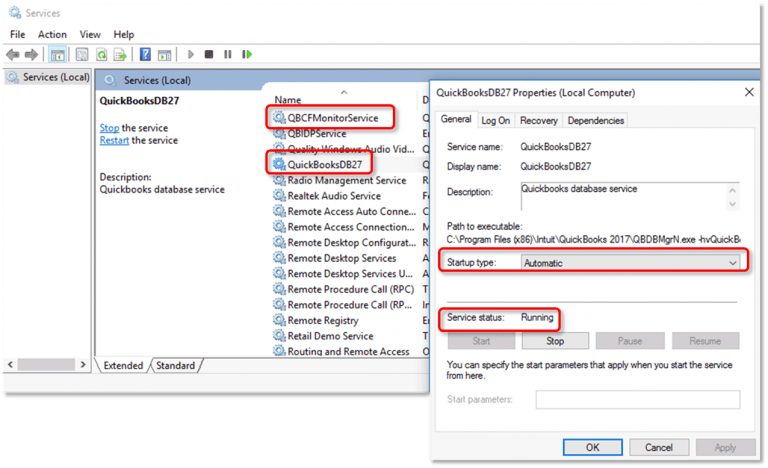
Make sure that the QuickBooksDBXX & QBCFMonitor services are running:
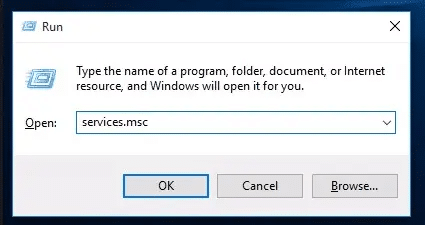
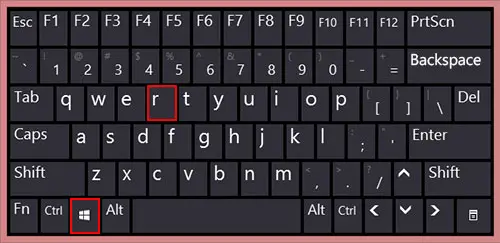
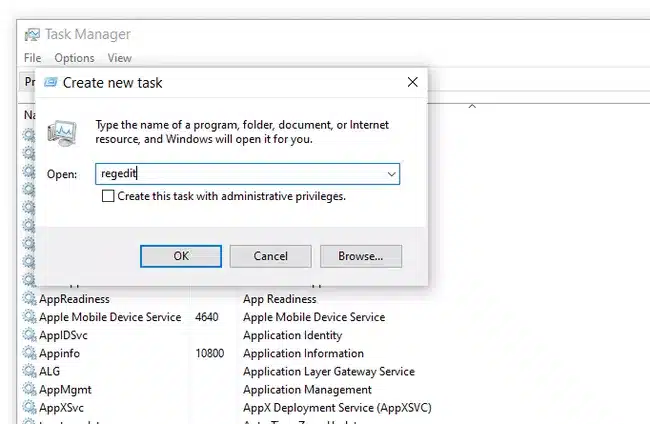
Hit the “Windows” or “Start” button
Insert the key “Window+R” keys
In the run box, enter “MSC” & press “Enter” tab
In the service window, search for “QuickBooksDBXX service“
Possibly, the QuickBooksDBXX service is not visible:
The very first step is to press the “Windows + R” keys together to open the “Run window”
And then, type in “cmd”, along with that hit “Enter” to open the Command Prompt window
The next step in the process is to type “ipconfig/all” and then hit enter to run the command
The last step in this process is to write down the “Hostname and IP Address” somewhere. The user will have to repeat the process for all the systems having multi-user setup.
After that, edit the Windows Hosts file:
Now, the user needs to “shut down QuickBooks” and then move to the “start menu”
After that move to “This PC” and make sure to access: “C:\Windows \ System32 \ Drivers\ Etc or C:\Windows \ Syswow64\ Drivers\Etc“.
The next step is to follow the hidden files and folders, in case the user is unable to find the Windows folder in This PC.
Click on the “View tab” and then click on “Hidden items”. The user will be able to see the hidden files
And then right click on the host file and then choose “Open” with and open it with Notepad
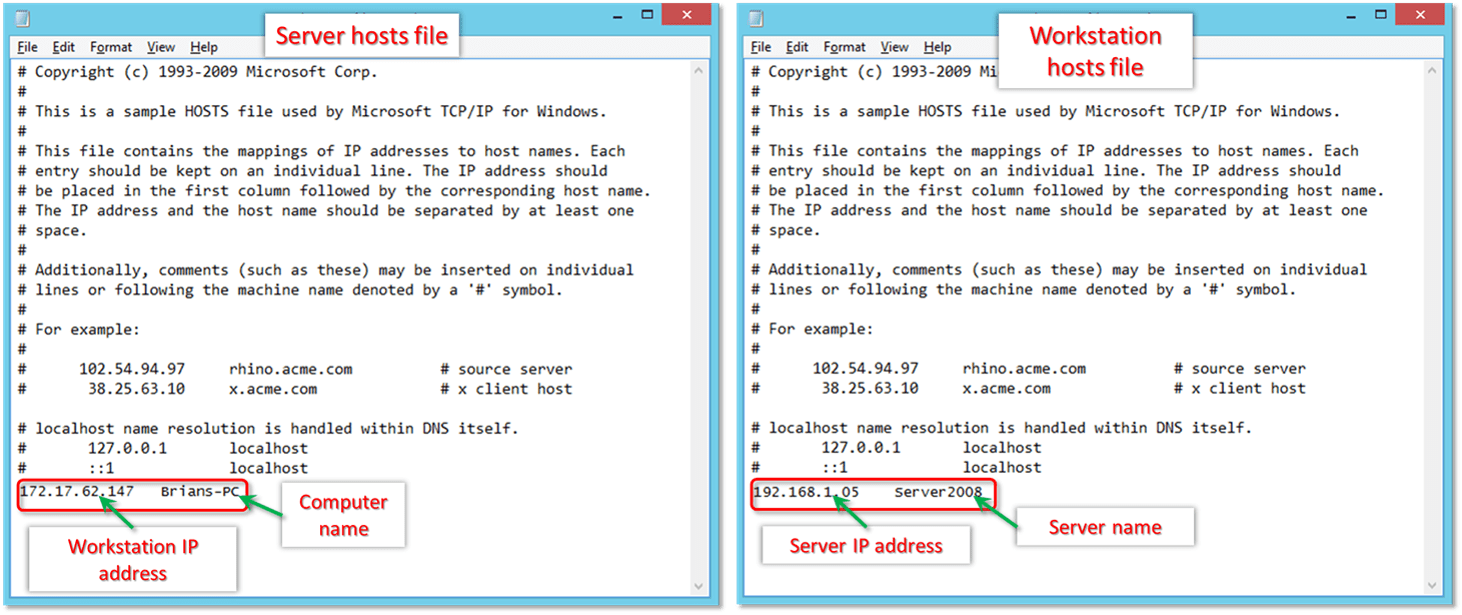
The next step is to fill in the IP Address and Computer Name. When the user enters the details, the user needs to use the Tab key, rather than the spacebar to put spaces between the IP address and system name
The last step is to save the changes and then reopen QuickBooks in multi-user mode
Solution 4: Create a new folder for the company file and enable access to company file
The very first step is to create a new folder in the hosting computer
And then, make sure that the Windows getting entry permissions to the company file
After that copy the qbw file into the new folder
The last step is to multi-user mode and also open the company file to complete the process
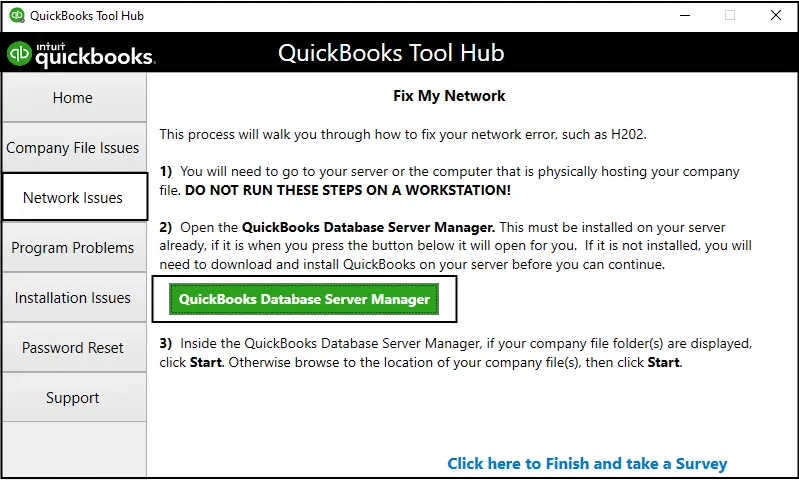
Solution 8: Run QuickBooks database server manager
You can run the QuickBooks database server manager from the QuickBooks tool hub using the set of steps enumerated below:
Step 1: Download and Install the QuickBooks tool hub on the server
To start off with close QuickBooks
Later on, download the QuickBooks tool hub file
Followed by saving the file at any easy to remember location
You now need to open the file downloaded earlier i.e., QuickBookstoolhub.exe
Furthermore, perform the onscreen steps to install and agree to the terms and conditions
After the install finishes, the user needs to double click the icon on the windows to open the tool hub
Note that if the icon is not visible, then search for it in windows for QuickBooks tool hub and then select the program
Step 2: Run QuickBooks database server manager, from the tool hub program
Select the network issues tab from the QuickBooks tool hub
Followed by selecting the QuickBooks database server manager. In case QuickBooks is not installed on the server, install it via the on-screen prompt
Select the start scan option, in case the company file folder. In case they aren’t, then browse to the location of the company file and then click on start scan
The database server manager will repair the firewall permission on its own. After the scanning process ends, ensure to choose close.
The last step is to open QuickBooks on each of the workstation facing the issue. Also, select the file option and switch to multi user mode. If the user detects any server system, as a workstation, then ensure to check that too.
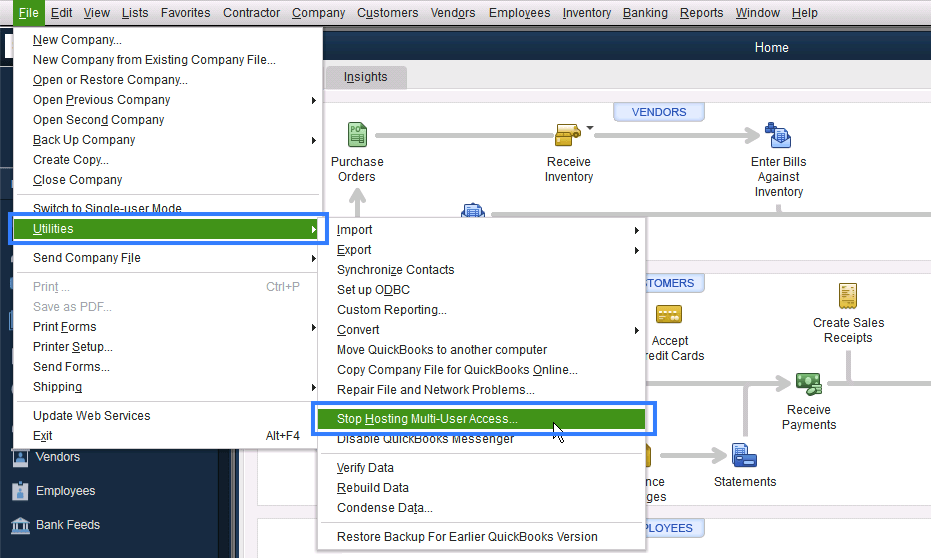
Solution 9: Perform the steps according to host the company files
Step 1: Host own network
In case the QuickBooks database server manager is not installed, then make sure to install the database server manager on the server for each version of QuickBooks being used. The server is the system that hosts the company files. Once the user has installed the database server manager, the below steps can be performed.
The full program option: The user needs to install the full version of QuickBooks desktop and database server manager on the server system
The server only option: Only install the database server manager on the server system
Step 2: Hosting the network with Windows Server 2012 essentials R2
The user is required to perform the below steps to use the Windows Server 2012 essentials R2 for hosting the network.
Use QuickBooks enterprise hosting – If the users are using QuickBooks enterprise hosting, then reaching out to professionals is suggested.
Use another hosting solution – If the user is making use of another solution, then directly contact the hosting provider to restart the hosting environment.
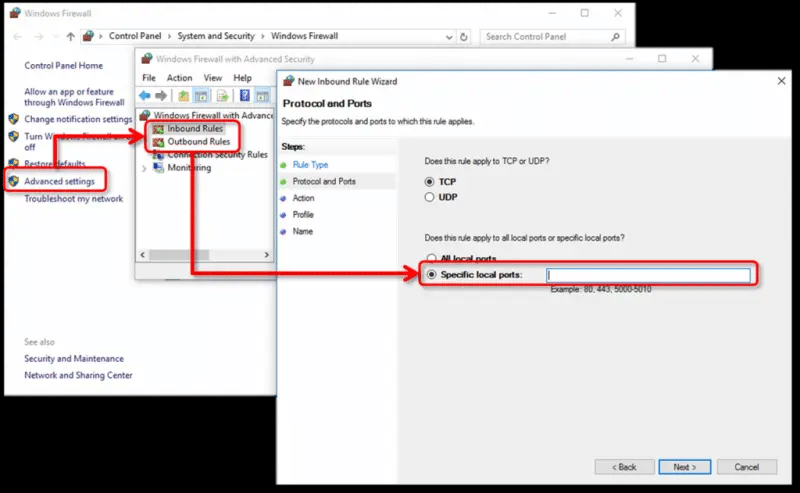
Solution 10: Open network ports for QuickBooks
Step 1: Configure the firewall settings
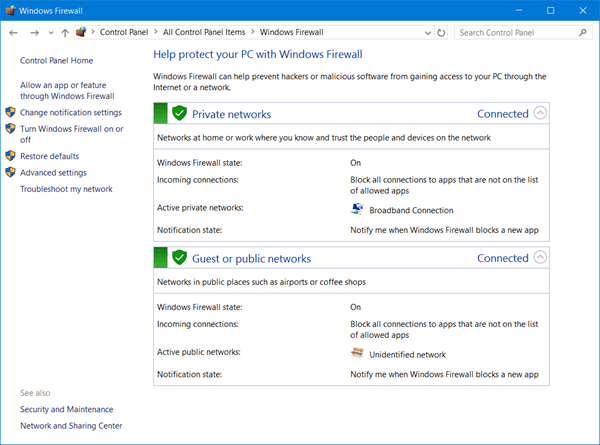
Start the procedure by moving to the Windows firewall settings and then right-click on the Windows option to click on the control panel.
Type in firewall in the search bar and also click on enter tab.
Click on the Windows firewall and press advanced settings
The user is then required to hover to the left and also right click on the outbound rules and select new rule
Click on the ports and also click on next tab
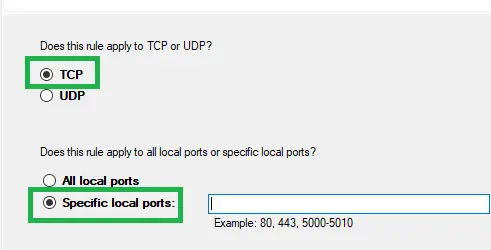
After that hit the TCP tab and in the specific local ports, enter the following ports:
For QuickBooks desktop 2015: 8019,56725,55363-55367
For QuickBooks desktop 2016: 8019,56726,55368-55372 QuickBooks
desktop 2017: 8019,56727,55373-55377
For QuickBooks desktop 2018: 8019,56728,55378-55382
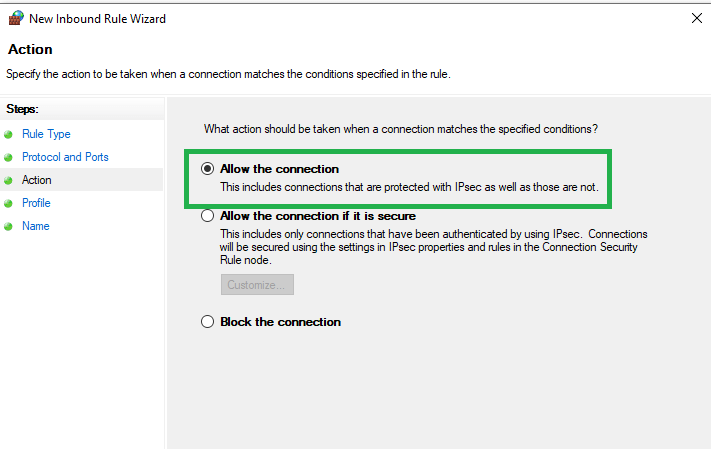
The user needs to choose the next tab and also click on Allow the connection tab
Now, click on next to type in the name and also click the finish tab
The user will the have to repeat steps 1-5 for inbound rules
The last step here is to move to the multi-user mode again and also open QuickBooks
Step 2: Turn on network discovery
Under this process, you simply need to open the control panel and then select the system and security
After that click on a Windows firewall
Also, click on the permit associate app/feature on the Windows firewall
Press modification option
Select network discovery and click on ok tab
Step 3: Find out the name of the server
The user needs to open the run command and then press on the Windows + R and type in CMD and also click on enter tab
Also, enter config/all and click on the enter tab
Once done with that, search for the host name in the IP configuration section
The user will then see the server name on the right
The last step is to click on save tab and also click on next tab
This drives us to the end of this article, where we hope that the information shared above will help in fixing QuickBooks error code H505. Perhaps, the error still persists even after applying all the solutions mentioned above. In that case, all you require is the best QuickBooks enterprise support.
We, are a specialized team of certified QuickBooks technicians. You can get in touch with them at +1-888-510-9198. Our professionals team will be happy to help you!
FAQs Related to quickbooks error code h505
What is QuickBooks error H505?
QuickBooks error code H505 is basically a technical error that can be seen when the user tries to access or move the company files to other computer systems.
How do I fix H505 error in QuickBooks?
A bunch of methods listed below can help: 1. Use QuickBooks File Doctor Tool 2. Make changes to the firewall settings 3. Edit the host settings 4. Create a new folder for QuickBooks company files. 5. Check server services.
What are various causes behind error H505?
There are a bunch of factors triggering this issue in QuickBooks. 1. The hosting configuration of the device is Incorrect. 2. Incorrect or damaged .ND file results in the failure of QB company file being accessed by the entire network. 3. Incorrect DNS settings. 4. It can occur when the QB Services such as QuickBooksDBXX/QBCF are not working. 5. In case the database server manager is not able to find the IP address of the host computer or in case it is using several different IP addresses.
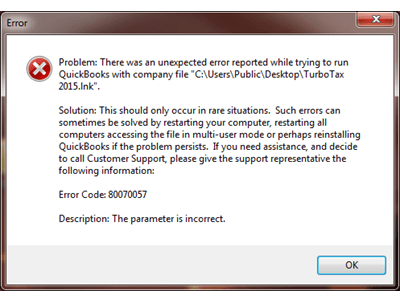
Interrupted by QuickBooks error code 80070057 when opening a QuickBooks company file? Well, often when trying to open a QuickBooks company file, an error i.e., QuickBooks error 80070057. This error often stops your QuickBooks software abruptly and at times ends up in QuickBooks crashing. A common reason behind the occurrence of this issue is the communication gap between the file and the server or host network. There are a bunch of factors triggering such an error, which we will be elaborating on later in this segment. To understand the parameter is incorrect.0x80070057 error better, stick around this piece of writing carefully, or you can also get on a call with our technical support team at +1-888-510-9198, and we will provide you with instant support and guidance related to all sorts of QuickBooks queries.
QuickBooks Error Code 80070057 is a run-time error that generally appears when you try to open a company file. This error is usually associated with communication issues with the QB Company file over the network on a different system (Server or Host). QuickBooks Error Code 80070057 simply means that you do not have adequate permissions to delete/eliminate the QB files in the specified folder. You can use/open/access the QuickBooks application in the multi-user environment if you have access to read/ write and have the authority to delete/create QuickBooks Company files stored in a specific folder.
When this error occurs, the system displays an error message that says:
80070057: the parameter is incorrect
Or
Error Status:80070057 The parameter is incorrect, or You do not have sufficient permissions
If you want to resolve error code 80070057 QuickBooks by yourself, follow the below-given instructions that the industry’s best accounting professionals provide.
Here are some of the potential reasons causing QB Error 80070057 : –
Damage Network Data (.ND) file(s): Network Data (.ND) files are the configuration files that store relevant information/details of QuickBooks Company Files accessibility in the multi-user mode. It enables the programs & other applications to identify the database server that it will utilize. This generally happens when the users try to move or delete the .ND files on the host or server machine, then file turn to an unreadable file. Hence, it leads to the Error Code 80070057.
Improper Firewall & Internet Security Setting: Sometimes, System Security applications and Firewall configuring incorrectly or improperly tend to distort the communication path between QuickBooks Desktop & QB Database Server. In this scenario, the chances of experiencing QB Error code 80070057 elevate a lot.
This error code can also arise when the QB user tries a direct attempt to open/access the QB company file via a shared folder. This generally happens because only the server or the host computer has permission to access or open the QB server files.
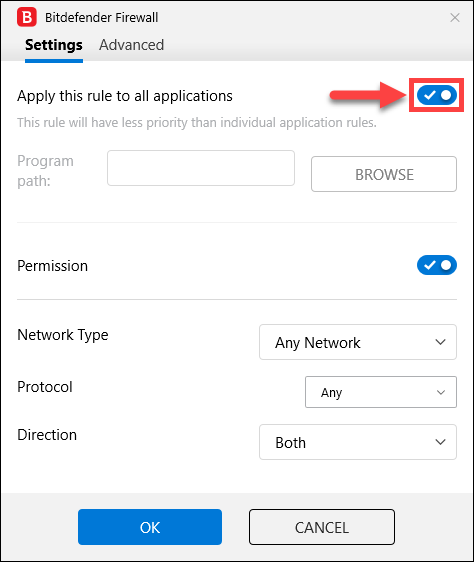
The antivirus used is BitDefender, which blocks uncommon ports when there is data traffic between the computers. QuickBooks Desktop 2018, 2017, and 2016 which uses the database service running on the host computer. This database service communicates through ports 56728(2018), 56727(2017), and 56726(2016) respectively. Bit Defender blocks these ports by the default manner.
Some Other Possible Causes of QB error 0x80070057
QuickBooks is unable to read your company file because of changed company file extension.
Latest Methods to Troubleshoot the QuickBooks Error Code 80070057
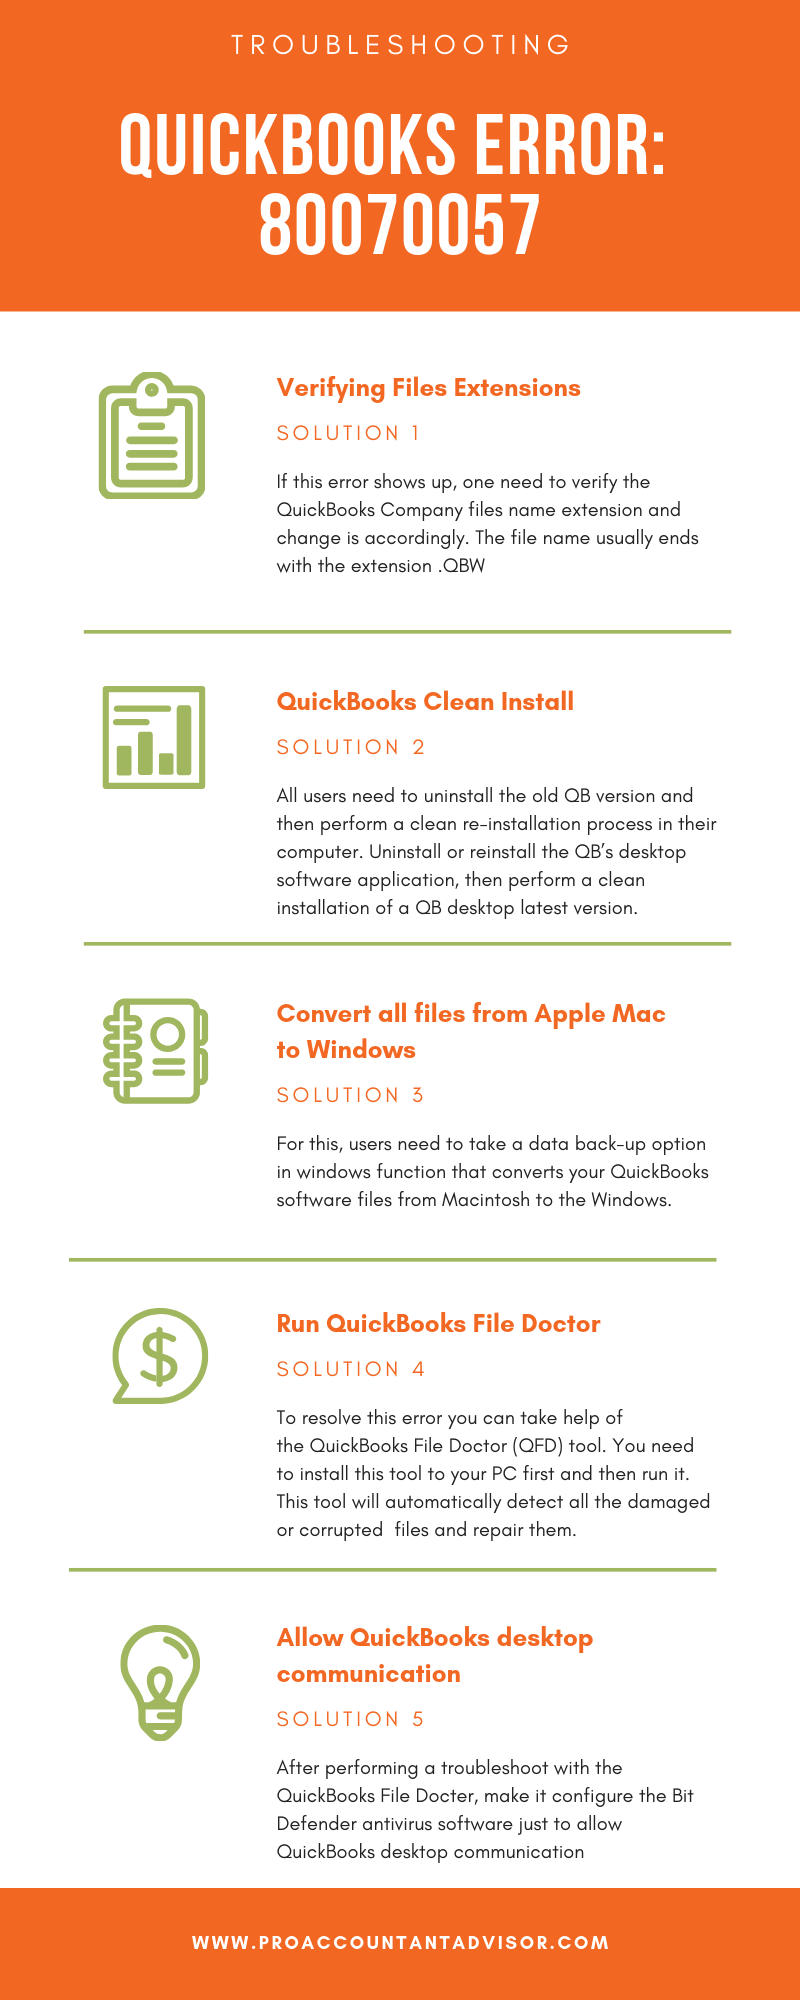
Check out these 5 Possible fixes for QuickBooks Error 80070057 through the below given info-graphic. You can skip this part and follow below given steps if you want to see the in-depth troubleshooting steps for this error.
Follow below possible methods to fix the QuickBooks error code 80070057: –
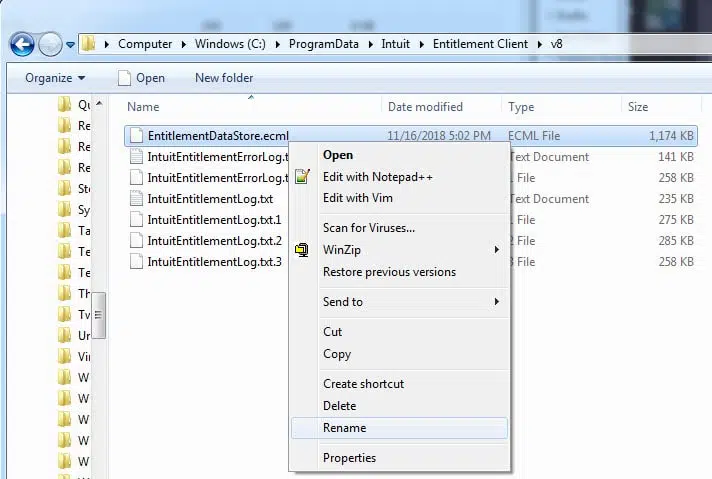
Solution 1: Edit or Delete the .nd File
At first, jump to a new copy of the Network Data (.nd) configuration files in the QuickBooks Company folder.
Ensure that all the users are logged out/sign out, and then shutdown the QuickBooks application on the entire machines.
Login as the system administrator and then go the QB company file folder.
Find the .nd extension file that associated with the QB company file that’s have the issues.
If you will be successful to find the desired file then, either rename it or delete it. This action will tend to automatic creation of the file itself in both the scenario.
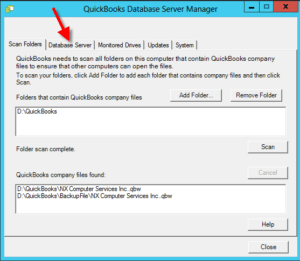
Solution 2: Rescan your File using the QuickBooks Database Server Manager
Note: This step is only applicable if you are using the company file over the network. We recommend you to perform this process on your server
In the file hosting system or server, open/access the QuickBooks Database Server Manager. Later, re-scan the entire QB company file folder.
QuickBooks Database Server Manager – Screenshot
Now Go to the windows “Taskbar” tab, enter the “QuickBooks Database Server Manager” and then choose the “Open” icon.
In case, you notice that QB company file are already listed: –
Select the “Scan” option.
Hit onto the “Add Folder” tab.
Go to the folder location, select the desired folder and press the “OK” button. Later, hit onto the “Scan” option.
The scan process will reconfigure the ‘QuickBooks File Sharing Permission’. Thus, it enables all the computers to access the permission which tends to report error associated with the firewall & Internet Security Settings.
Try to open the QuickBooks software on both the host computer & the system showing QB error code 80070057.
Solution 3: Reconfigure the BitDefender
Firstly, go to the ‘BitDefender 10.0’ menu, select the “Antivirus” option.
Choose the “Custom level” icon => “Exclude path from scan” option.
Select the “New item” tab.
Choose the “mapped drive” or “UNC path” feature. Both of them use to browse the QB Company files. i.e. “Q:\”
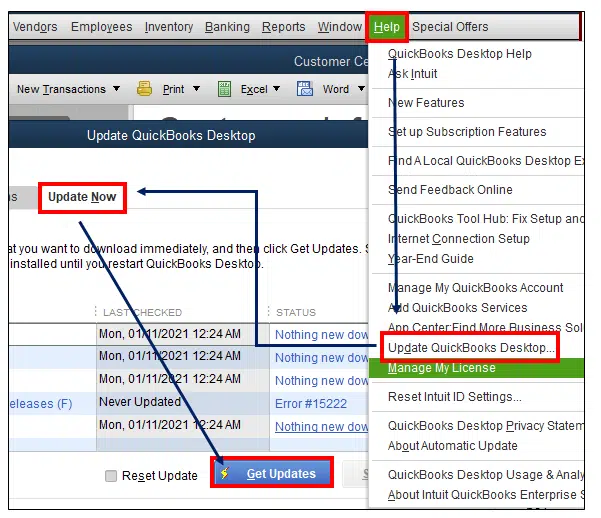
Under this process, you simply need to head to the help menu
Furthermore, click on the Update QuickBooks desktop.
Now, choose the Reset updates option if you wish to erase the earlier Update downloads.
Go for the Get updates option
Click on the Start QuickBooks again option.
Check if the issue is resolved
Solution 10: Cleaning up drive space
Often the junk files can pile up and create issues. When Windows perform a system update, it usually stores the old version in a folder that takes up much space. You can check out the space available on your system drive, by simply performing the steps below:
At first press Win + E
And launch the File Explorer
Now move to This PC.
If you feel the space is less, then right-click the drive
And choose the properties tab
And also click on Disk Cleanup
Now hit click on Clean up system files
After that check the Recycle Bin and Windows Update Cleanup
And click on the ok tab
Select the delete files option
And this would resolve the issue up to great extent
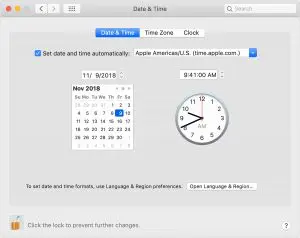
Solution 11: Sync the Windows Date and Time
Often when the Windows clock is out of sync, it might cause issues including error 0x80070057. However, it can be resolved by using the steps below:
At first, look the time and date by clicking the time in the Windows Taskbar
If you spot an issue, then continue with the steps:
Windows 11: Press Win + I to launch the Settings app and select the Time & language and Date & time options respectively
Windows 10: Here, you need to right-click the Taskbar and choose Adjust date/time.
It is suggested to enable the below options
Set time automatically
Adjust for daylight saving time automatically
Set time zone automatically
Now click on Sync now tab
In case you end up in same issue again and again, then there might some other technical issue
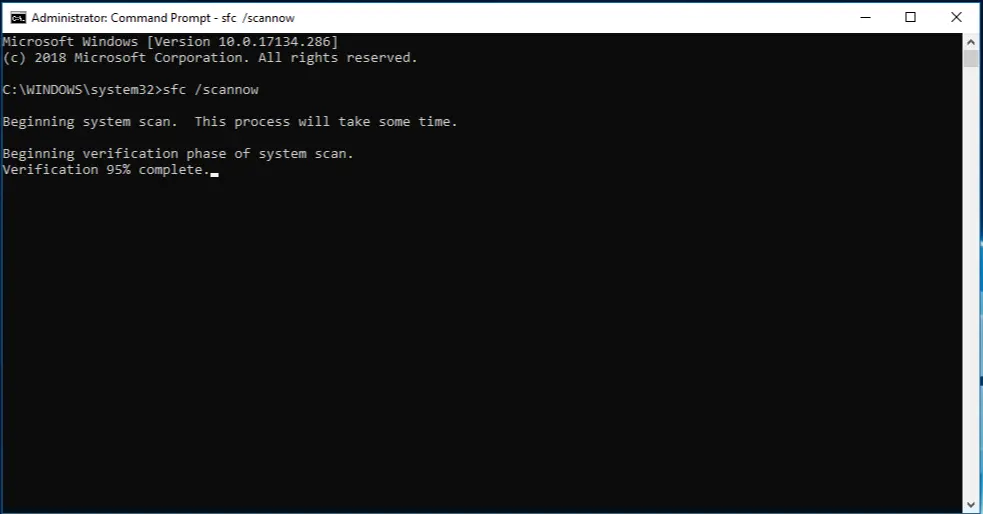
It should be noted that Windows have an inbuilt System File Checker tool that can be used to scan the system for any potentially corrupted files. This can be done by using the steps below:
At first, open an elevated Command Prompt by right-clicking the Start Menu
Choose the Command Prompt (Admin) or Windows PowerShell (Admin).
Now run the following command: sfc /scannow
This might take some time, so do not close the Command Prompt window until the verification is 100% complete. On completion, you’ll receive one of the following messages:
Windows Resource Protection did not find any integrity violations. Your system did not contain any corrupted files; you need to try another fix for this issue
Windows Resource Protection could not perform the requested operation. You need to reboot your system into Safe Mode, then run the command
Windows Resource Protection found corrupt files and successfully repaired them. Details are included in the CBS.Log %WinDir%\Logs\CBS\CBS.log. To view the details of what the System File Checker fixed, see the instructions below
Windows Resource Protection found corrupt files but was unable to fix some of them. Details are included in the CBS.Log %WinDir%\Logs\CBS\CBS.log. You’ll need to manually repair the corrupted files.
Look for System File Check Log
Just in case you get the final pair of messages, then you might have to look at the System File Check log. For which you need to continue with the below steps:
Start with opening an elevated Command Prompt
Right-click the Start menu
Choose the Command Prompt (Admin), Windows PowerShell (Admin), or Windows Terminal (Admin).
Run the following command: findstr /c:”[SR]” %windir%\Logs\CBS\CBS.log >”%userprofile%\Desktop fcdetails.txt”
This command will copy the details of the log to a plain notepad file on the desktop
In case you have corrupted files that shows the SFC process was unable to automatically replace, then the following entries might show up (taken from the Microsoft Support document on the System File Checker):
2007-01-12 12:10:42,
Info CSI 00000008
[SR] Cannot repair member file [l:34{17}]”Accessibility.dll” of Accessibility, Version = 6.0.6000.16386, pA = PROCESSOR_ARCHITECTURE_MSIL (8), Culture neutral, VersionScope neutral, PublicKeyToken = {l:8b:b03f5f7f11d50a3a}, Typeneutral, TypeName neutral, PublicKey neutral in the store, file is missing
In that case, we can replace the corrupted file with a known good copy, with the help of command prompt
Here, you need to open an elevated Command Prompt
This can be done by right clicking the Start menu
Now go for Command Prompt (Admin), Windows PowerShell (Admin), or Windows Terminal (Admin).
This might require you to have admin access. Make sure to replace the path and filename with the information provided in the sfcdetails.txt created in the previous section.
The user will then have to use the following command: takeown /f pathandfilenameem>Windows 10 Command Prompt takeown command
After that grant access to: icacls pathandfilenameem>/grant administrators:F
The last step is to replace the corrupted system file with a known good copy by using the following command: copy sourcefile destinationfileem
Solution 13: Run the DISM Command
Using the DISM command can help you in performing the steps easily. DISM stands for Deployment Image & Serving Management, it can be used to an attempt to download and restore the system files.
Enter the below command from the Windows command prompt: DISM /Online /Cleanup-Image /RestoreHealth
According to your system health and the level of corruption present, this might take some time to process
After it ends, check if any files have been replaced.
And then restart your computer
Also, run the sfc /scannow command again.
Solution 14: Fix Group Policy Interference
This is a unique solution is for Windows 10 Home users. However, Windows 10 Pro users had the option to alter their Group Policy settings as to render the update system impotent. The steps to be performed here are:
At first, press Win + R to open the run dialog
And then enter gpedit.msc
After that hit enter tab Head to system configuration and admin templates
Now select Wwindows components
And then choose Windows update
Once done with that configure automatic updates
And also click on not configured
Lastly, reboot the system and this would fix the issue
Solution 14: Update Windows
Last but not the least, try to update windows version to the latest release. At times the Windows version tends to create discrepancies with other software like QuickBooks and throws up various errors such as error 0x80070057. Updating Windows can eliminate such errors. Moreover, using the updated version of the operating system makes sure that the software doesn’t come across any sort of compatibility issues.
Use the steps shown above to resolve the QuickBooks Error 80070057. If you need immediate help & support for the QB problems – you can get in touch with our QuickBooks support helpline number i.e. +1-888-510-9198. We are available round the clock and provide you with the best services that you need.
Some FAQs Related to QuickBooks Error Code 80070057
What causes QuickBooks error 80070057 and how can I fix it?
QuickBooks error 80070057 typically occurs when a user tries to open a company file without the appropriate permissions or when there is an issue with the file path. To resolve this issue, ensure you have the correct permissions, update QuickBooks to the latest version, and check the file path for any discrepancies.
How can I prevent QuickBooks error 80070057 from occurring in the future?
To prevent QuickBooks error 80070057 from happening again, make sure to keep your software updated, consistently verify and rebuild your company file, and always use the proper file path when accessing your company file.
Is it possible that a firewall or antivirus software is causing QuickBooks error 80070057?
Yes, sometimes firewall or antivirus software can interfere with QuickBooks, leading to error 80070057. It is recommended to configure your firewall and antivirus settings to allow QuickBooks to function properly. If you’re unsure about how to do this, contact our toll-free support number +1-888-510-9198 for guidance.
Are there any tools available to help resolve QuickBooks error Code 80070057?
Intuit, the company behind QuickBooks, offers a File Doctor tool that can help diagnose and repair various issues, including error 80070057. Download and run the QuickBooks File Doctor to scan your company file and repair any detected errors automatically.
Learn the best ways to get overcome from QuickBooks error code 392
QuickBooks is one of the most persuasive and enduring accounting software accepted by all types of Business enterprises – small, medium or large-sized organizations throughout the world. QuickBooks always comes up in the market with various new and improved features. It is an excellent tool to be used to grow up your business. But sometimes, it may also encounter some technical issues or errors in its access. But we provide you all the possible solutions for them. Dial our toll-free customer support number i.e., +1-888-510-9198, in case you need any sort of technical guidance.
What is QuickBooks Error code 392?
This error code is one of the common error that users may face very often. QuickBooks error code 392 is generated when there is a crash in the active program. Sometimes, the computer crashes frequently, particularly when the same program is being run. It may lead to improper functioning of the software. This error code 392 may also occur when you install any software or program and when you try shutting down or starting Windows or sometimes at the time of the Windows installation.
Here In this article, we will discuss one of the error – QuickBooks Error code 392. This error occurs when the active program window crashes. We will also learn the various causes behind this error code 392. We will also provide 5 simplest solutions to solve this issue. In case you are not good in technical aspects or you are not an expert then you can take advice from our QuickBooks experts.
Before you move to the actual troubleshooting steps, you should install any available Windows update and remove your system junk, temporary files and folders.
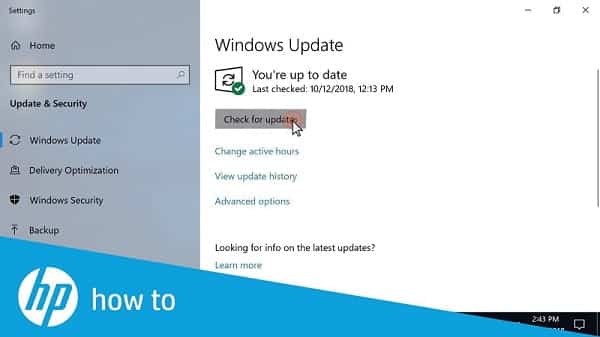
Step 1: Install all available windows updates
The following steps will help you find any available updates in Windows XP, Vista, 7, 8, and 10.
Click on the Start button on the screen or press Windows key on keyboard
Type in Update in the search box and hit Enter
The Windows Update dialog box will appear on your screen
Click the Install Updates button if you see any updates
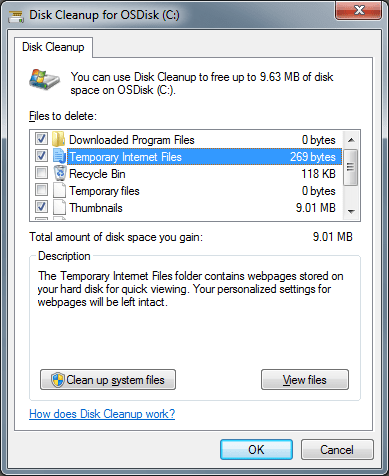
Step 2: Use Disc Cleanup to remove System Junk, Temporary Files, and Folders
Cleaning system junk with Disk Cleanup – Screenshot
Here is how you use Disc Cleanup:
Click on the Start button on the screen or press Windows key on keyboard
Type in Command in the search box
Press the CTRL and Shift keys on your keyboard and then hit Enter
A permission dialog box will show on your computer screen
Click Yes
A black box with a blinking cursor will appear
Type in “cleanmgr” and press the Enter key
Disc Cleanup process will instigate and you would see the occupied disc space that you can reclaim
You will see multiple check boxes on the Disc Cleanup dialog box
Check on the boxes such as Temporary Files that you want to remove
Check if the error 392 has been fixed. If it persists, try the following troubleshooting steps:
(Note – Please try to take the help of an expert when you try to fix it manually as minor damage or mistake will cause permanent damage to the software.)
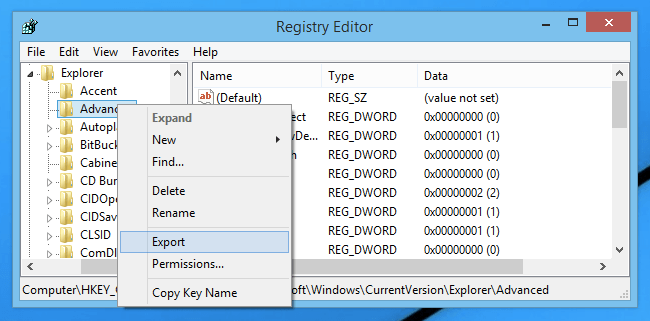
Step 3: Try to Repair registry entries related to the error
First, make a backup by exporting a part of the registry related to QB Error 392
Then, Press on the ‘Start‘ button.
Type ‘Command‘ in the search box and do not press ‘Enter‘
Hold the key ‘Ctrl+shift‘ and then press ‘Enter‘ key
Step 6: You will get a backup of the QuickBooks-related registry entry
After this, ‘Edit your registry‘ with the help of an expert
Conduct a ‘Full Malware Scan‘ of Your PC
Furthermore, go to the ‘Start‘ button
Type “command” in the search box and Do not press ‘Enter‘ immediately
Holding ‘CTRL+Shift‘ on your keyboard, hit ‘ENTER‘
Step 7: A Permission dialogue box will resemble your window
Click on ‘Yes‘ then, a black box will appear with a blinking cursor on the screen
Write “cleanmgr” in the box and press ‘ENTER‘
Calculate how much you can reclaim from the occupied disk space
In the ‘Disk Cleanup‘ dialog box, select a series of checkboxes
Check the boxes for the categories that you want to clean and press ‘OK‘
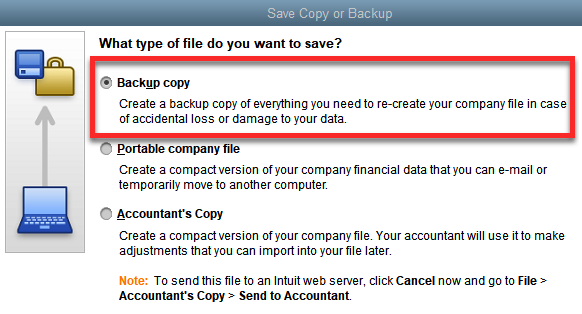
Step 8: Make a backup of your Company file
Creating a backup company file will help in getting the file when needed if it gets deleted by the system or is misplaced. The steps involved in this process are as follows:
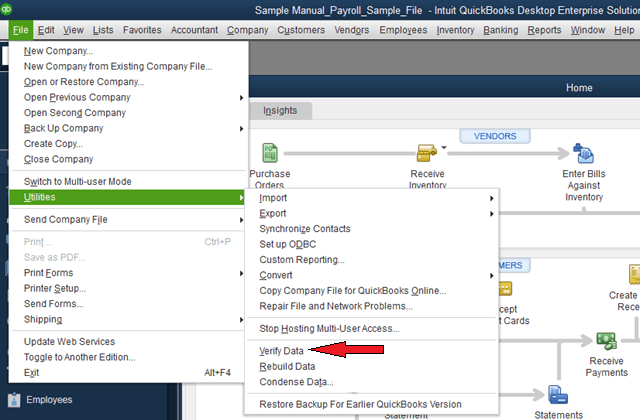
The first step is to click on file option and select utilities tab
After that, click on rebuild data and also click on ok tab on the QuickBooks information window
Moreover, perform the onscreen steps to save a backup
The last step is to press on ok tab
Few other possible solutions to fix Error 392
Furthermore, you can update the system drivers
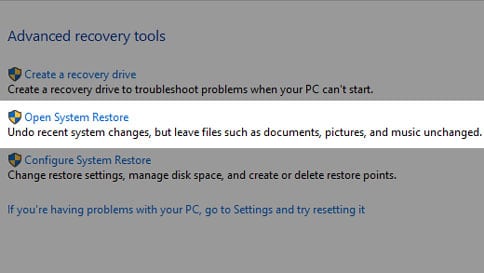
Use ‘Windows System Restore‘ so that you can ‘Undo‘ recent changes in the system
These are some really simple solutions that will definitely fix the QuickBooks Error code 392. Hopefully, you will find the article valuable and will be able to follow the perfect procedure by following the steps carefully and try them as recommended.
If you want any further information or you suffer any trouble, then you can anytime contact us on our QuickBooks error support team at +1-888-510-9198 and get connected to our tech experts. We are always there for your help. Our experts are available round the clock and they posses cutting-edge tool and technology to offer you quick and precise solutions of all your accounting software related issues.
FAQs
How do I fix a QuickBooks error?
To get rid of the QuickBooks errors, the user can run the QuickBooks install diagnostic tool fix common install errors. Open the QuickBooks tool hub, and then choose installation issues. After that choose QuickBooks install diagnostic tool.
How do I repair a company file in QuickBooks?
The user can try repairing a company file using the steps below: 1. The user needs to head to the file menu 2. Move to the utilities tab and choose rebuild data 3. Now, let the tool repair the file 4. When the tool finishes, choose ok tab 5. Head to the file menu 6. Let the tool check the file data issues
What is QuickBooks error code 392?
QuickBooks Error 392 message pops up on your screen when the QB file crashes all your active programs in Windows. This error is often seen when there is a crash in the active program.
How do I restore a company file?
The user can try to restore the company file using the steps below: 1. In QuickBooks, move to the file menu and choose open or restore company 2. Choose restore a backup copy and hit next 3. The user is then required to choose local backup and click on next 4. Browse the system for the backup company file 5. Choose a folder to decide where to save your restored company file
QuickBooks payroll has made payroll and other activities much easier for businesses with its powerful features. Features like automatic tax calculations, e-payment, free transactions, and many more make daily activities quick and smooth. However, there are certain errors and technical glitches that might show up when working on this software. There can be a handful of common QuickBooks payroll errors that you can experience and to help you out in dealing with such errors, we have curated this piece of writing. This segment shares the complete information about different QuickBooks Payroll errors & their solution.
Most of the QuickBooks Payroll errors happen when customers try to update the payroll software or the tax table, or try to set an employee up for a child support deduction, try to pay employees and more. To learn further about QuickBooks payroll update errors, make sure to stick around this piece of writing, or you can further connect with us at +1-888-510-9198, and we will help you with the complete information.
When you run a business, it is essential to ensure that your payroll is in order. However, even if you are careful, certain mistakes can happen unknowingly, which can further land you into various payroll errors. You can come across various payroll errors due to corruption of existing registry files or missing files of the windows system. Incorrect installation of the software is another common factor. You can also expect to face some payroll update errors when a few discarded files are left behind when uninstalling the software.
If the first step doesn’t work for you the Uninstall and Reinstall the QuickBooks:
First of all, click on the Microsoft Windows “Start” button and then choose the “Control Panel“.
After that you have to manually remove the following QuickBooks installation folders.
C:\Program Files\Intuit
C:\Program Files\Common Files\Intuit
C:\Documents and Settings\All Users\Application Data\Intuit
C:\Documents and Settings\All Users\Application Data\Common Files\Intuit
C:\Documents and Settings\All Users\Documents (Shared Documents)\Intuit
That’s all from our behalf. We hope that above given both solution methods works for you and now you are capable to solve Intuit Payroll related most common errors.
Solution 3: Rename CPS Folder in the System
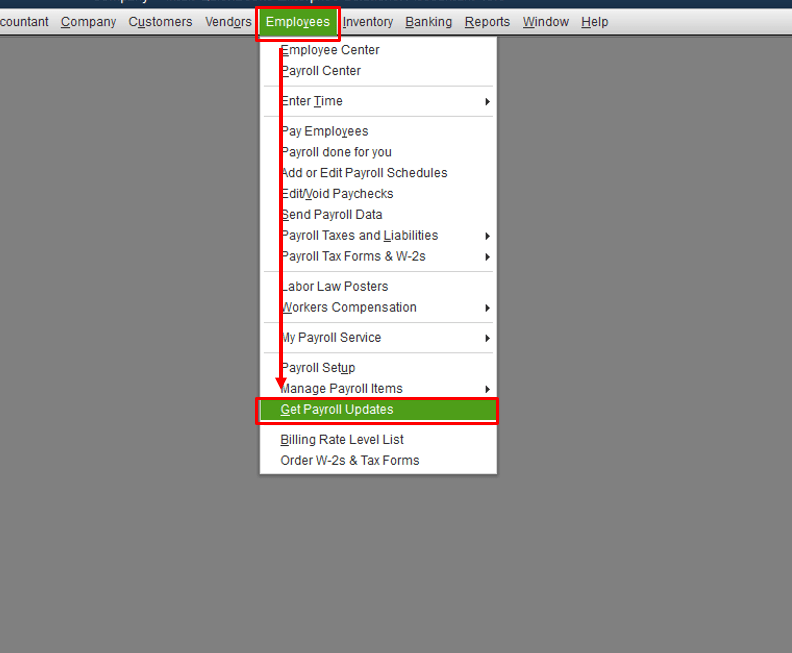
The user will first have to update QuickBooks payroll tax table
And then, open My computer and move to the local drive C:\Program Files\Intuit\QuickBooks 20XX\Components\Payroll\CPS
In this, XX denotes the year of the QuickBooks version like QuickBooks 2019, QuickBooks 2018, etc.
After that, the user will have to rename the CPS folder to CPSOLD and then check if the issue is resolved
Now, again update QuickBooks payroll tax table and check if the error is resolved or not
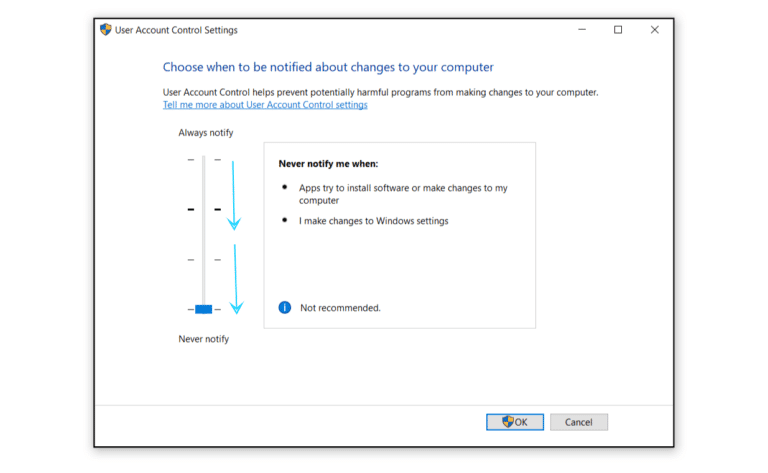
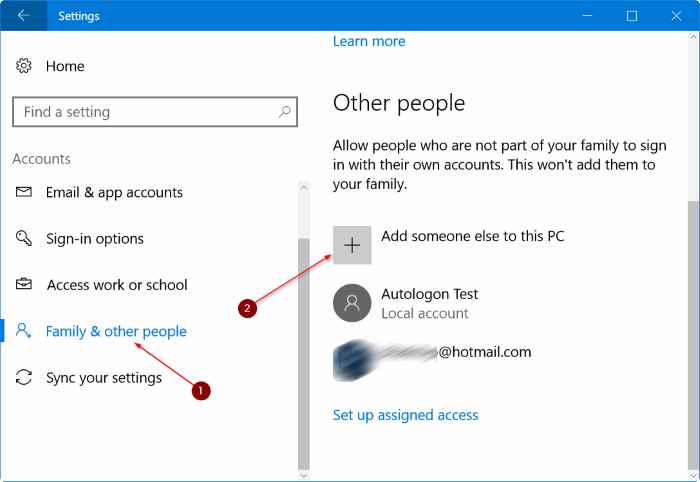
Follow the steps below to change UAC settings in Windows 10, 8.1, 8, and 7.
At first, the user is supposed to press hold Windows + R on the keyboard. This will open the windows Run program
Now, type in control panel and also click ok tab
The next step is to click on the user accounts and then choose the user account (Classic view) option
The last step is to move back to the change user account control settings tab and then choose never notify option
Solution 5: Run Reboot.bat
Well, running the reboot.bat file can help in fixing common payroll errors. This batch is present in the QuickBooks folder. The steps for this process are as follows:
Under this process, you need to first close QuickBooks desktop/ payroll.
Followed by opening the folder where the reboot.bat file is present.
You now have to run the file as admin.
Note that, a DOS command window will appear.
Let the process complete, and the window will close on its own.
Avoid closing the window manually.
Now, reboot the system
In addition to that, launch the QuickBooks Desktop and check if the issue occurs again.
Solution 6: Verify Internet Explorer Settings
In case your system is connected to an internet connection but doesn’t allow you to update the software, then try configuring internet explorer in your system.
Here, you need to simply set Internet Explorer as your default browser.
Furthermore, check if the date and time on your computer are correctly set.
In addition to that, verify the Cipher Speed.
You are supposed to visit the Tools tab.
Navigate to Internet Options to update settings and this ends the process.
Solution 7: Close all the QuickBooks processes
At times, simply closing processes in the task manager can eliminate the issues. Thus, perform the steps below and close all the background process hindering the smooth working of the software.
You need to initially ensure that you have an active subscription.
Later on, reset the QuickBooks desktop update.
Furthermore, check the accuracy of the payroll service key.
In addition to that, restart your system.
You are now required to head to Task manager by hitting the Ctrl + Alt + Delete keys.
Move to the Processes tab.
Go for Qbwebconnector.exe.
Click on the End process option and this ends the process.
Solution 8: Configure firewall and Internet security settings
You can simply configure the internet security settings to work seamlessly with QuickBooks software. However, if you aren’t much aware about this, then feel free to seek professional assistance and speak to your IT team and ask them to configure the security settings for you.
Solution 9: Uninstall and reinstall QuickBooks Desktop in Selective Startup
Often uninstalling and reinstalling in selective startup mode can rectify the issue in QuickBooks. The steps involved in this process are as follows:
Under this process, you need to open the Run command (by pressing the Windows and R keys together).
Furthermore, under the Run command, enter MSConfig.
Click on the Ok button.
Head to the General tab.
Navigate to the selective startup and Load system services.
You are now required to open the Services tab.
Go for hiding all Microsoft Services.
Furthermore, Disable all.
Also, uncheck the Hide all Microsoft Services checkbox.
In addition to that, verify the Windows Installer checkbox is clicked.
Click on the OK button.
Go for Restart on the System Configuration window.
Now, install, uninstall, or reinstall QuickBooks Desktop through clean install.
Solution 10: Install a digital signature certificate
Initiate the process by navigating to C:\Program Files\Intuit\QuickBooks.
Within the QuickBooks folder, search for the QBW32.exe file.
Right-click on the file.
From the drop-down options, choose Properties.
Head to the Digital Signature tab.
Make sure that Intuit is selected in the signature list.
Choose the Details option.
Go for the option to View Certificate option in the Digital Signature Details window.
Head to the option to Install Certificate.
Click on Next until the Finish message is displayed on your computer screen.
Go for the Finish button.
Lastly, reboot your computer.
Once the system reboots successfully, open QuickBooks Desktop and re-download the payroll/QuickBooks update.
Solution 11: Download the updates in Safe Mode can fix common QuickBooks payroll errors
In certain situations, some conflicting programs can cause these issues. Try updating the accounting application after opening Windows in Safe Mode to check this. Steps involved here are:
Open your computer in Safe Mode by restarting the computer and pressing the F8 key.
Go for Safe mode with Networking.
Hit the Enter key.
Re-download the update.
The significant difference between running windows in the safe mode and the Normal mode is that the safe mode obstructs any background programs from working.
After the QuickBooks download process ends successfully, reboot your computer in Normal Mode.
Lastly, try to re-download the update in normal mode.
If still you are troubling with these errors then connect with one of our 24/7 QuickBooks Payroll support agent and get the U.S based best technical support for your QuickBooks issues. Our dedicated helpline number is +1-888-510-9198. We feel more happy to help you out in this. Call us today.!
An unusual error hindered your QuickBooks update? Well, while updating your QuickBooks payroll software, you might land on the most common QuickBooks errors i.e. QuickBooks Error PS077 and PS032. These Payroll errors often show up when users try to download updates of QuickBooks Payroll. If you too come across this error while downloading the payroll updates, here is everything you should know about the QuickBooks Error PS077 and PS032.
However, for any further information or if you are seeking expert assistance, then the user can feel free to call us at our toll-free number i.e. +1-888-510-9198. Our QuickBooks error support team will help the users in getting rid of the QuickBooks payroll error PS077 or PS032.
Before you learn the causes and fixes of the QuickBooks error PS077 or PS032, it is important to learn about these errors. This error code is often seen when the user tries to download payroll updates. It comes up with an error message stating:
Payroll Update
[PS032] QuickBooks can not read your payroll setup files, Note the message number at the beginning of this message, and click Help for troubleshooting tips to resolve this problem.
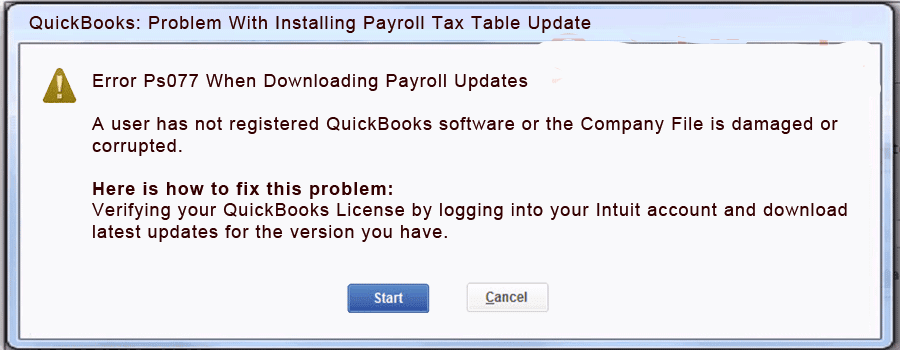
QuickBooks: Problem having trouble installation payroll tax table update.
Error PS077 When Downloading Payroll Updates
A user has not registered QuickBooks software or the Company file is damaged or corrupted.
It should be noted that the prefix PS indicates a QuickBooks payroll error. These errors can hamper the progress of QuickBooks activities. As a result of such an error, the tax table might fail to update or might get stuck in the middle of the process. It can further lead to freezing your system. There can be various factors causing this issue, the user can check them out below.
What May Lead to QuickBooks Errors PS077 or PS032?
Here are a few factors causing QuickBooks payroll error PS077 or PS032:
When QuickBooks failed to read the information registered for the software
When your Billing Information may be incorrect
QB Payroll or some of its components may have damaged tax table files
Your billing information is outdated or incorrect
QuickBooks Company files may be damaged or corrupted
You might not have registered your QuickBooks software
We hope that the above-mentioned troubleshooting steps will fix the QuickBooks Error PS077 and PS032. If the issue still prevails, you can contact our experienced QuickBooks Payroll customer help team which is equipped with modern tools and technology to fix any QuickBooks-related issue.
Call us at +1-888-510-9198 early in the morning or late in the night, we are available round the clock.
Some Common FAQs related to QuickBooks Error PS077 and PS032:
What is QuickBooks Error PS077 or PS032?
QuickBooks Error PS077 or PS032 occurs when the software is unable to download the payroll updates. Error PS077 usually indicates a problem with the tax table update, while PS032 indicates an issue with the QuickBooks payroll subscription. These errors prevent you from downloading the latest payroll updates, which can lead to incorrect payroll calculations and other issues.
What are the common causes of QuickBooks Error PS077 or PS032?
The common causes of QuickBooks Error PS077 or PS032 include: 1. Incorrect payroll subscription details or an expired subscription 2. Damaged or corrupt QuickBooks company file 3. Outdated or incorrect QuickBooks installation 4. Incorrect QuickBooks company file setup or configuration 5. Internet connectivity issues or firewall restrictions
How can I fix QuickBooks Error PS077 or PS032?
Here are some troubleshooting steps to fix QuickBooks Error PS077 or PS032: 1. Check and renew your QuickBooks payroll subscription if it has expired 2. Verify that you have an active internet connection and that your firewall is not blocking QuickBooks 3. Update your QuickBooks to the latest release 4. Verify your QuickBooks company file and ensure it’s not damaged or corrupt 5. Perform a clean installation of QuickBooks and then reinstall the latest payroll updates
Can I prevent QuickBooks Error PS077 or PS032 from occurring?
Yes, you can prevent QuickBooks Error PS077 or PS032 from occurring by: 1. Renewing your QuickBooks payroll subscription before it expires 2. Verifying your QuickBooks company file for errors regularly 3. Updating QuickBooks and the payroll tax table regularly 4. Ensuring that you have a stable internet connection and that your firewall is not blocking QuickBooks 5. Running regular virus scans to prevent damage to your QuickBooks company file.