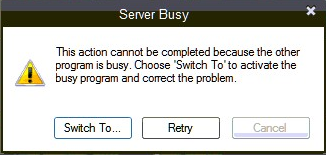
QuickBooks Error Server Busy mainly occurs when you are using QB Desktop. A dialogue box will open on your screen announcing “QuickBooks Error: Server Busy:This action cannot be completed because the other program is busy”. QuickBooks Desktop is specialized accounting software used for various business operations. Hence, it is necessary keep this financial accounting tool fit always. Moreover, it also hold numerous of your momentous business information.
This error is quite complicated to fix and thus it needs an IT professional hand to solve this issue, thus feel free to call at +1-888-510-9198. Lets us begin with the causes of this error and after that, we will discuss the fixation of QuickBooks server busy error. However, you can request for help and support from our QuickBooks Error Support advisors by dialing the toll-free +1-888-510-9198.
What is QuickBooks Server Busy Error?
QuickBooks Server busy message usually appears in case QuickBooks is unable to complete the data exchange process. In case the user gets a server busy error in QuickBooks, then it indicates that the company file is employed by another user. The error occurs when the system is unable to communicate with the application server. The error message restricts the workflow and creates an irreparable issue.
Causes of QuickBooks Server Busy Error
The following factors can trigger such an error in QuickBooks. Let us have a look:
Another program waiting for your feedback is trying to work on QuickBooks Desktop.
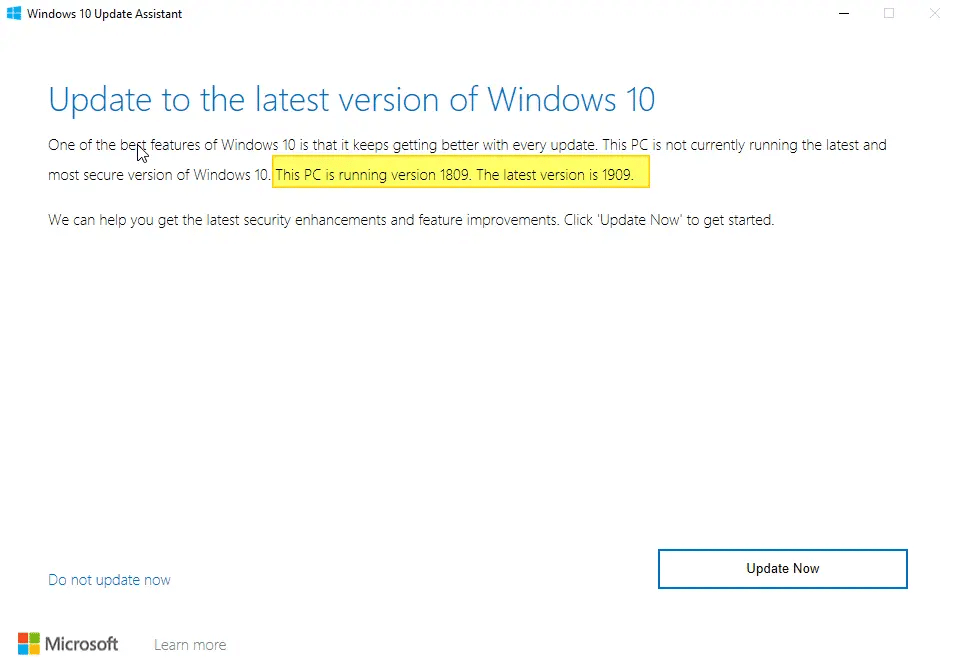
Check whether Windows Update is running or not. If the Windows update is running in the background then this arrangement would probably cause this issue..!
Either the QuickBooks Desktop application or some of its components did not appropriately turn off whilst you last shut down the QuickBooks.
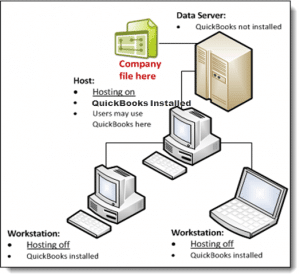
More than one computer is set to host QuickBooks application company files.
Software security application or Personal Firewall is blocking the update of QuickBooks Desktop.
This may be due to the clash between QuickBooks Update Manager and other programs/applications of the computer.
This issue may appear due to the clashes between Intuit ProSeries (US) & profiles (Canada).
Fewer resources to run the QuickBooks Desktop.
You may see that an error message comes on your screen while you are working in QuickBooks Desktop:
Firstly check your network resources and then open the QuickBooks application again. Implement the steps mentioned below so that the QuickBooks desktop server busy error can be solved.
Method 1: Shut-Down all the open programs
Make sure that in any open program there is no dialogue box. For Example, a dialogue box of MS Word is asking you to save the document and this is the one reason which leads to server busy error message.
Programs like Norton, Windows Defender, Google Desktop, Vista Security, and Pivot SoftwareControl have the reason
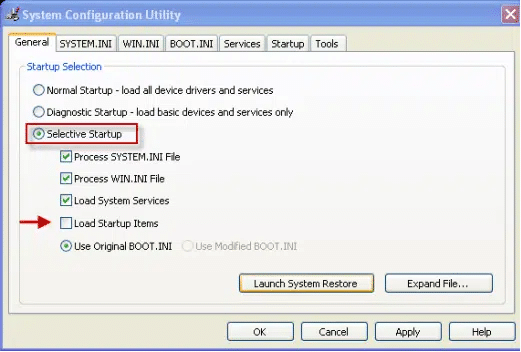
You are trying to use selective startup in Windows then stop IntuitFCS
Webroot Spy Sweeper is causing this error message. Temporarily Disable QuickBooks Desktop or just run it in gamer mode. For further information check that in Webroot Spy Sweeper User Guide.
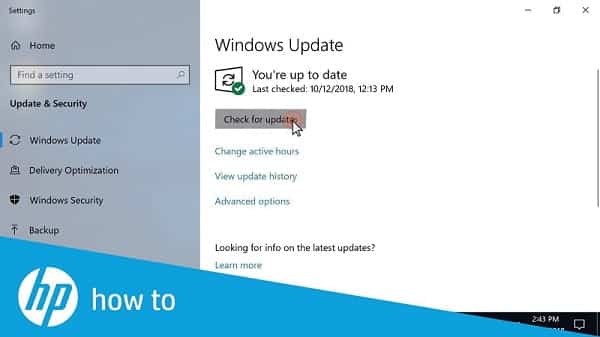
Method 2: Try to update the Windows
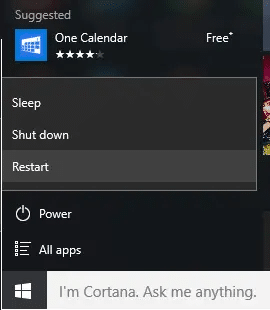
Check for your Windows updates if there is an update to be made then update it and restart your computer and try working on QuickBooks. And if there are no updates then jump to the next solution.
When Intuit Pro-Series is installed on the computer
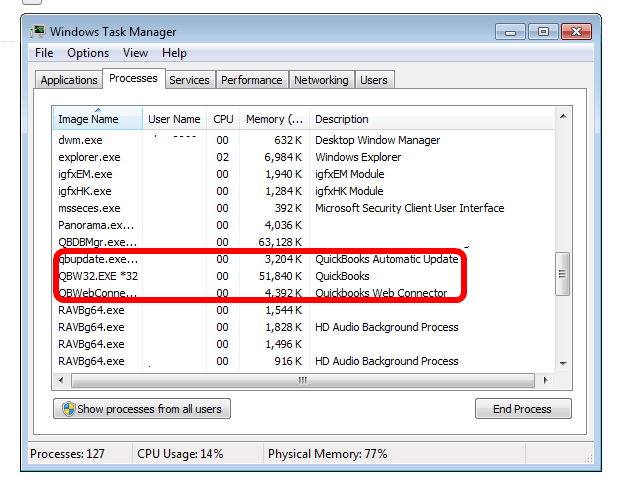
Check Windows Task Manager for QbpsevntXXr.exe and note that the XX denotes the year of your software.
Open Explorer Browser.
Browse and then open Intuit ProSeries folder for that specific year. It usually looks like this- C: \ ProWinXX (XX is the year of Intuit ProSeries).
Open 32-bit folder.
Find qbpsevntXXr.exe and rename it by adding “.old” at the end of the renamed file.
EXAMPLE: qbpsevnt18r.exe.old.
Close the Windows Explorer.
If the above prescribed steps are unable to troubleshoot this issue, try the sequential actions given below with the help of an IT professional or any under the guidance of any expert.
Boot the Windows to Safe Mode with Networking, then start the QuickBooks Desktop application, and later restart the Windows in Normal Mode will frequently fix this problem.
Try to run QuickBooks Desktop application and then perform the action causing the technical error in Windows Selective Startup and later Windows Safe Mode.
In case, you are operating the QuickBooks Desktop on a network, then restart the machine, and later reconnect the system to all mapped drives.
Figure out if the backup or mirroring software is running on the server or a network. If this is so, it may be actively scanning the hard drive, blocking the access to QuickBooks Desktop application files & leading to this error. Test this by temporarily disabling the software to see if the QuickBooks Desktop issue recurs. If it doesn’t, there is a conflict with the scanning software that must be resolved with help from your system or network administrator (if you have one), the vendor from whom they purchased the software or hardware, the manufacturer’s or software developer’s Web site, or a local computer consultant.
If there is security software installed on the server machine, it may be scanning new and updated files in the background and therefore locking up the template file. To prevent this, either disable the security software or add .DOC files to the exception list. Please see your security software’s documentation for steps on how to do this.
At first, open Windows task manager and see if you can find qbpsevntXXr.exe (XX denotes the year of the Intuit ProSeries software) and note the year in the file name.
Open Windows Explorer.
Open Intuit ProSeries folder (C:\ ProWinXX) for that year.
Go to the 32bit folder.
Find the qbpsevntXXr.exe file and then right-click on it and select Rename.
Add “.old” to the end of the file name (qbpsevnt18r.exe.old).
Close Windows Explorer
Method 6: Quick fix my program
You can use the quick fix my program tool to eliminate the server busy issue permanently. The steps to be performed here are as follows:
After that, save the file somewhere where it can be accessed easily.
The user is then required to open the file downloaded earlier by double-clicking on the same.
Now, follow the onscreen prompts to install and agree to the terms and conditions.
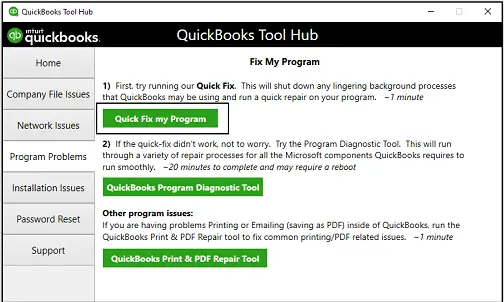
Double-click the tool hub icon to open the QuickBooks tool hub.
Followed by launching the tool hub and clicking on the program problems option.
You are then required to select quick fix my program.
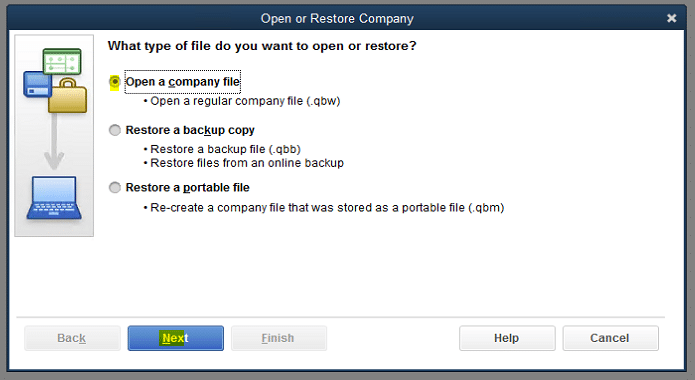
Lastly, open the QuickBooks and access the company file.
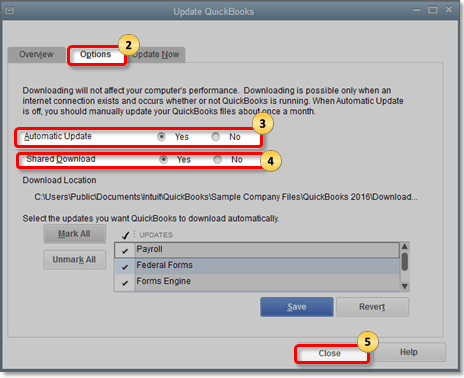
Method 7: Disable the automatic update in QuickBooks
Under this process, you need to click on ctrl + alt + delete tabs.
Now, select the task manager and startup tab.
Later on, click on the QuickBooks automatic update and also go for the disable tab.
Once done with that, turn off the shared updates in QuickBooks.
Visit the help menu and click on the update QuickBooks tab.
You are then required to select the options tab.
Select the share download option.
End the process by hitting the close tab.
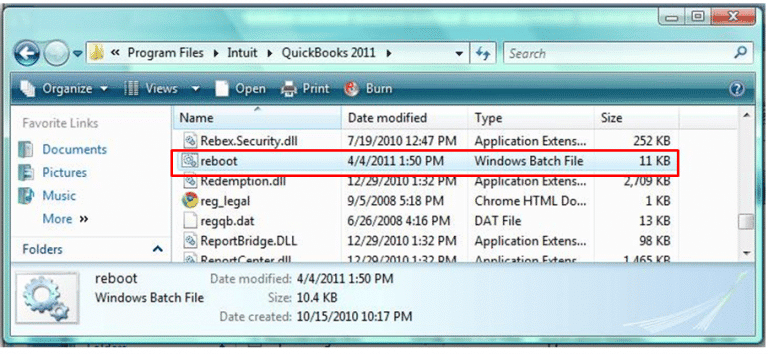
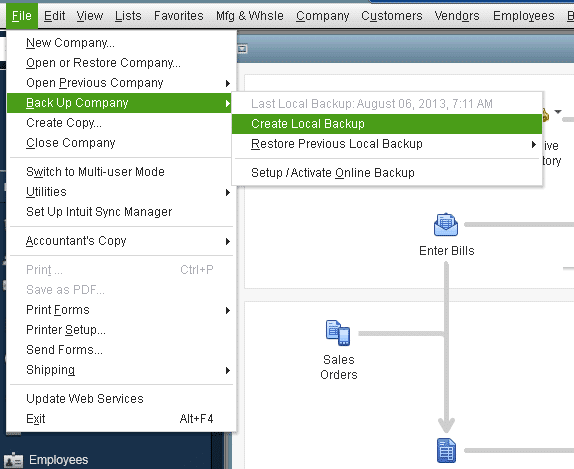
Method 8: Running reboot.bat file
Close QuickBooks
Followed by, right-clicking the QuickBooks desktop icon selecting the properties tab, and also clicking on the open file location option.
You are then required to select the shortcut option from the properties menu.
Once done with that, you need to right-click the reboot.bat file.
In addition to that, go for the run as admin option.
This will show up in a command window. Avoid manually closing the window.
Other Quick fixes
Other than the above-stated solutions, you can try to fix the issue using the steps below:
Method 1: Using the safe mode option
Here, you are required to move to the safe mode from Windows with networking.
Open the QuickBooks software.
Reboot the windows in normal mode.
Also, run QuickBooks desktop and perform the actions in Windows selective startup, and also head to Windows safe mode.
Reboot the system and reconnect it to all mapped drives.
Go for an alternate method by identifying if the backup or mirroring software. Actively scan the hard drive and block access to QuickBooks files.
Disable the software.
Method 2: Map the network drive in Windows
Go for the start menu
Enter this PC and hit the enter tab
Double-click this PC option
And go for map a network drive
Select an available letter for the drive
Click the browse tab
Use your navigational tools to find the location where your QuickBooks files are currently kept.
Click on the OK tab and also click on the Finish tab
Use the newly mapped drive to access the company now.
Conclusion
We hope that with help of troubleshooting steps mentioned above really did help you a lot to fix QuickBooks server busy error and if you still have any doubts then feel free to seek help from our QuickBooks toll-free support number at+1-888-510-9198.
QuickBooks Web Connector (QBWC) is an application that allows qbXML and qbposXML to pass between a Web-based application and QuickBooks financial software as well as Point of Sale. Since the communications of all sorts are initiated by the QuickBooks Web Connector error running on the same system as QuickBooks, the opening of firewall ports is not recommended. Communication with Web services can be consequently planned or basically be started at the client’s comfort. However, QuickBooks web connector can at times tend to show some sort of errors, one of which is QuickBooks web connector error QBWC1085.
In this article, we will try to elaborate this error further along with the ways in which you can try to eliminate it successfully. Thus, make sure to stick around till the end, or in case you need our assistance at any point in time, give us a call at ++1-888-510-9198, and our team of certified QuickBooks professionals will ensure to answer all your queries immediately.
QuickBooks Web connector error QBWC1085 is seen when the log file named QWCLOG.TXT gets damaged or corrupt. You can experience this error when opening QuickBooks or when starting your computer. It further indicates WebConnector log file not working. It appears on the screen with the following warning messages:
QBWC1085: QuickBooks was unable to write to the log file. QuickBooks will open without writing to log file.
Exception TypeError: Unknown name
QBWC1085: There was a problem with the log file. QuickBooks Web Connector will continue without the log file.
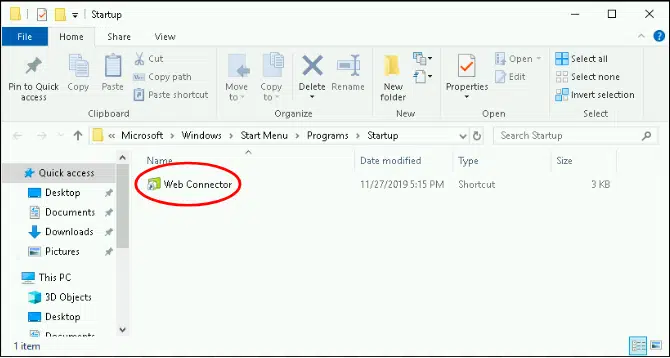
Web Connector lets you to connect some web based programs to QuickBooks. In case you have not connected QuickBooks to any third-party programs, then remove the web connector from the startup menu.
QuickBooks Web Connector XML Web Services are also accessible by adding service reference same as it is done with other WCF services (windows communication foundation). Thus, if any sort of references added, the latest .net framework version will be targeted. Web references can still be included for applications created in earlier visual studio versions that target 2.0 version of .net framework.
Process to add new web service with QuickBooks Web Connector
Adding new web service is as simple as downloading the file. Users of Quicken’s online banking functions will quickly recognize the interface because it was based upon the Quicken One Action Update feature.
The QuickBooks web connector is usable with any of the QB desktop product that QB SDK or QBPOS SDK supports along with:
For the US versions of accounting software such as simple start (2006 and above), pro (2002 and above), premier (2002 or above), enterprise solutions, QuickBooks POS (v4 or above) etc.
For Canadian QuickBooks pro, premier, enterprise versions (2003 and above)
And For the UK edition of QB pro or accountant edition (2003 and above)
An installer for the QuickBooks Web connector software is available to every person as a free download from the QuickBooks web connector download web page. Developers may refer their clients to this web page or redistribute the installer to their clients.
What is QuickBooks Web Connector Error Code QBWC1085 or Exception TypeError?
This is a log file .QBwebconnector issue that should be taken care of immediately. Error messages like these pop up in the situation when a user logs into QuickBooks and attempts to access the file which is already opened by someone having new QuickBooks release.
Owing to this issue:
When you open your QuickBooks Enterprise Solutions then you see one of these errors:
You may fail to write to the log
QuickBooks opens without writing to log file
The web connector functions in absence of log file
The QuickBooks web connector will continue without the log file
You can end up in such an error due to the following factors:
When QBWCLOG.TXT file of the web connector gets damage.
Another possible reason can be if you are unable to access the QBWCLOG.TXT file of the web connector.
You can further end up in such an error if QuickBooks is unable to write the web connector log file.
Be prepared for the same issue if you didn’t connect to the third-party programs with QuickBooks.
Moreover, if there are any kind of damage to the components of QB web connector, you can land into similar issue.
Signs and Symptoms of QuickBooks Web Connector Error QBWC1085
The below discussed signs and symptoms can help you in identifying the QuickBooks web connector error QBWC1085.
In case the functions of the web connector program are not working properly.
Another indication can be if the QuickBooks is not functioning in a proper manner.
In case you sense a freeze error with QuickBooks, then it is probable to experience QuickBooks web connector error QBWC1085.
Also, if you are not getting response from windows, then it can indicate this error.
Troubleshooting steps to Fix QuickBooks Web ConnectorError QBWC1085
Resolve Errors to Fix QuickBooks Web Connector Error QBWC1085:
Web connector lets you to connect some web-based programs to QuickBooks
If you have not attached QuickBooks to any type of third-party programs, after that you can simply remove web connector from the Start-up menu
If you have connected your data file to a third-party application that utilizes Web connector, then you would certainly look for Web Connector to remain in the Startup menu
In this situation, you can rename the QWCLOG.TXT file to deal with the error
If you have not connected your company data to a third-party program. Comply with the basic action as listed below mentioned-
Condition 1: When you are connected to data through a third-party application in the web browser
Close QuickBooks and web connector
Find log by following file path: C:/ProgramData/Intuit/QBWebconnector/log (for MS windows vista, 7 and 8)
Follow path C:/documents & settings/all users/application data Intuit/QBwebconnector/log (for windows XP)
Then, change the name of “qbclog.txt” file to “qbclog.txl.old”
Now, restart web connector
Restart your computer, open QuickBooks and sign-in to a third-party application.
If you still receive QuickBooks Web Connector Error QBWC1085, then try the following troubleshooting steps:
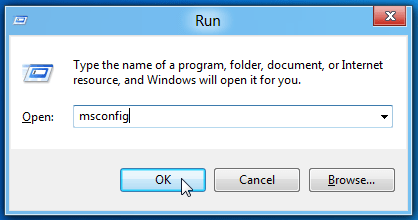
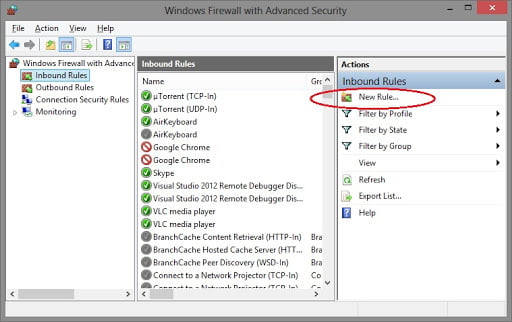
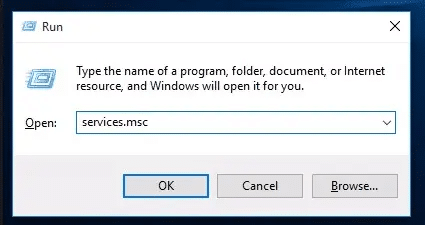
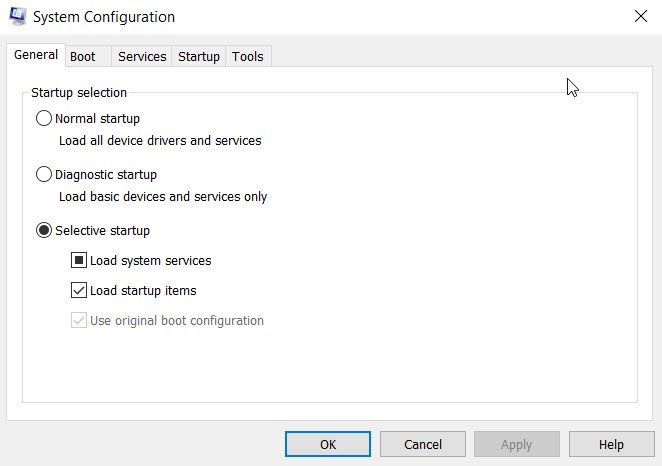
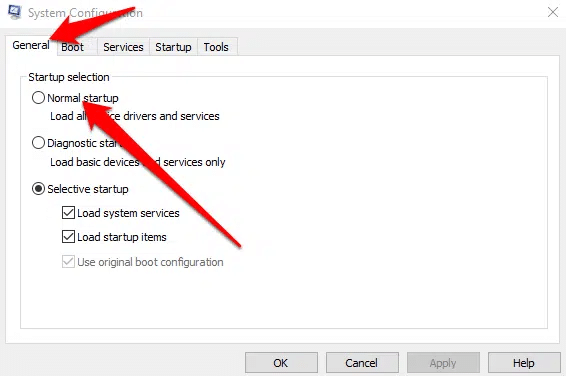
Open the Run window by pressing Windows and R keys on your keyboard.
Type MSConfig in the open box and then hit the OK button at the bottom left.
After the System Configuration window opens, click on the Startup tab.
Scroll down to find the QuickBooks web connector and check the checkbox.
Click Apply and then OK button.
Next, restart your computer for changes to save and open QuickBooks Enterprise Solutions and see if the QuickBooks web connector error continues.
Note: By following the all above given steps your computer will start without getting any error. Also now you will be able to sync successfully with any of your third-party application.
We hope that you find this blog helpful in Fix QuickBooks Web Connector Error QBWC1085. In case the issue persists or you require an expert, you can always reach our QuickBooks technical support team at ++1-888-510-9198. We will be more pleased to help you out in your all accounting related concerns.
FAQs Related to QuickBooks Web Connector Error QBWC1085
How do I fix QBWC1085 error?
You can try fixing the QBWX1085 error by performing the steps enumerated below: 1. At first, identify the QuickBooks web connector icon on the taskbar. 2. You now have to right click on it and further click on exit. 3. Once done with that, navigate to QuickBooks web connector directory. 4. Also, right click the QWCLOG.txt file and also click on rename tab. 5. You now have to change the name to QWCLOGOLD.txt. 6. Lastly, restart the web connector program to generate a new QWCLOG.txt file.
Why is my QuickBooks Web Connector not responding?
In case you get an error message that states “QuickBooks web connector has stopped working”, then uninstall the existing version and re-install a fresh version.
What is QuickBooks Web Connector?
QuickBooks web connector is a Microsoft Windows application that enables web services to exchange data with QuickBooks desktop products.
Where is the QWC log file?
C:\ProgramData\Intuit\QBWebConnector\log\QWCLog.txt The log file will show you both the QBXML request and the response sent between QuickBooks desktop and QBWC server.
An easy guide to resolve QBDBMGRN Not Running on this Computer Server Error (A QuickBooks Database Error)
QBDBMgrN is a process that runs as part of the QuickBooks Database Server Manager. QuickBooks Database Server Manager is a utility provided by QuickBooks that enables multiple users to access a company file stored on a server or host computer. QBDBMgrN is responsible for monitoring the QuickBooks company files that are stored on the host computer and allowing other users to access them over the network.
The “N” in QBDBMgrN stands for “network”, which indicates that it is designed to manage QuickBooks databases that are shared over a network. QBDBMgrN runs in the background as a Windows service, meaning that it starts automatically when the computer is turned on and runs continuously until the computer is turned off or restarted.
In case, you install the full QuickBooks desktop program – the QuickBooks Database Server Manager (QBDBSM) will install & run automatically. But if you choose to install only database server manager (QBDBMGRN) – then, you have to run the other programs manually.
Why QBDBMGRN not running on this computer server error occurs?
QBDBMgrN is an essential component of QuickBooks when multiple users need to access the same company file. If the QBDBMgrN service is not running, or if it encounters an error, users may not be able to access the company file over the network.
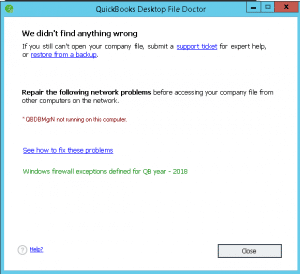
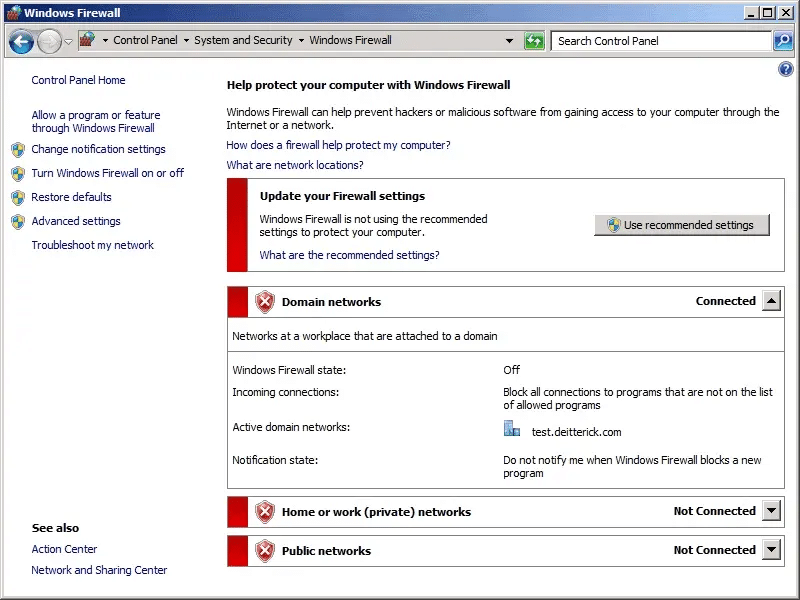
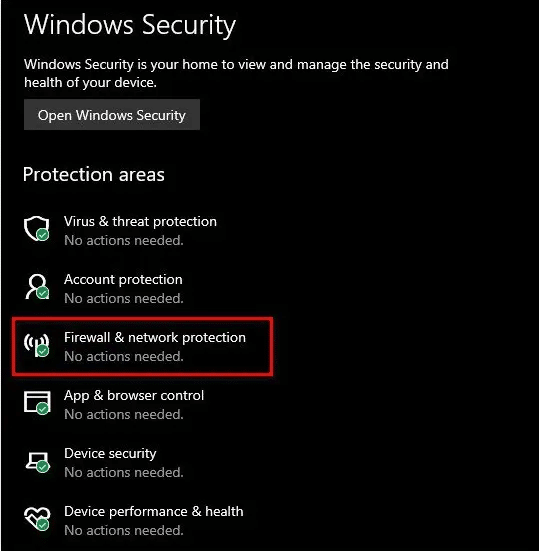
This type of QuickBooks error can occur when the user update QuickBooks to the latest version, but the Windows firewall is not updated. This means that the firewall blocks the access to the Internet. When the user makes an attempt to repair the company file using the QuickBooks file doctor. An error message might appear on the screen stating:
“Repair the following network problems before accessing the company file from other computers on the network “QBDBMgrN not running on this computer“.
It should be noted that the QuickBooks file doctor tool can be used to simply fix the common issues on its own, but the fact is that it can’t configure the firewall of the system. And this can be one of the major causes of the issue. Thus, this makes it important for the user to carry out a manual process for changing the firewall settings, along with its port, in order to establish a proper internet connection.
It might be possible that when the repairing is in processing – the user encounter error messages with “File In Use” dialogue. In case such error messages appear, the following steps supposed to be performed: –
Note: Before performing repair steps we request you to create a backup of your important files. In case of you have any queries related to data recovery, or data files repair, you can contact our QuickBooks data recovery support services.
At first, select the “Ignore” icon (system must be a reboot).
Hit the “OK” icon.
It might be possible that you have to choose the “Ignore” icon multiple times. In order to continue the repair process.
In case, there is no “Ignore” icon. Hit the “Close” tab and wait until the repair done.
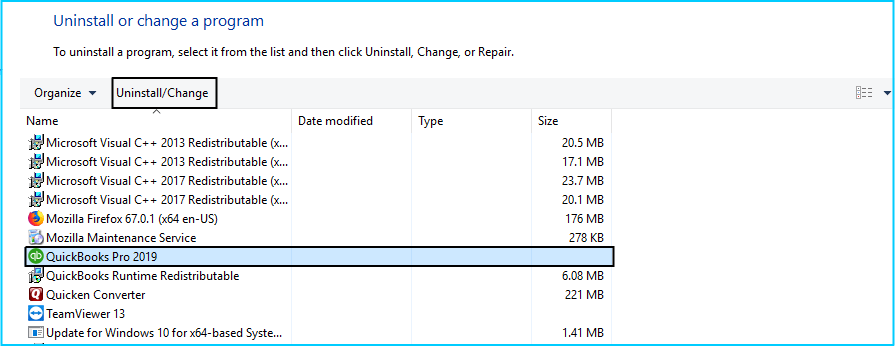
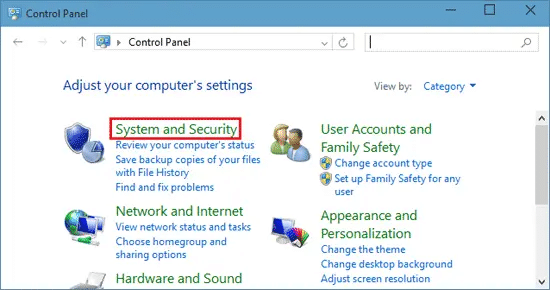
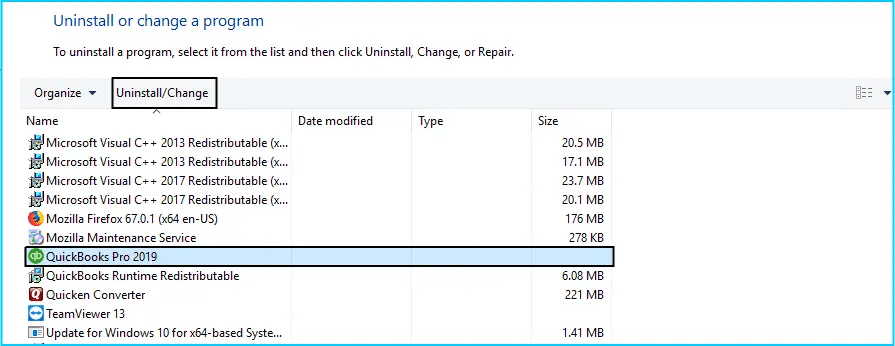
In the search box, type in the “Control Panel” and press the “Enter” button.
The user then needs to select “Programs and Features”. In case, “Control Panel” appears in the “Category” view then, choose the “Uninstall a Program”.
After that, in the list of programs, the user needs to opt for the “QuickBooks” and then “Uninstall/Change”. The QB users supposed to follow the prompt for completing the process.
In case, there is an existing error in the QB software then, QuickBooks can’t be uninstalled. In such a scenario, the user supposes to seek assistance from the support team anytime.
Rename the Installation folders:
You can either rename the installation folders manually. Or the user can also make use of the QuickBooks Clean install Tool to rename the folder.
Download and Run the QuickBooks Clean Install Tool
First of all, the user is required to download and save the QB Clean Install.exe file on the desktop.
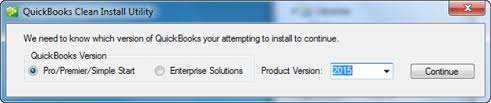
Make sure that the QuickBooks_Clean_Install_Utility.exe is open. The QB users supposed to accept the license agreement and select the accurate QuickBooks version. Then, hit the “Continue” tab.
Lastly, when the message gets displayed on the screen stating “QuickBooks is now ready for a clean install, please install to the default directory”. Hit the “OK” button.
Windows Explorer is recommended to display the entire hidden files & to rename all the folder locations. Preferably, users must add the “old” or “damaged” to the end of a folder name. This will not let QuickBooks software recognize the folder for creating a new folder.
64-bit version C:\Program Files (x86)\Intuit\QuickBooks (year)
Access Denied while Renaming folders
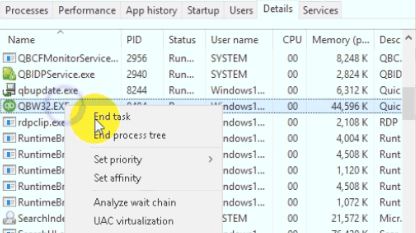
In this, the very first step is to hit the task manager, once right-clicking on the Windows Taskbar.
Moving ahead, under the Processes tab, the user needs to tap on the Image Name column header, in order to sort the processes in alphabetical order.
Once done with that, the user needs to select QBDBMgrN.exe, QBDBMgr.exe, QBCFMonitorService.exe, Qbw32.exe and select “End Process”.
The next step in the process is to tap on “Yes” when this message appears: “WARNING: Terminating a process can cause undesired results including loss of data and system instability….”
Once this done, QuickBooks Desktop must be downloaded and installed.
This problem appears quite frequently in front of the QuickBooks users.! The above-prescribed solution and tips are enough to solve the QBDBMGRN not running on computer server issue manually. If none of these step work, you may need to reach out to QuickBooks technical support for further assistance.
For a hassle-free and smooth experience, you can contact us at any time of the clock on their toll-free helpline number i.e. +1-888-510-9198. We will be more than happy to help you out in your concerns.
What are the common causes of qbdbmgrn not running?
Some of the common reasons for qbdbmgrn not running include missing QuickBooks components, outdated software, incorrect firewall settings, and damaged installation files.
How can I resolve the issue of qbdbmgrn not running?
If you are facing the issue of qbdbmgrn not running, you can try troubleshooting steps such as reinstalling QuickBooks, updating your software, and checking your firewall settings. If these steps do not resolve the issue, please feel free to call our toll-free number +1-888-510-9198 for further assistance.
Why is qbdbmgrn not responding?
qbdbmgrn may not respond if there is a problem with the QuickBooks installation or if there are issues with the software or your computer. In such cases, you may need to reinstall QuickBooks or troubleshoot the issue with the help of a professional.
What can I do if qbdbmgrn is not starting up?
If qbdbmgrn is not starting up, you can try troubleshooting steps such as checking the firewall settings, updating QuickBooks, and reinstalling the software. If these steps do not resolve the issue, you can reach out to our customer support team by calling +1-888-510-9198 for further assistance.
What is the impact of qbdbmgrn not running on my QuickBooks data?
If qbdbmgrn is not running, it can lead to issues with your QuickBooks data such as data corruption or data loss. It is important to resolve any issues with qbdbmgrn as soon as possible to prevent any potential data loss.
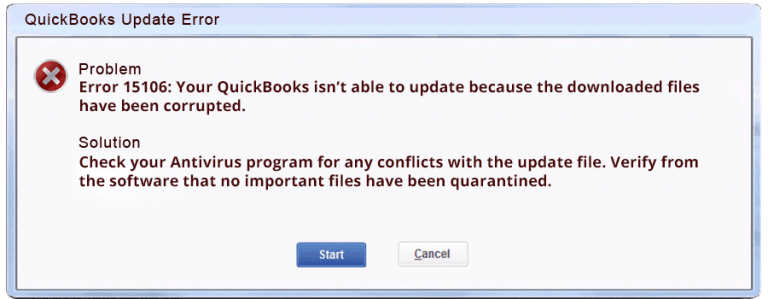
Recurring errors like QuickBooks error code 15106 can be extremely annoying for QuickBooks users. Well, QuickBooks error 15106 is usually seen when updating QuickBooks accounting software. This error indicates that the update program has been damaged. As this is an update error, it can trigger a bunch of issues. Thus, it becomes crucial to get this error fixed as soon as possible.
To help you deal with this issue successfully, here we are with this segment sharing the complete set of steps that can be performed to get rid of the error code 15106 in QuickBooks. However, if there are any queries, then consulting our technical support professionals at +1-888-510-9198 is suggested.
When you come across QuickBooks payroll error 15106, it will show up the following error messages on the screen:
Error 15106: The update program cannot be opened
or
Error 15106: The update program is damaged
These error messages can be seen when your antivirus blocks your QuickBooks update or you aren’t signed in as a Windows admin user. You can further land into a similar issue when trying to update QuickBooks to the latest release. QuickBooks error 15106 indicates that the update program has been damaged. It is a payroll update error and can be a bit annoying to tackle. There are a bunch of factors triggering such an error in QuickBooks, which we will be discussing later in this segment.
Possible Causes of Payroll Error 15106
There can be a few possible reasons causing such an error in QuickBooks. These include:
Antivirus or system security application installed blocking the communication.
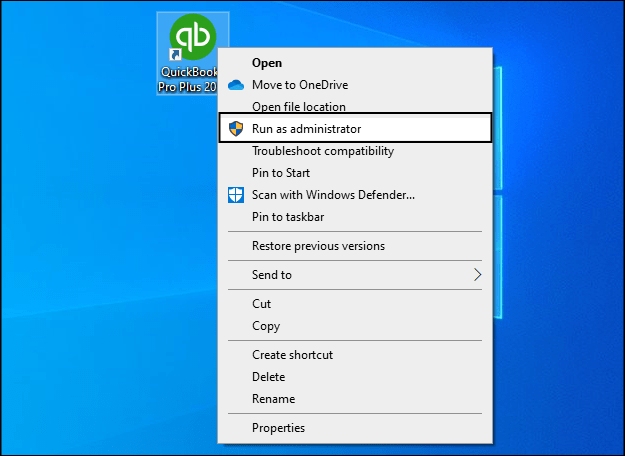
There must be some limitation to write or read the new file because the QB user not logged in as an administrator
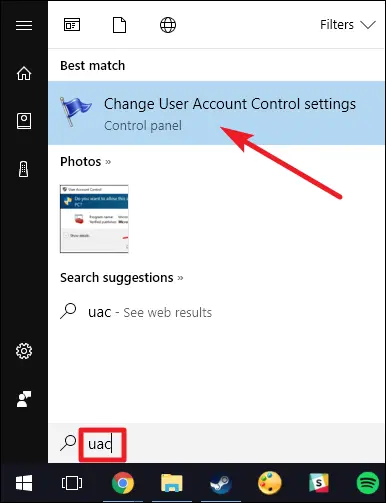
In case the user account control is enabled, then error 15106 can be triggered.
It has been seen that many QB users face frustrating error QuickBooks payroll error 15106 and issues related to their accounting software. Due to this, we have a specialized team of Intuit QuickBooks Certified ProAdvisors gathered in a team.
What are other Solutions to Fix QuickBooks Error Code 15106?
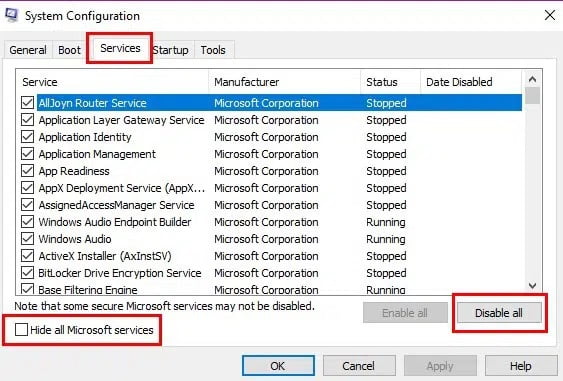
Other than the above solutions, the user can try to eliminate the issue by using the solutions listed below: · Disable User Account Control. · Perform a clean installation and try to install QuickBooks in selective startup mode
Can Spy Sweeper cause QuickBooks Error 15106?
Spy Sweeper is basically Webroot’s antivirus program. And the error code 15106 can be caused by it, as it treats the QuickBooks update program as malware and downloads unwanted files onto the computer. The user can check whether the spy sweeper is running or not by simply clicking on Ctrl + Alt + Esc to launch the task manager and then clicking on more details tab and also look for the processes tab for spysweeper.exe.
What is QuickBooks payroll error 15106?
The payroll error 15106 in QuickBooks belongs to the 15xxx series and is basically a payroll update error. It can be seen when the user tries to update QuickBooks payroll and fails to do so due to a handful of reasons.
Experiencing QuickBooks online error 101? Well, this segment shares the quick fixes to this error, along with the factors that can trigger this issue. Talking about QuickBooks online error 101, it is a scripting error that often appears when windows is unable to complete the command required to run web-based applications. Windows applications such as .Net Framework, Java, and Flash should work properly for QuickBooks Online to function properly. Issues with these Windows components may impact QuickBooks Desktop and Online Service Center can lead to errors like QuickBooks Online Error 101.
If you receive this error, you may not be able to link your bank account or import banking transactions to QuickBooks Online. So, let’s proceed without wasting any time and learn “how to resolve QuickBooks online Error 101”. However, if you need any sort of technical guidance, then you can simply reach out to our team of professionals at +1-888-510-9198, and we will provide you with immediate support and guidance.
What are the factors causing QuickBooks banking error 101?
The below factors can trigger such an error in QuickBooks.
In case the windows fail to run Flash, Java, .Net Framework, and ActiveX, then it can result in QuickBooks Error 101.
Or if the internet explorer settings are misconfigured, then they can restrict QuickBooks from connecting with the internet.
Outdated or blocked Windows components like Microsoft .Net Framework and ActiveX Controls hampers the display function in QuickBooks Online which further leads to QuickBooks Bank Feed Error 101.
Disabled Script Debugging can also cause a similar issue
The following are enlisting steps to troubleshoot the QuickBooks online error 101. The QB users recommended following the resolution steps to fix this error code. However, you can take help from QuickBooks online support team to save your time and efforts.
Solution 1:
Go to the left menu, hit onto the “Banking” tab.
Hit onto the unwanted accounts to un-select.
Note: (In case, QuickBooks user wants to update some of the accounts. Blue indicates the selected bank whereas grey means unselected.)
At the upside right-hand corner, choose the “Update” icon.
Enter the Multi-Factor Authentication (MFA) credentials if QuickBooks requires doing that.
Note: QuickBooks users are supposed to enter the Multi-Factor Authentication (MFA) credentials before it disappears.
Select the “Continue Update” icon.
Once the update is completed, you will see a notification that updated successfully.
Finally, check that last update date & transaction must have changed too.
Verify the internet connection setting on the computer.
Open the browser and try to open any website to check the internet connection.
In case, the website opens normally then internet connection is fine. If not, then it will notify that there is some problem with the internet connection.
Once there is proper internet connect, download the update from the Internet Explorer.
Ensure that Internet Explorer is set as the default browser.
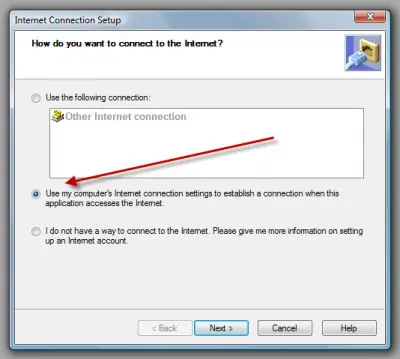
Reconfigure the QuickBooks Internet connection:
Go to the “Help” menu, select the “Internet Connection Setup” tab.
Choose the “Use my Computer’s Internet Connect Setting” option.
Choose the “Next” icon and later hit the “done” icon to start the process.
Finally, reset the QuickBooks updates.
Solution 5:
Enable TLS 1.2 and make changes to Encrypted Pages Settings
Go to the Advanced tab and scroll down to “TLS 1.2”.
See if TLS 1.2 is checked, if not, click and check the box in front of that.
Now look for “Do Not Save Encrypted Pages” to Disk and uncheck this option
Click on “Apply” and then hit “OK” to save the changes
Solution 6:
Download recent updates available for .Net Framework, Java, Adobe Flash Player on Windows.
Alternate Methods
If the above methods did not work for you, check out the alternates below.
Method 1: Ensuring to add intuit as a trusted website
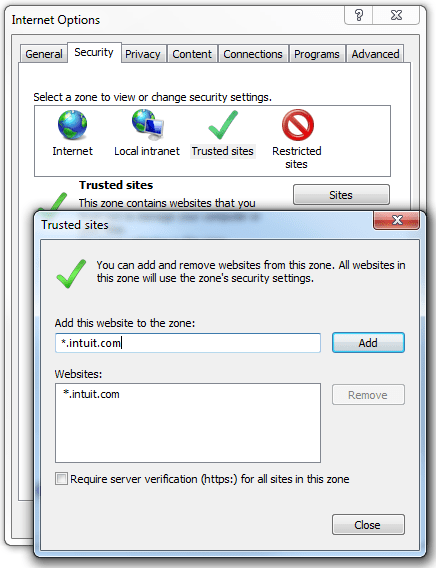
The very first step is to open Internet Explorer in the first place.
Once done with that click on the Gear icon and go for Internet Options.
Now, head to the Security tab
The next step is to click on the Trusted Sites followed by Sites.
Now, enter https://*.intuit.com in the add website field.
And click on Add and follow the same steps to add https://*.QuickBooks.com. Then, click on Close.
Look for the Miscellaneous option under the Custom Level section.
Also, enable the Allow Cross-Domain Requests option
Hit ok tab
And also click on Apply followed by OK.
The user should then open the Internet Explorer once again and try to update the transaction again in QuickBooks Online.
Method 2: Reset Internet Explorer’s Pop-up Settings
At first head to the Privacy tab and go for the Advanced option.
Once done with that mark the Override Automatic Cookie Handling checkbox.
Now, ensure to accept First Party and Third-Party Cookies in the browser settings.
The next step is to mark the Always Allow Session Cookies checkbox.
And click on OK to save the changes.
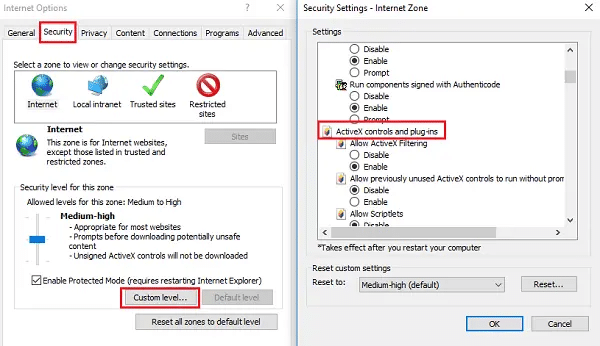
Method 3: Enable ActiveX Controls
The user needs to first head to the Security tab and go for the Internet option followed by Custom Level.
After that scroll down to ActiveX Controls and Plugins under the Internet Zone window.
And ensure to enable the Download Signed ActiveX controls, Binary and Script Behaviors, Script ActiveX Controls Marked Safe for Scripting and Run ActiveX Controls and Plugins options.
The next step is to click on OK and close the Internet Explorer.
Now, try to connect your bank account once again with QuickBooks.
Method 4: Ensure to have a stable Internet Connection
The very first step is to open Internet Explorer and search for a safe website. (www.google.com)
If you are not able to connect, it indicates that you can fix the connectivity issue.
Check your internet connection and check if the issue persists
Hopefully, the manual solutions shown above are beneficial for users to resolve the QuickBooks Error Code 101 on their own. But if you still have any query or problem associated with this error code or any other QuickBooks problem – feel free to contact us at our QuickBooks payroll support number i.e. +1-888-510-9198. Our support team remains active 24/7.
Some Common FAQs related to QuickBooks Online Error 101:
What is QuickBooks Online Error 101, and why does it occur?
QuickBooks Online Error 101 is a banking connection issue that occurs when QuickBooks Online is unable to establish a secure connection with your bank or financial institution. This can happen due to a variety of reasons, such as incorrect login credentials, outdated browser settings, or issues with the bank’s website or server. Error 101 can prevent you from downloading transactions or reconciling your bank account in QuickBooks Online.
How can I fix QuickBooks Online Error 101?
There are several steps you can take to fix QuickBooks Online Error 101, depending on the specific cause of the error. Some common solutions include verifying your bank login credentials, updating your browser settings or trying a different browser, clearing your browser cache and cookies, disabling pop-up blockers or anti-virus software temporarily, or contacting your bank to resolve any issues with their website or server. Additionally, you can try disconnecting and reconnecting your bank account in QuickBooks Online to refresh the connection.
How can I prevent QuickBooks Online Error 101 in the future?
To prevent QuickBooks Online Error 101 from occurring in the future, you can take several precautions. These include ensuring that your bank login credentials are up to date and accurate, using a supported and up-to-date browser, regularly clearing your browser cache and cookies, disabling pop-up blockers or anti-virus software temporarily, and keeping QuickBooks Online and your browser up to date. Additionally, it’s a good idea to check for any alerts or notifications from your bank regarding system updates or maintenance that may affect your connection.